Working With Models in the RAI Console
Models in RelationalAI’s RKGS are collections of relations, modules, entities, integrity constraints, or any kind of logic that is persisted in the database. You can use models to build and organize your Rel applications.
Persisting models in the database is called loading models.
For more information on installed models in the context of Rel applications, see Working With Models.
Managing Models
You can manage and edit models through the RAI Console, as well as the RelationalAI SDKs, the RelationalAI CLI, and the RelationalAI VS Code Extension.
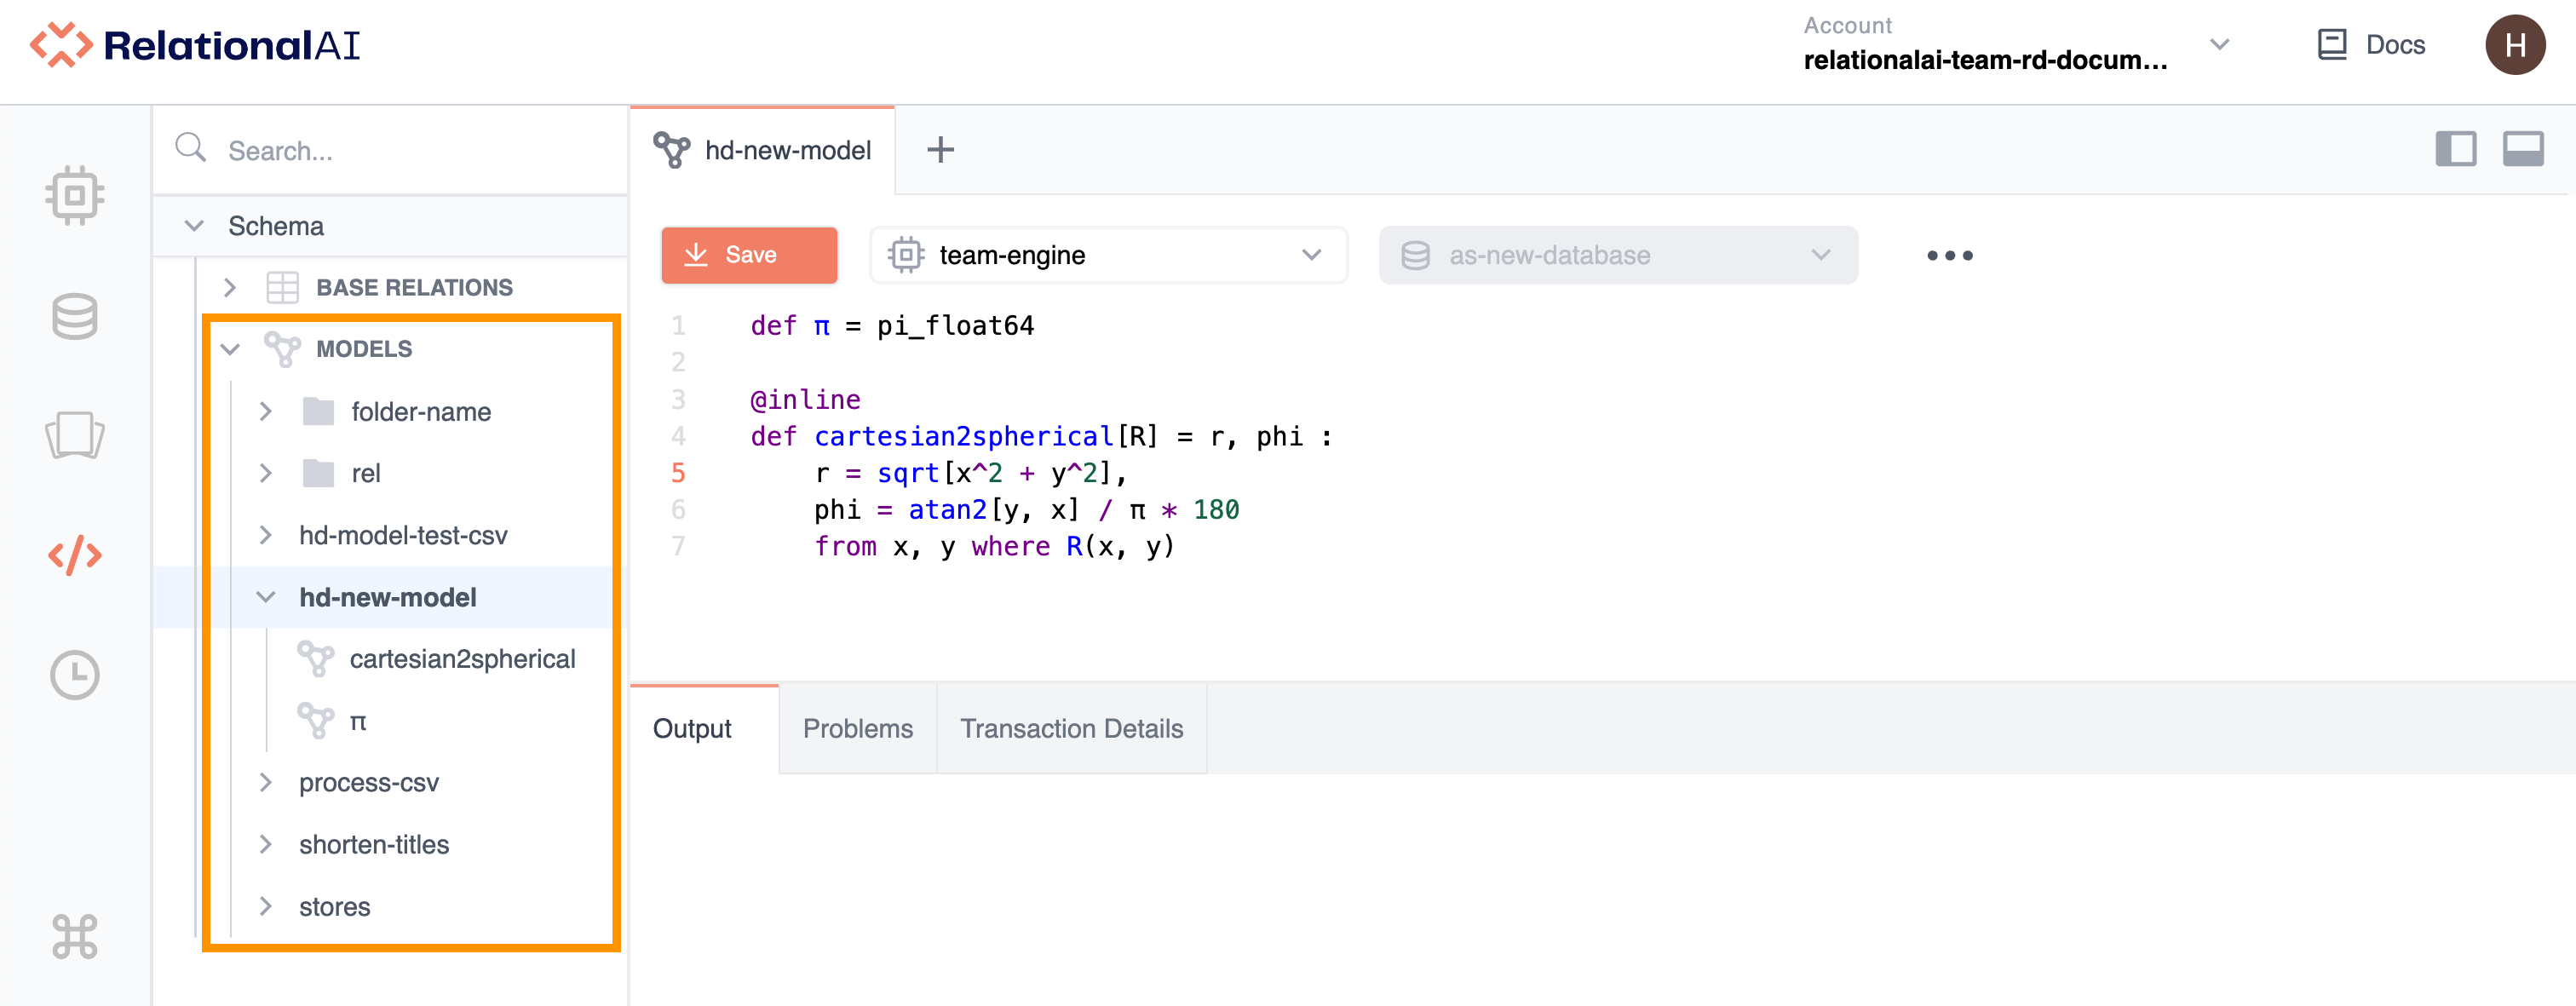
When you open a database in the RAI Console, models appear in the Object Tree in the Editor.
The Object Tree lists:
- All models that you have directly created, along with the relations defined in them.
- All models that you have imported, along with the relations defined in them.
- Built-in Rel Libraries.
You can create, rename, edit, export, import, share, organize, and delete models from the RAI Console. You edit models using the Editor.
Creating Models
You can create models directly from the Object Tree. This is useful in order to:
- Create models that will be shared among users.
- Create models that you want to make available to an SDK.
To create a model:
-
In the Object Tree, either:
- Right-click Models and choose Create Model.
OR
- Hold the pointer over Models, then click the three dots that appear and choose Create Model.
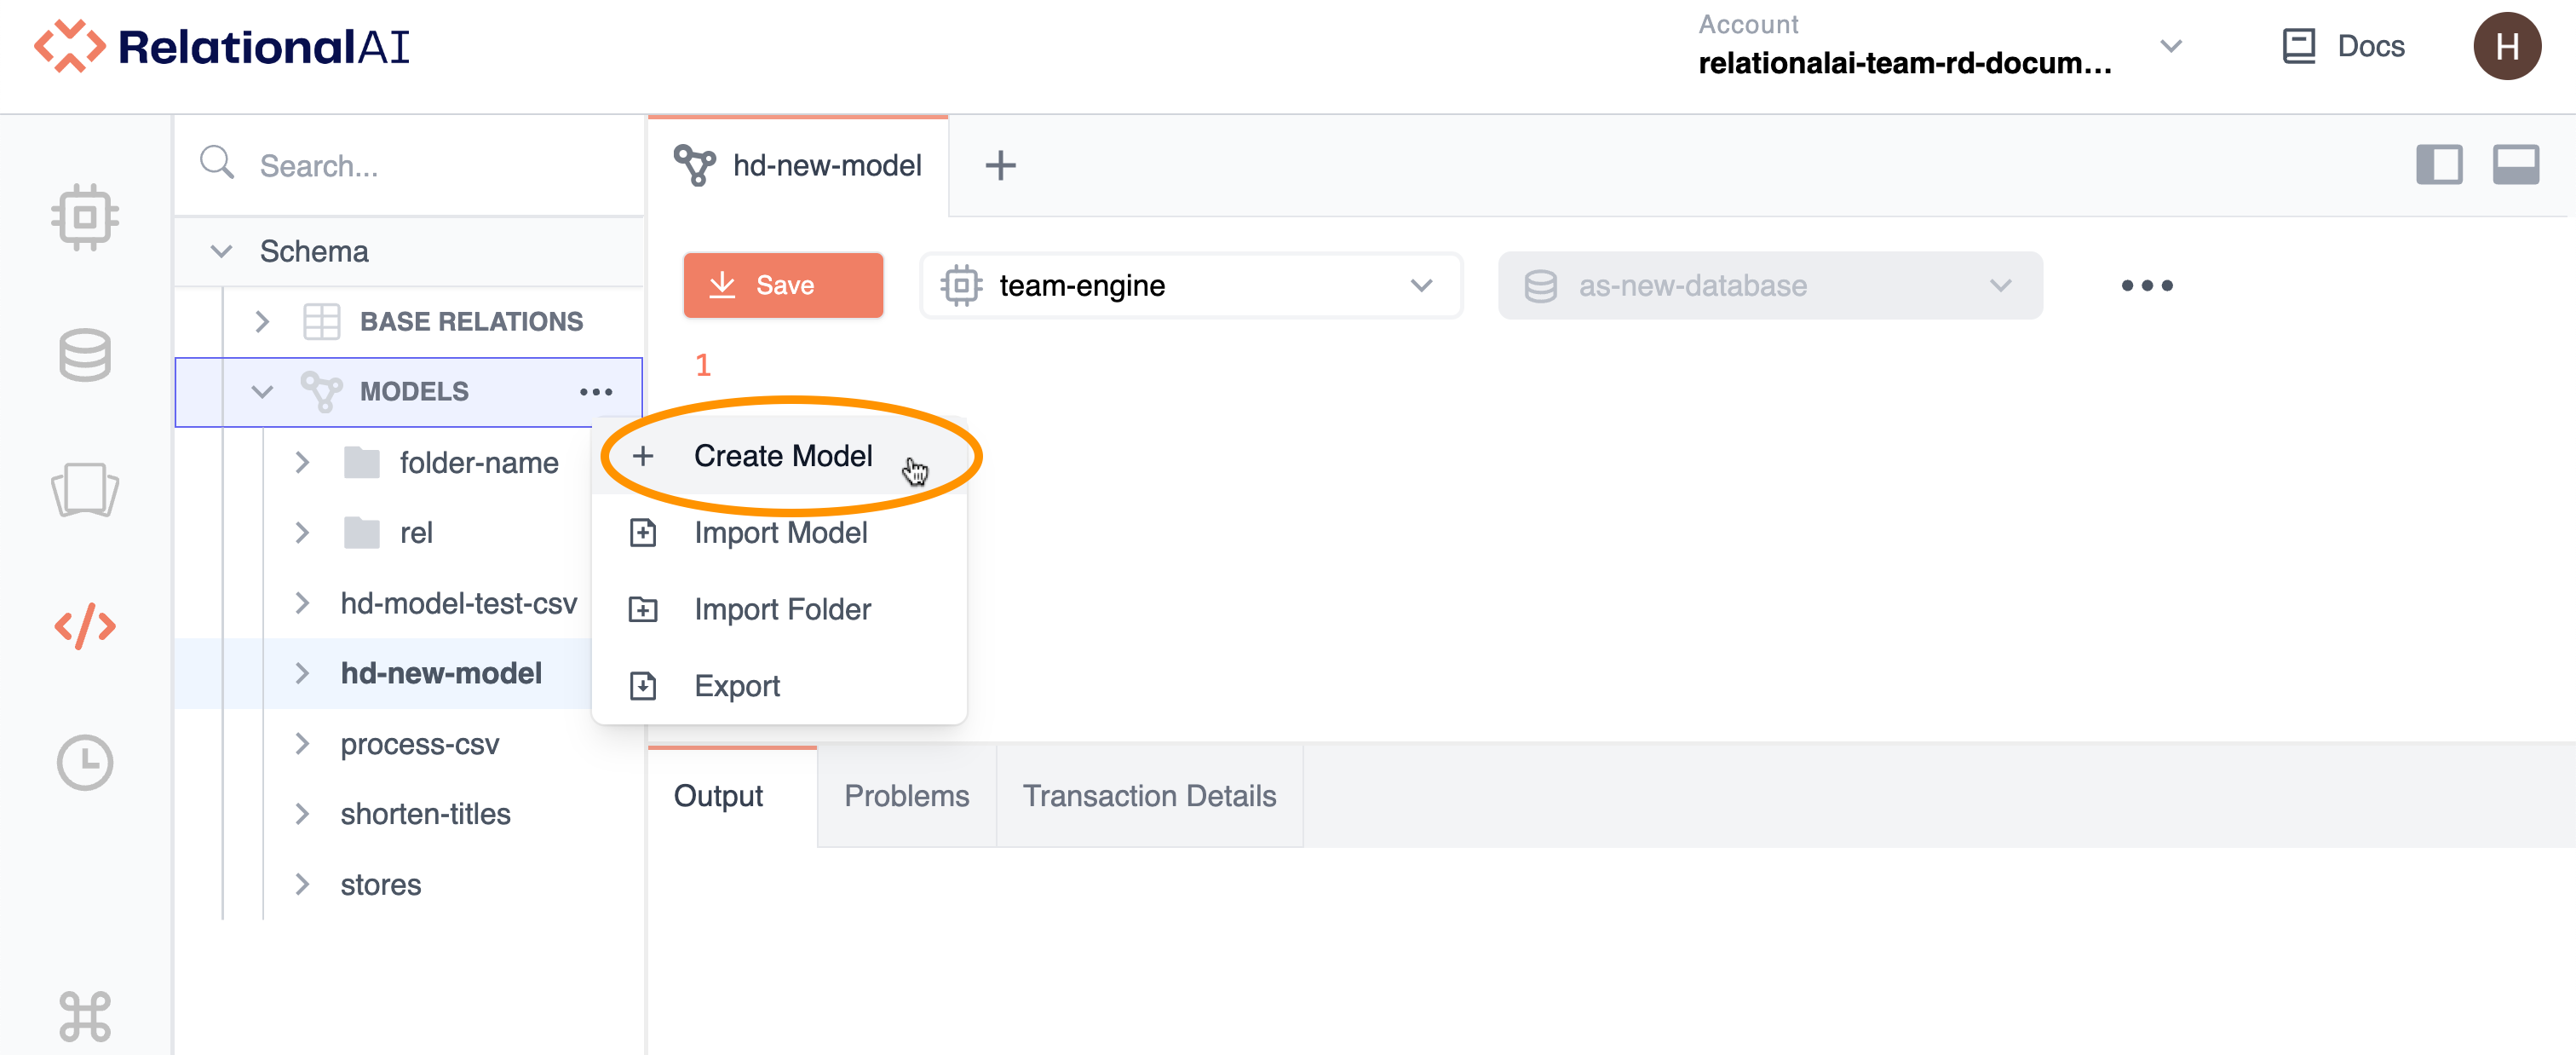
- In the dialog box that opens, give the model a name and click Create.
On Mac computers, right-click is equivalent to Control+Click.
The new model appears in the Object Tree and opens in the Editor so that you can edit it.
Note that when you click the node arrow to the left of a model, a list of relations defined in the model appears under it in the Object Tree.
Renaming Models
You can rename models either in the Object Tree or in the Editor.
To rename a model:
-
In the Object Tree, right-click the model name and choose Rename.
OR
In the Object Tree, hold the pointer over the model name, then click the three dots that appear and choose Rename.
OR
In the Editor, double-click the model tab.
OR
In the Editor, click the three dots and choose Rename.
-
In the Rename Model window that opens, enter the new name for the model and click Rename or press Enter or Return.
The new name appears in the Object Tree and in the model’s tab.
Selecting an Engine
To edit models in the Editor, you need to select an engine from the Engines pop-up menu. For more information on Console engines, see Managing Engines.
Note that, by default, a newly created model inherits the same engine as that of an active worksheet or model.
Selecting a Database
Models are stored separately from databases.
To edit models, you first need to select a database from the Databases page — for more information on databases, see Managing Databases. This will automatically take you to the Editor page where you can view all stored models in the Object Tree.
Note that you cannot select a database from the Databases pop-up menu in the Editor. This option is unavailable (grayed-out) because you cannot move a model from one database to another.
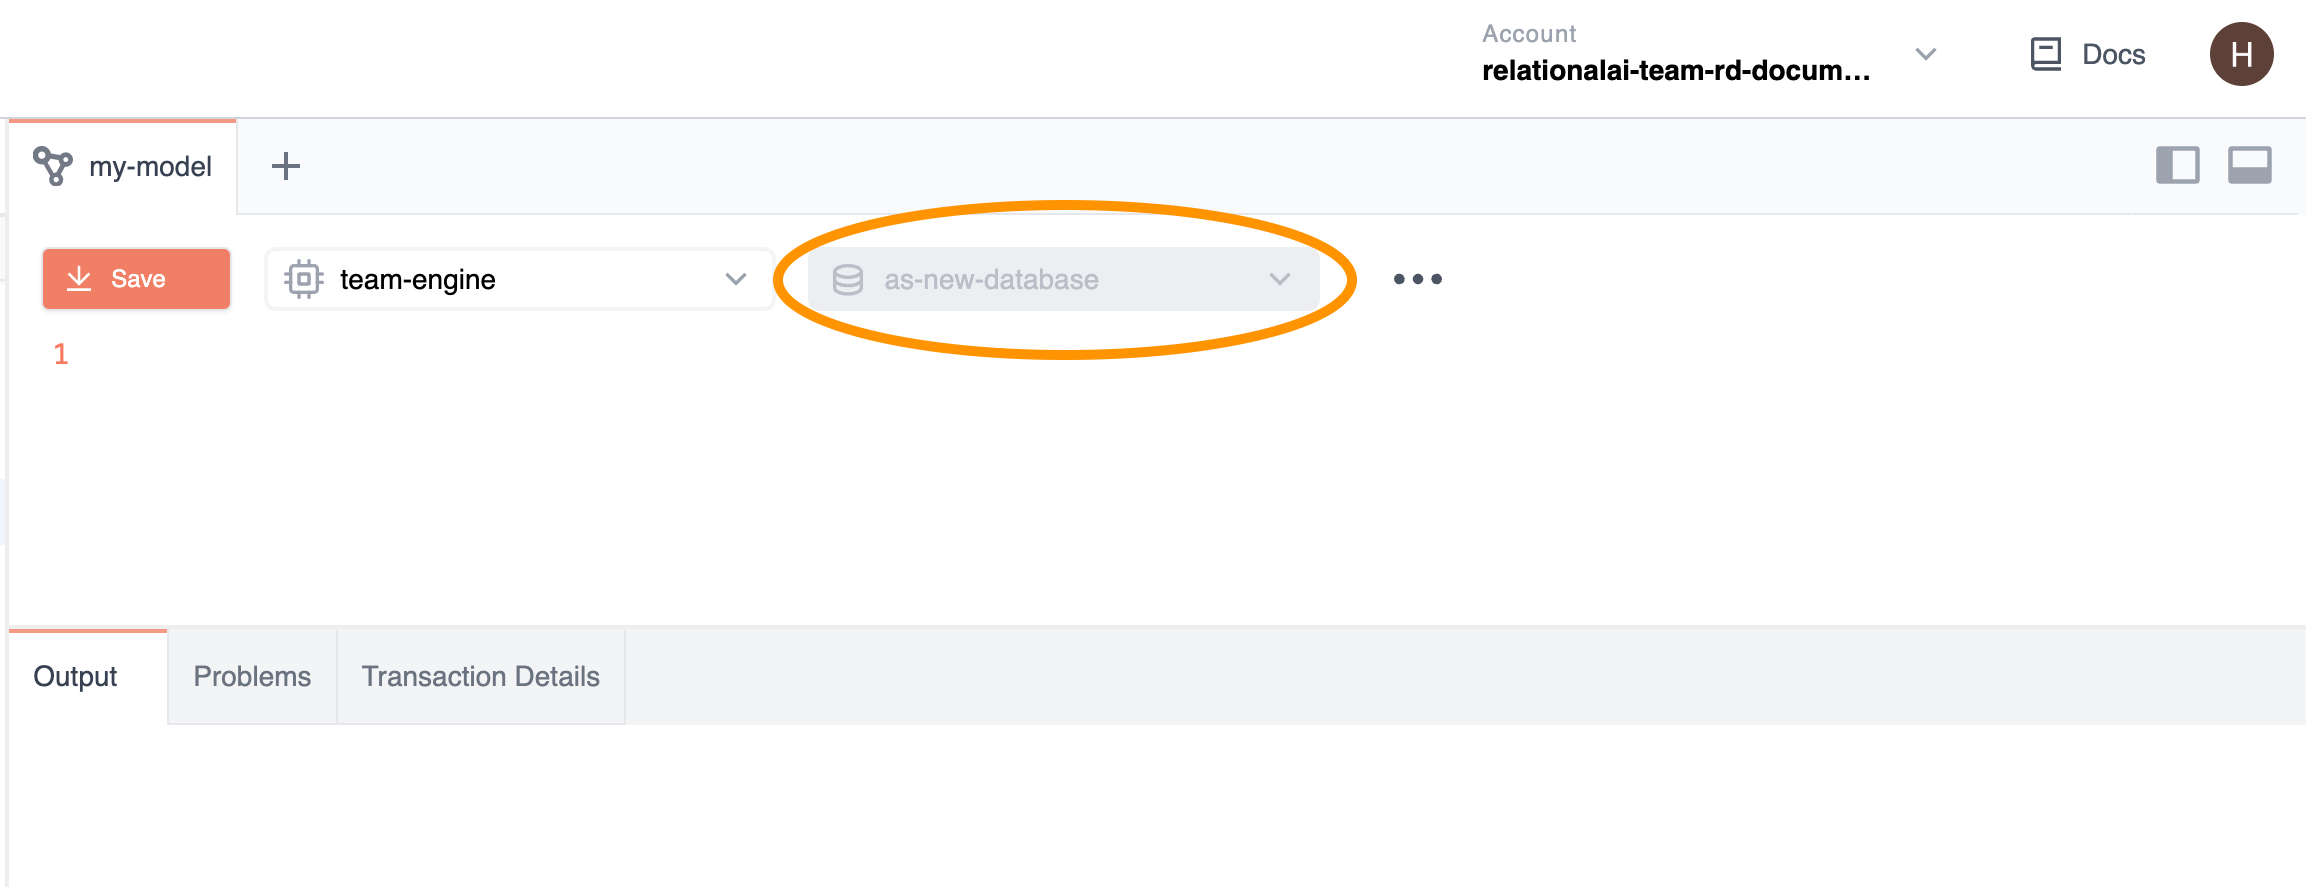
You can, however, export the model from one database then import it into another database.
By default, a newly created model inherits the same database as that of an active worksheet or model.
Editing Models
You edit models in the Editor. You can add any valid Rel code to the model. The Editor will flag any errors in your code in the Problems tab when you save. For more details, see Using the Problems Tab in the Working With Worksheets guide.
To edit a model:
- Click the name of the model in the Object Tree. The model opens in the Editor.
- Edit the code as needed.
- Click Save or press Shift+Enter.

The Editor has built-in features that facilitate editing models, such as Autocomplete, Find and Replace, and commenting out segments. For more details on how to use these features, see Editor Tips and Tricks in the Working With Worksheets guide. Note that these features are applicable to both models and worksheets in the same manner.
Sharing Models
You can share models with other users either by exporting, importing, or sharing URLs.
Exporting Models
You can export models as Rel files in order to share them with other users. Once you export a model, other users will be able to import it into their databases.
To export a model:
In the Object Tree, right-click the model you want to export and choose Export.
OR
In the Object Tree, hold the pointer over the model you want to export, then click the three dots that appear and choose Export.
OR
In the Editor, click the three dots and choose Export.
A window opens at the top of the page to show whether the export is successful. Press Esc to close it.
The file saves in your Downloads folder with the default name <your-filename>.rel.
Importing Models
You can import Rel files directly into the database.
To import a model:
- In the Object Tree, either:
- Right-click Models.
OR
- Hold the pointer over Models then click the three dots that appear.
- Choose Import Model.
- Browse to the location containing the Rel file.
- Click Open.
The model appears in the Object Tree and is imported into the database.
Sharing Model URLs
Each model has a unique URL. To share a model, you can copy the model’s URL and send it to another user.
The user will need to have access to the RAI Console in order to view the model.
When you share a model, the other user will be able to make changes to your data. To save the model, the user will need to select an engine from the Engines pop-up menu. By default, the model inherits the same database as that of an active worksheet or model in the user’s account.
Changes made to a model by different users using the same database are saved for all users.
Organizing Models in Folders
You can create folders to organize your models.
To create a folder, you create a model and use forward slashes (/) to indicate that the model should be contained within a folder.
You can also import folders that contain Rel files, which will appear as folders in the Object Tree.
Creating Folders
To create a folder:
-
In the Object Tree, either:
- Right-click Models.
OR
- Hold the pointer over Models and click the three dots that appear.
-
Choose Create Model.
-
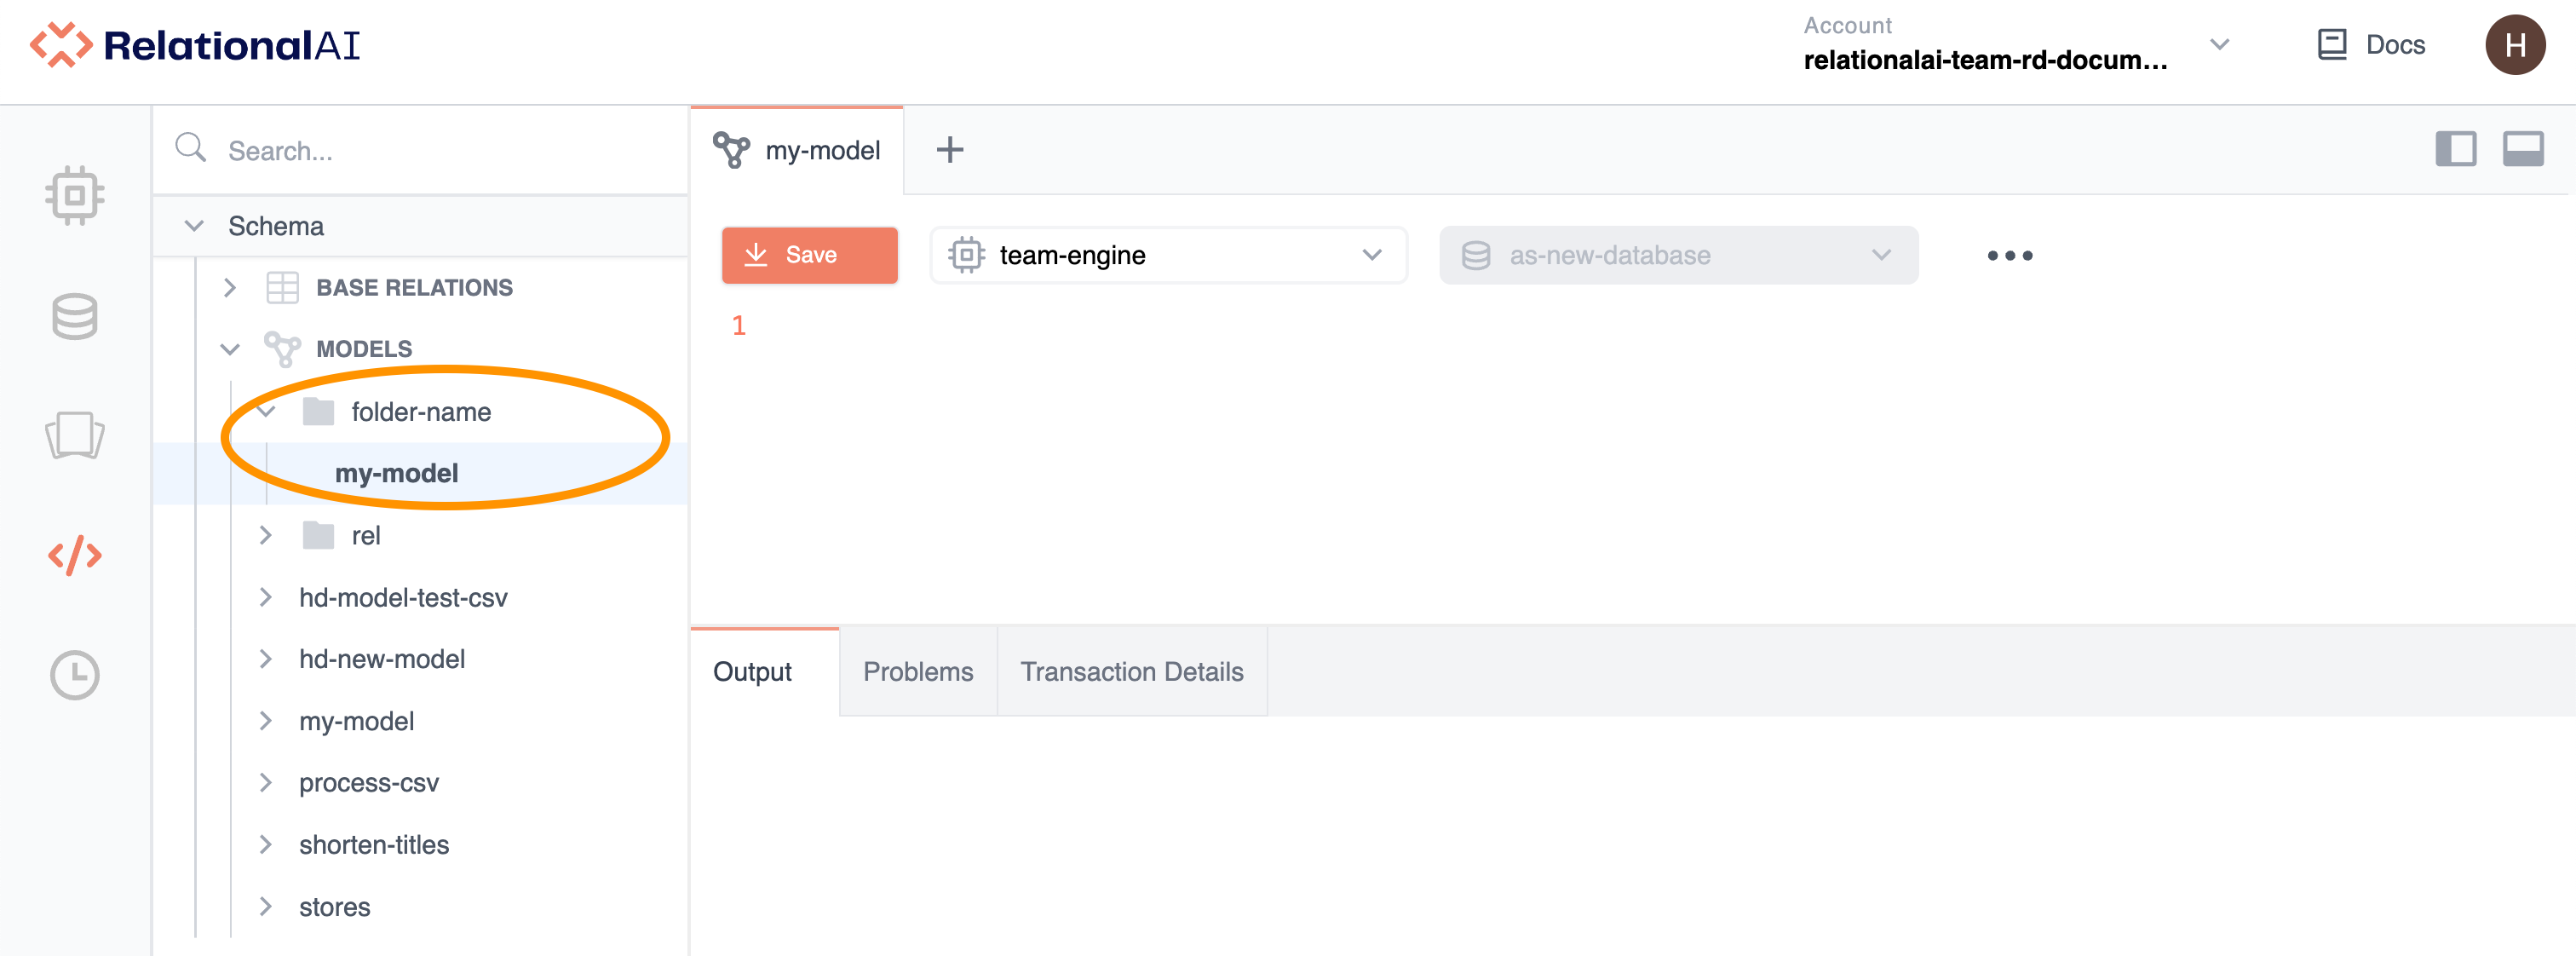
In the dialog box that opens, give the model a name with a forward slash to indicate a folder, such as
folder-name/my-model. You can use multiple forward slashes to create subfolders, such asfolder-name/subfolder-name/my-model.
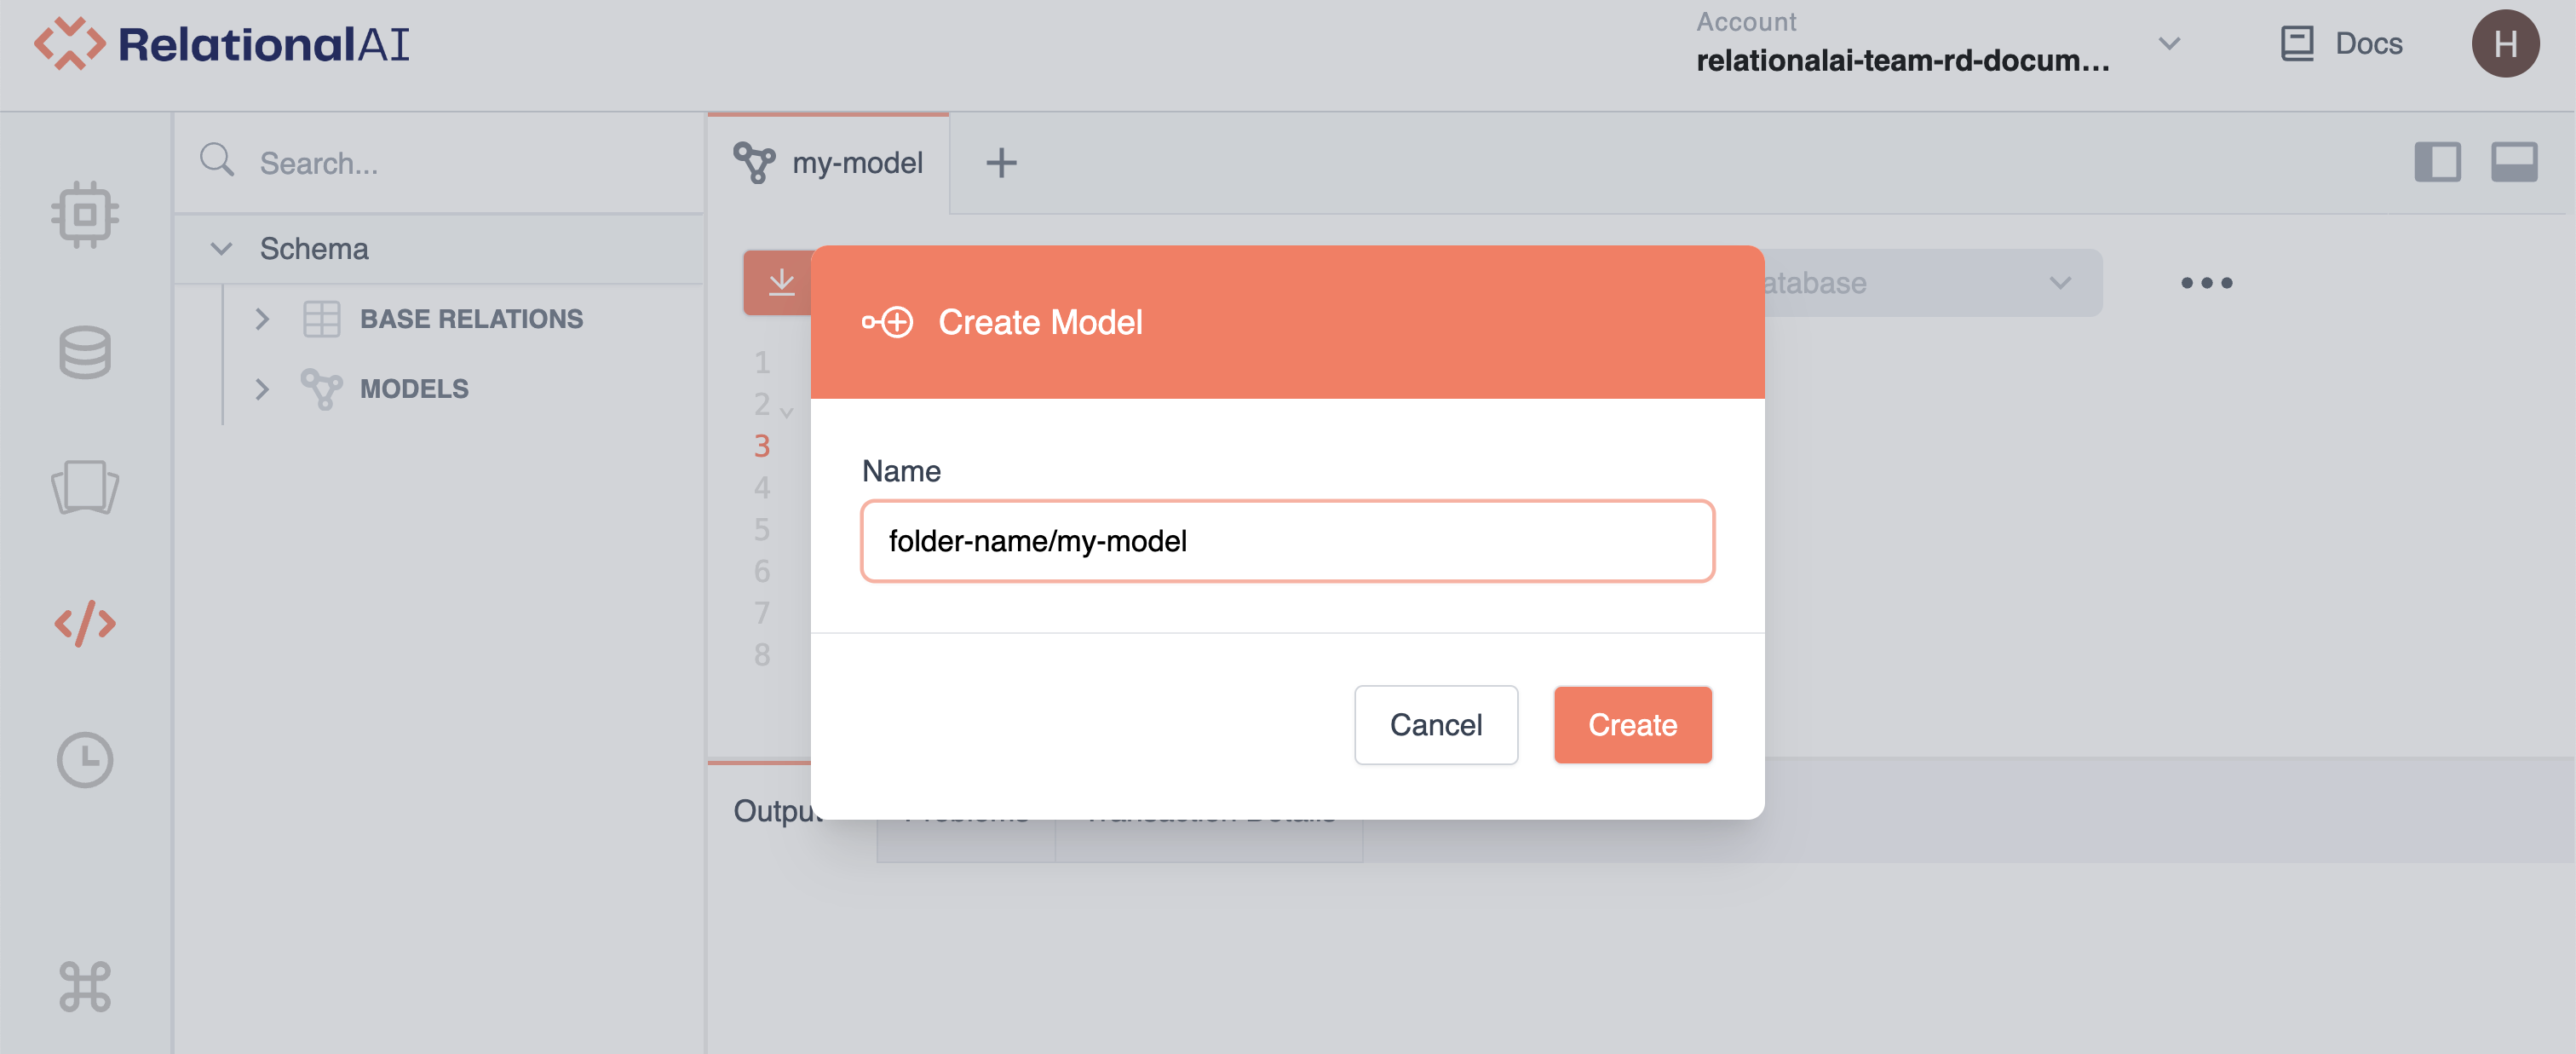
- Click Create.
The model appears in the folder in the Object Tree.
To add additional models to the folder:
-
Either:
- Right-click the folder.
OR
- Hold the pointer over the folder and click the three dots that appear.
-
Select Create Model or Import Model.
Importing Folders
To import a folder:
-
In the Object Tree, either:
- Right-click Models.
OR
- Hold the pointer over Models and click the three dots that appear.
-
Choose Import Folder.
-
Browse to the location containing the folder.
-
In the message that opens, click Upload to confirm.
The folder appears in the Object Tree, with the Rel files added as models.
To add additional models to the folder:
-
Either:
- Right-click the folder.
OR
- Hold the pointer over the folder and click the three dots that appear.
-
Select Create Model or Import Model.
Viewing Rel Libraries
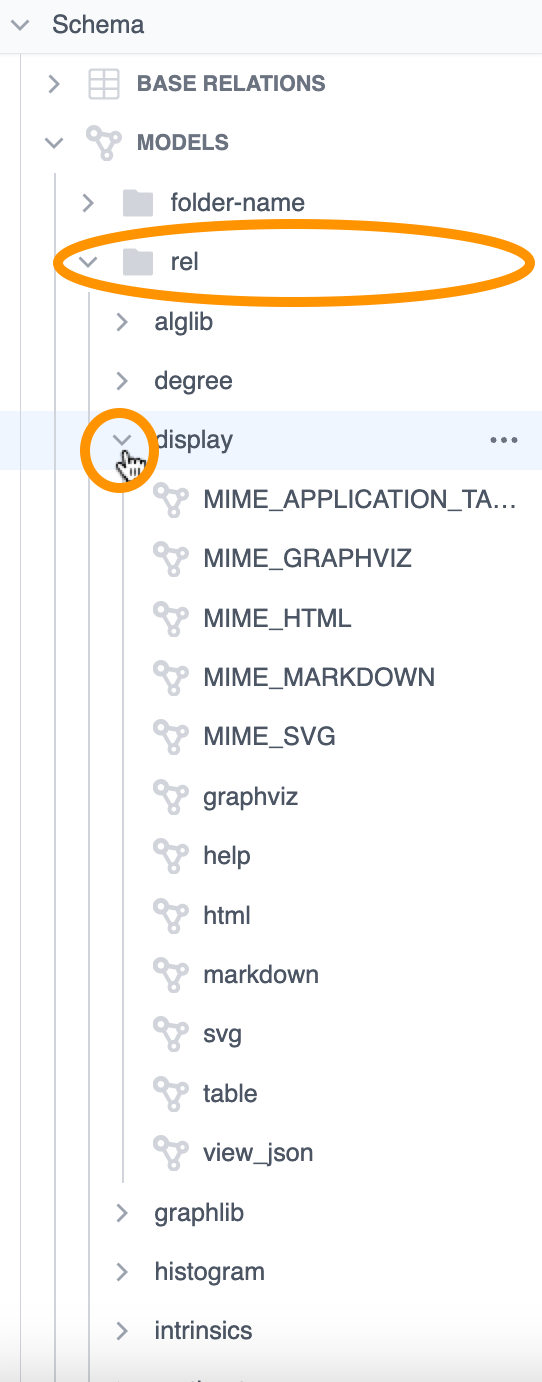
The Rel Libraries provide user-friendly relations for common tasks organized by use cases. To view the Rel Libraries, click the rel folder under Models in the Object Tree. You can then click the node arrow to the left-hand side of the library to view the list of relations. For more details, see Rel Libraries.
Deleting Models
You can delete models in the Object Tree.
Before doing so, it’s best practice to:
- Export the model so that you can access it later if necessary.
- Check with other team members to make sure they are not using the model. The model will be unrecoverable once deleted.
To delete the model:
- In the Object Tree, right-click the model you want to delete and choose Delete.
OR
In the Object Tree, hold the pointer over the model you want to delete, then click the three dots that appear and choose Delete.
OR
In the Editor, click the three dots and choose Delete.
- In the Confirmation window that opens, click Delete.
The model disappears from the Object Tree and is removed from the database.