Quick Start for Snowflake Users
This Quick Start guides you through the steps to create some toy data in Snowflake, use the RAI Integration to turn this data into a graph, and run a shortest path length algorithm to compute the distance between two nodes in graph.
If you’re an account administrator and you want to set up the RAI Integration for your team, please see the Quick Start for Admins.
Get Ready
Before you begin, make sure that you:
- Have a Snowflake account.
- Ask your Snowflake account admin to provide the information listed below.
In order to use the RAI Integration Services, you need the following information:
- The name of the Snowflake database and warehouse to use.
- The name of the Snowflake user role.
- The location of the RAI database link (database and schema).
- The names of the RAI resources (RAI database and RAI engine).
If you don’t have all this information, please contact your account admin.
As you go through this quick start, be aware of the following:
- Fields written with angle brackets
<>indicate that you need to replace them with the actual value in your environment. They usually refer to the information you should have received from your admin. - RAI resources, unlike Snowflake resources, are case-sensitive.
If you are not familiar with Snowflake’s UI, you can learn more in the Snowsight: The Snowflake Web Interface (opens in a new tab) guides.
Log Into Snowflake
Sign into Snowflake by selecting your account.
Log in with your user credentials.
See the Snowflake documentation (opens in a new tab) for details on how to log in.
If you don’t know your account name, username, and password, please contact your account admin.
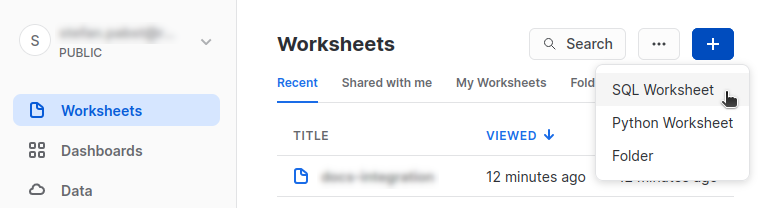
Get Started in Snowflake
An easy way to get started is by using worksheets. You can create a new worksheet or select an existing one.
You first need to select the user role required to work with the RAI Integration, and go to the database that contains the RAI database link:
-- Select your role.
USE ROLE <developer_role>;

-- Select your database.
USE DATABASE <sf_database_name>;
You need to replace the names for the user role and database with the ones you plan to work with. For this quick start, it is best to use the database that contains the RAI database link you plan to use.
Use the warehouse your admin prepared for you:
-- Select the Snowflake warehouse.
USE WAREHOUSE <sf_warehouse_name>;
Next, create a schema for your quick start project and add some toy data:
-- Create a schema for your project and use it.
CREATE SCHEMA my_schema;
USE SCHEMA my_schema;

-- Create a table for your data.
CREATE TABLE my_edge_table(x INT, y INT)
    AS SELECT * FROM VALUES
    (11, 12), (12, 13), (13, 13), (12, 14);

-- View your table.
SELECT * FROM my_edge_table;
/*+----+----+
  |  X |  Y |
  |----+----|
  | 11 | 12 |
  | 12 | 13 |
  | 13 | 13 |
  | 12 | 14 |
  +----+----+  */
The toy data in my_edge_table represent the list of edge pairs for the following undirected graph you will build further below:
11 --- 12 --- 14
        |
       13__
        |__|
Now you are ready to start using the RAI Integration.
Verify Access to the RAI Database Link
The RAI database link is set up by the account admin. You can verify that you have access by querying the procedures (or user functions) provided by the RAI database link. To query the procedures, execute:
-- Get a list of the procedures in the schema "RAI".
SHOW PROCEDURES IN SCHEMA RAI;
/*+------------+--------------------+-------------+ ... +----------------------------------------------------------------------------+ ...
  | created_on |        name        | schema_name | ... | description                                                                | ...
  |------------+--------------------+-------------+ ... +----------------------------------------------------------------------------+ ...
  |    ****    | create_data_stream |     RAI     | ... | Automatically created object for RAI integration "<rai_integration_name>". | ...
  |    ****    | create_data_stream |     RAI     | ... | Automatically created object for RAI integration "<rai_integration_name>". | ...
  |    ...     |         ...        |     ...     | ... | ....                                                                       | ...
 */
Here, the database link has been set up in the schema RAI.
The schema name is chosen by the admin that set up the database link, so your schema name may be different.
Note that some procedures like create_data_stream occur multiple times because these procedures are overloaded (opens in a new tab) and have multiple signatures.
If the list of procedures is empty, please contact your account admin.
To query also the user functions, execute:
SHOW USER FUNCTIONS IN SCHEMA RAI;
/*+------------+-------------+-------------+ ... +----------------------------------------------------------------------------+ ...
  | created_on |    name     | schema_name | ... | description                                                                | ...
  |------------+-------------+-------------+ ... +----------------------------------------------------------------------------+ ...
  |    ****    | ADAMIC_ADAR |     RAI     | ... | Automatically created object for RAI integration "<rai_integration_name>". | ...
  |    ...     |    ...      |     ...     | ... | ....                                                                       | ...
*/
Create a RAI Data Stream
In order to turn your data into a graph, you need to link your Snowflake data with RAI using a RAI data stream. A RAI data stream establishes a Snowflake stream (opens in a new tab) and a recurring task (opens in a new tab) that synchronizes your data with a RAI database at regular time intervals (usually 1 minute).
To create a RAI data stream, you first need to select a RAI database <rai_database_name> as your target location for your RAI data stream by using the following command:
CALL RAI.use_rai_database('<rai_database_name>');
/*+---------------------+
  |  USE_RAI_DATABASE   |
  +---------------------+
  | <rai_database_name> |
  +---------------------+ */
You must prefix the function and procedure names with RAI — the schema containing the database link — because you’re working in a different schema (my_schema).
RAI database names are case sensitive. The RAI databases should be set up for you by your admin. See Create a RAI Database and Engine for more information.
You must prefix the function and procedure names with RAI — the schema containing the database link — because you’re working in a different schema (my_schema).
To create a RAI data stream for your SQL table my_edge_table, perform the following command:
CALL RAI.create_data_stream('my_edge_table');
/*+------------------------------------------------+
  | { "account": "***",  ..., "state": "CREATED" } |
  +------------------------------------------------+ */
Once the data stream has been successfully established, you will get as a response a JSON object detailing all the data stream information, including the state "CREATED".
Each SQL object can have only one data stream.
The data stream is identified by the fully-qualified name (opens in a new tab) of the SQL object, which has the form <database>.<schema>.<object>.
It may take a few moments before all the data is synced. To check the status of the data stream, you can run the following command:
CALL RAI.get_data_stream_status('my_edge_table');

/* +----------------------------------------------------------------------------------------------------------------------------------------------+
   | PROPERTY                                           | VALUE                                                                                   |
   |----------------------------------------------------------------------------------------------------------------------------------------------|
   | Source                                             | "<integration_name>--<sf_database_name>.rai-<sf_database_name>.my_schema.my_edge_table" |
   | DB Link                                            | "<sf_database_name>.rai"                                                                |
   | ...                                                | ...                                                                                     |
   | Data stream health                                 | "Healthy"                                                                               |
   | Data sync Status                                   | "Syncing: pending unloading from SF"                                                    |
   | Latest changes received from SF - SF unload time   | "2023-06-26 19:12:02.483"                                                               |
   | ...                                                | ...                                                                                     |
   +----------------------------------------------------------------------------------------------------------------------------------------------+ */
Note that the synchronization status "Syncing: pending unloading from SF" indicates that the data have not been synchronized yet.
Wait for the synchronization status “Fully synced” before proceeding.
Getting the synchronization status "Fully synced" with the RAI data stream status "Healthy" means that your data have been successfully synced.
Now, you can start building a graph.
Create a Graph
To build an undirected graph out of your edge list, you first have to to select a RAI engine, which is required in order to perform the graph creation. You will use this engine later to execute your graph algorithms.
Select the RAI engine <rai_engine_name> using the following command:
CALL RAI.use_rai_engine('<rai_engine_name>');
/*+-------------------+
  |  USE_RAI_ENGINE   |
  +-------------------+
  | <rai_engine_name> |
+-------------------+ */RAI engine names are case sensitive. The RAI engines should be set up for you by your admin. See Create a RAI Database and Engine for more information.
To tell RAI to build an undirected graph out of your edge list, run the following command:
CALL RAI.create_graph('my_graph', 'my_edge_table');
/*+------------------------------------------------------------------------------------------+
  | {"message":"Graph 'my_graph' created in database '<rai_database_name>'.","success":true} |
  +------------------------------------------------------------------------------------------+  */
By default, create_graph creates an undirected graph.
The first argument, my_graph, is the name of the graph.
The second argument, my_edge_table, is the SQL table name that identifies the data stream you just established.
To verify the graph exists, you can list all the graphs that have been created,
select RAI.list_graphs();
/*+-------------------------------------------------------------------------------------------------------------------------------------------------+
  | [{ "DIRECTED": false, "EDGE_STREAM": "<sf_database_name>.my_schema.my_edge_table", "NAME": "my_graph", "RAI_DATABASE": "<rai_database_name>" }] |
  +-------------------------------------------------------------------------------------------------------------------------------------------------+ */
and search for your graph name in your RAI database.
Find the Distance Between Two Nodes
The RAI Integration provides various graph algorithms that you can run over your data. See the Graph Analytics guide for more information. For this example, you will pick the shortest path length to determine how far apart the graph nodes are from each other.
To compute the length of the shortest paths from node 11 to all other nodes, run the following command:
SELECT * from TABLE(RAI.shortest_path_length('my_graph', { 'source': 11 }));
/*+--------+--------+--------+
  | SOURCE | TARGET | LENGTH |
  |--------+--------+--------|
  | 11     | 11     | 0      |
  | 11     | 12     | 1      |
  | 11     | 13     | 2      |
  | 11     | 14     | 2      |
  +--------+--------+--------+ */
The response is a table, stating that the SOURCE node reaches a TARGET node in a certain number of steps (LENGTH).
For instance, node 13 is reachable from node 11 in two steps.
Note that it may take up to one minute to receive the results when you execute this call for the first time. Using a newly created RAI engine requires an additional warmup period that occurs the first time you run a query. Subsequent executions will be much faster.
This concludes the user quick start. To explore your graph with another graph algorithm, check out the Graph Analytics guide to see which algorithms are available with the RAI Integration.
Clean Up (Optional)
If you don’t want your data to stay in sync with RAI anymore, delete the data stream:
CALL RAI.delete_data_stream('my_edge_table');
/*+------+
  | "ok" |
  +------+ */
Put It All Together
To summarize, here is the complete code which you can copy and edit in your Snowflake worksheet:
-- Select your role.
USE ROLE <developer_role>;

-- Select your database.
USE DATABASE <sf_database_name>;

-- Select the Snowflake warehouse.
USE WAREHOUSE <sf_warehouse_name>;

-- Create a schema for your project and use it.
CREATE SCHEMA my_schema;
USE SCHEMA my_schema;

-- Create a table for your data.
CREATE TABLE my_edge_table(x INT, y INT)
    AS SELECT * FROM VALUES
    (11, 12), (12, 13), (13, 13), (12, 14);

-- View your table.
SELECT * FROM my_edge_table;
/*+----+----+
  |  X |  Y |
  |----+----|
  | 11 | 12 |
  | 12 | 13 |
  | 13 | 13 |
  | 12 | 14 |
  +----+----+  */

-- Select a RAI database.
CALL RAI.use_rai_database('<rai_database_name>');
/*+---------------------+
  |  USE_RAI_DATABASE   |
  +---------------------+
  | <rai_database_name> |
  +---------------------+ */

-- Select a RAI engine.
CALL RAI.use_rai_engine('<rai_engine_name>');
/*+-------------------+
  |  USE_RAI_ENGINE   |
  +-------------------+
  | <rai_engine_name> |
  +-------------------+ */

-- Set up a data stream.
CALL RAI.create_data_stream('my_edge_table');
/*+------------------------------------------------+
  | { "account": "***",  ..., "state": "CREATED" } |
  +------------------------------------------------+ */

-- Check the RAI data stream status.
CALL RAI.get_data_stream_status('my_edge_table');
/* +----------------------------------------------------------------------------------------------------------------------------------------------+
   | PROPERTY                                           | VALUE                                                                                   |
   |----------------------------------------------------------------------------------------------------------------------------------------------|
   | Source                                             | "<integration_name>--<sf_database_name>.rai-<sf_database_name>.my_schema.my_edge_table" |
   | DB Link                                            | "<sf_database_name>.rai"                                                                |
   | ...                                                | ...                                                                                     |
   | Data stream health                                 | "Healthy"                                                                               |
   | Latest changes received from SF - SF unload time   | "2023-06-26 19:12:02.483"                                                               |
   | ...                                                | ...                                                                                     |
   +----------------------------------------------------------------------------------------------------------------------------------------------+ */

-- Create a graph.
CALL RAI.create_graph('my_graph', 'my_edge_table');
/*+------------------------------------------------------------------------------------------+
  | {"message":"Graph 'my_graph' created in database '<rai_database_name>'.","success":true} |
  +------------------------------------------------------------------------------------------+  */

-- Run the `shortest_path_length` algorithm.
SELECT * from table(RAI.shortest_path_length('my_graph', { 'source': 11 }));
/*+--------+--------+--------+
  | SOURCE | TARGET | LENGTH |
  |--------+--------+--------|
  | 11     | 11     | 0      |
  | 11     | 12     | 1      |
  | 11     | 13     | 2      |
  | 11     | 14     | 2      |
  +--------+--------+--------+ */

-- Clean up: Remove data stream.
CALL RAI.delete_data_stream('my_edge_table');
/*+------+
  | null |
  +------+ */
What’s Next?
For more details on using the RAI Integration for graph analytics workloads, see Graph Analytics.