Using Editors
The RelationalAI VS Code Extension contains Editors that enable you to edit code using embedded editing features.
You can also use the Editors to send code in .md and .rel files to the server.
Using Editing Features
The RelationalAI VS Code Extension has features that facilitate writing and editing your code.
Using the Outline View
You can directly locate a specific relation in the currently open .rel file and navigate to its definition:
- Under Explorer, click Outline. This displays a list of relations defined in the currently open Editor.
- Click a relation to navigate to it in your Editor.
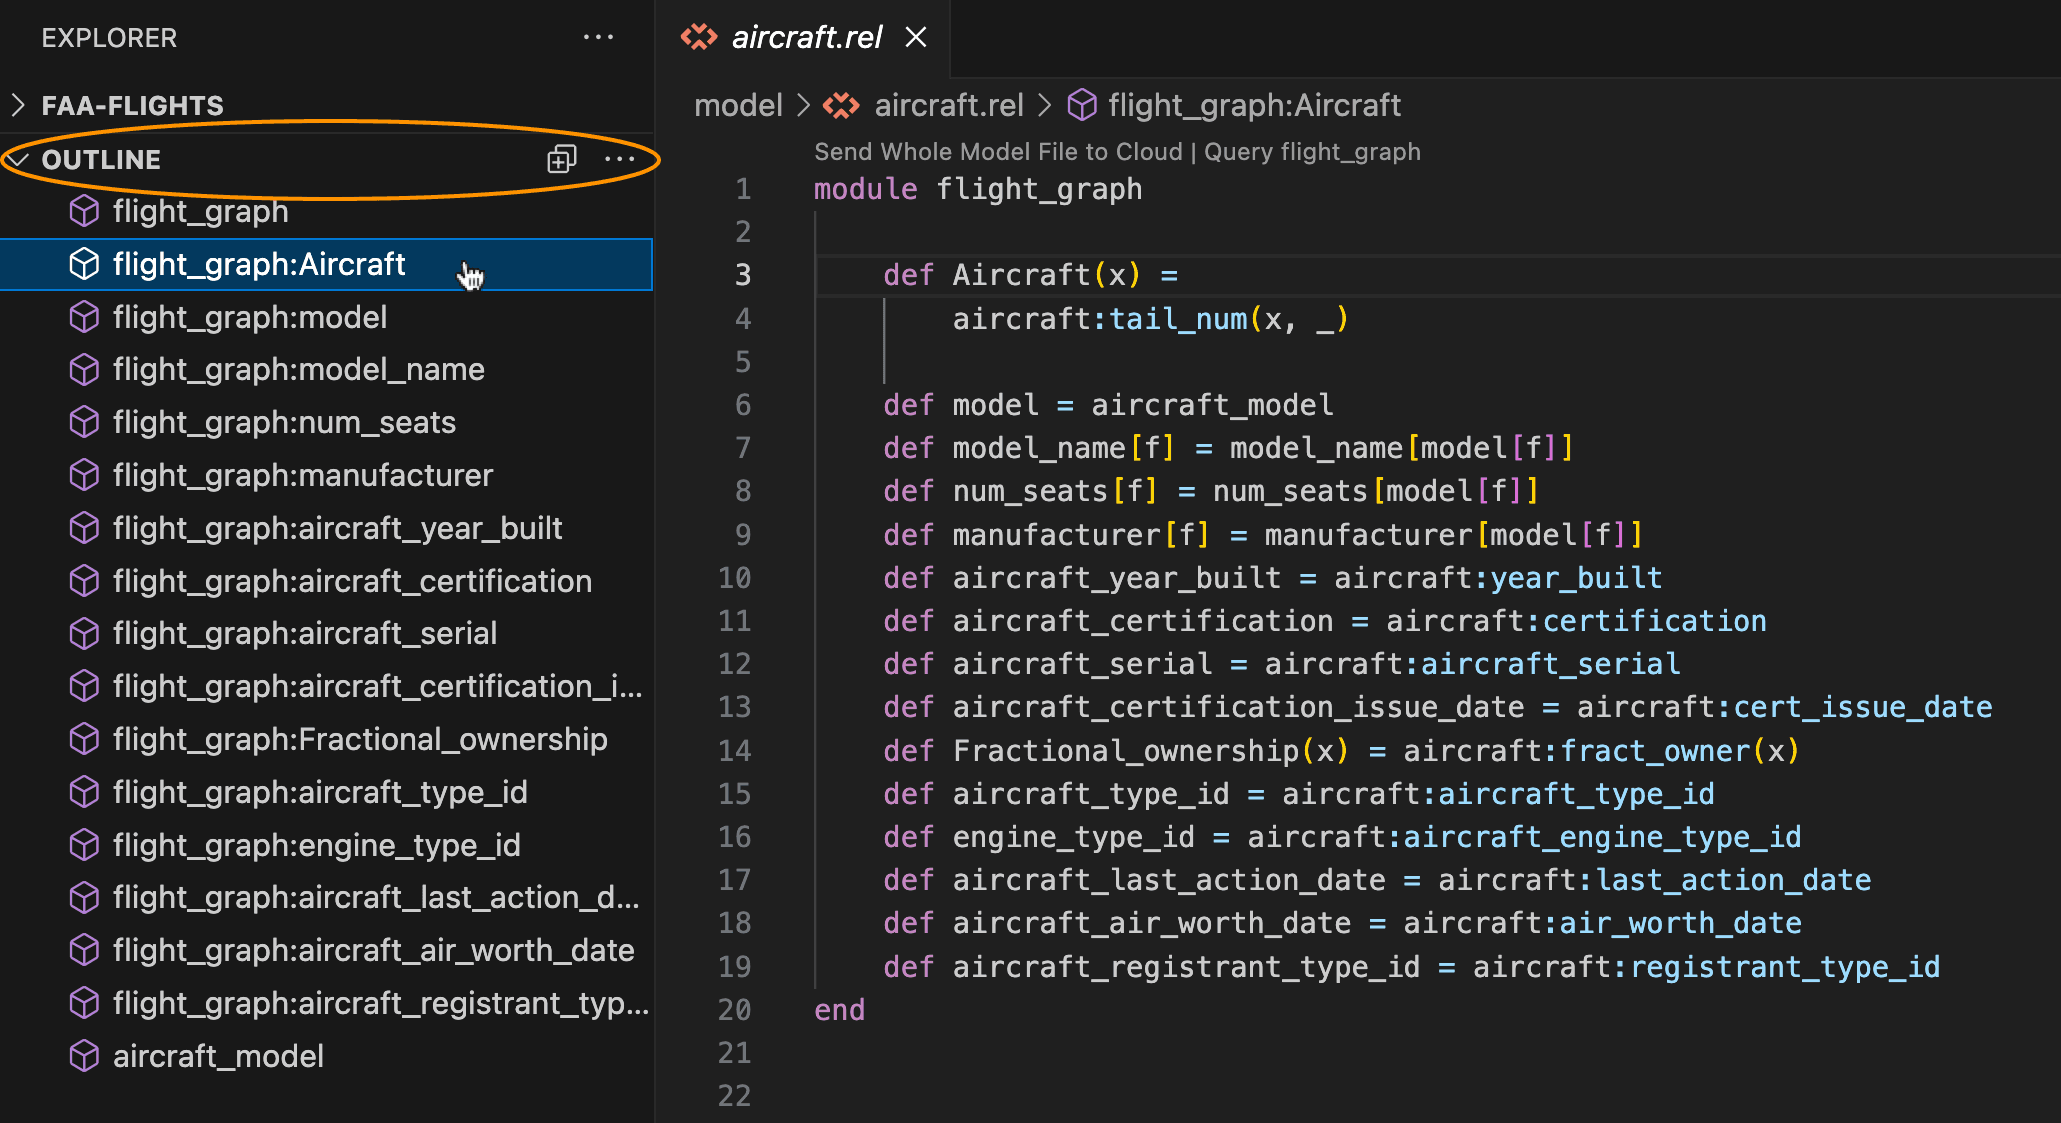
The contents of your Rel file must be valid Rel code for the Outline feature to work. If errors are encountered while parsing your code, the Outline View will be empty.
Syntax Highlighting
Syntax highlighting highlights relations in your open Editor. This improves readability and allows you to better detect errors in your code.
Syntax highlighting is available for code in .rel files as well as for fenced code blocks in .md files.
In strings in Python, Javascript, Typescript, Go, Java, C#, and Julia files: sections of code between //beginrel and //endrel comments are also syntax highlighted.
Autocomplete
The Autocomplete feature fills in the rest of a term when you begin typing.
Autocomplete includes all Library relations, user-defined base relations and derived relations, and control relations like insert and delete.
It also supports special Unicode characters, such as mathematical operation symbols, relation operation symbols, and Greek letters.
To use Autocomplete:
- Begin typing a relation name. A pull-down menu opens with Autocomplete suggestions.
- Select the desired text by either clicking it with your pointer or selecting it using the down/up arrows and pressing Enter or Tab.
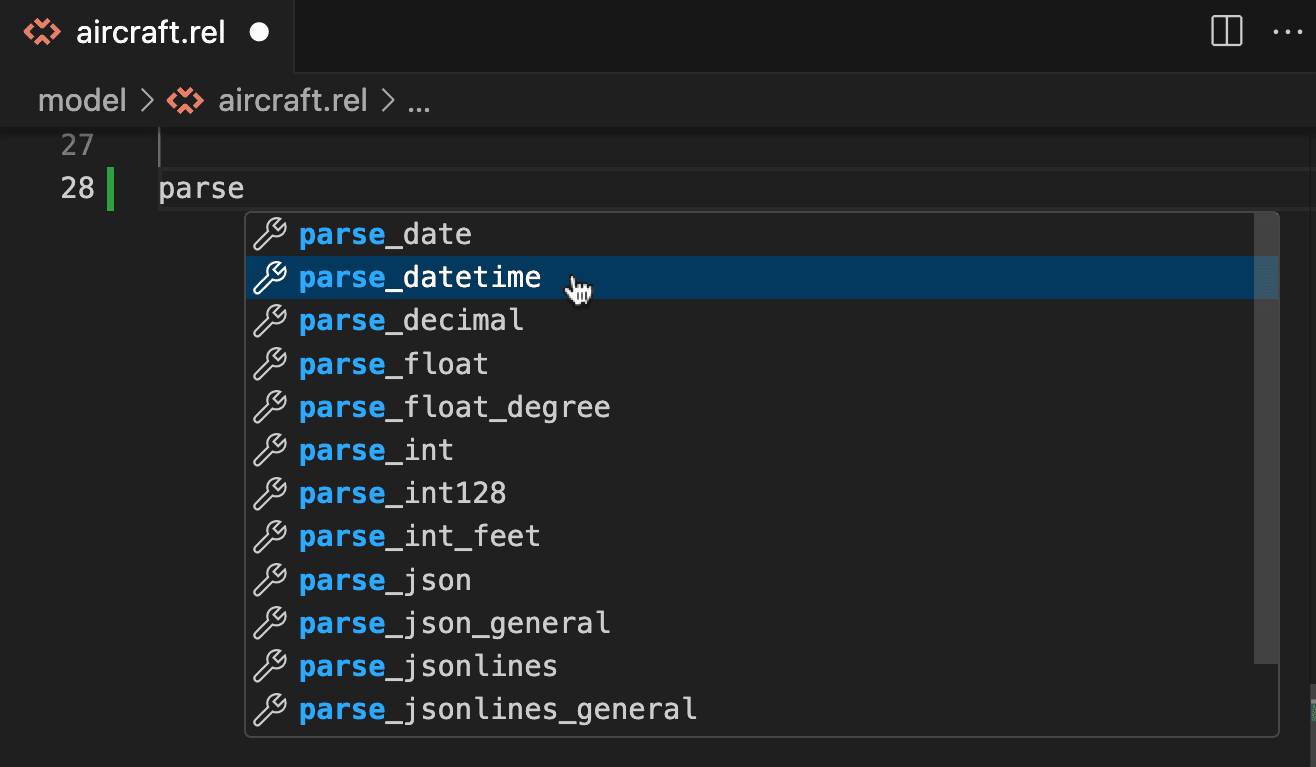
For example, if you type parse, Autocomplete offers a list of options: parse_date, parse_datetime, parse_decimal, and so on.
To select parse_datetime, you can click it from the pull-down menu.
To add special Unicode characters:
- Type
\followed by the character’s trigger. - Press Tab or Enter.
For example, to add subset of (⊂):
- Type
\subset. - Press Tab or Enter.
Hover
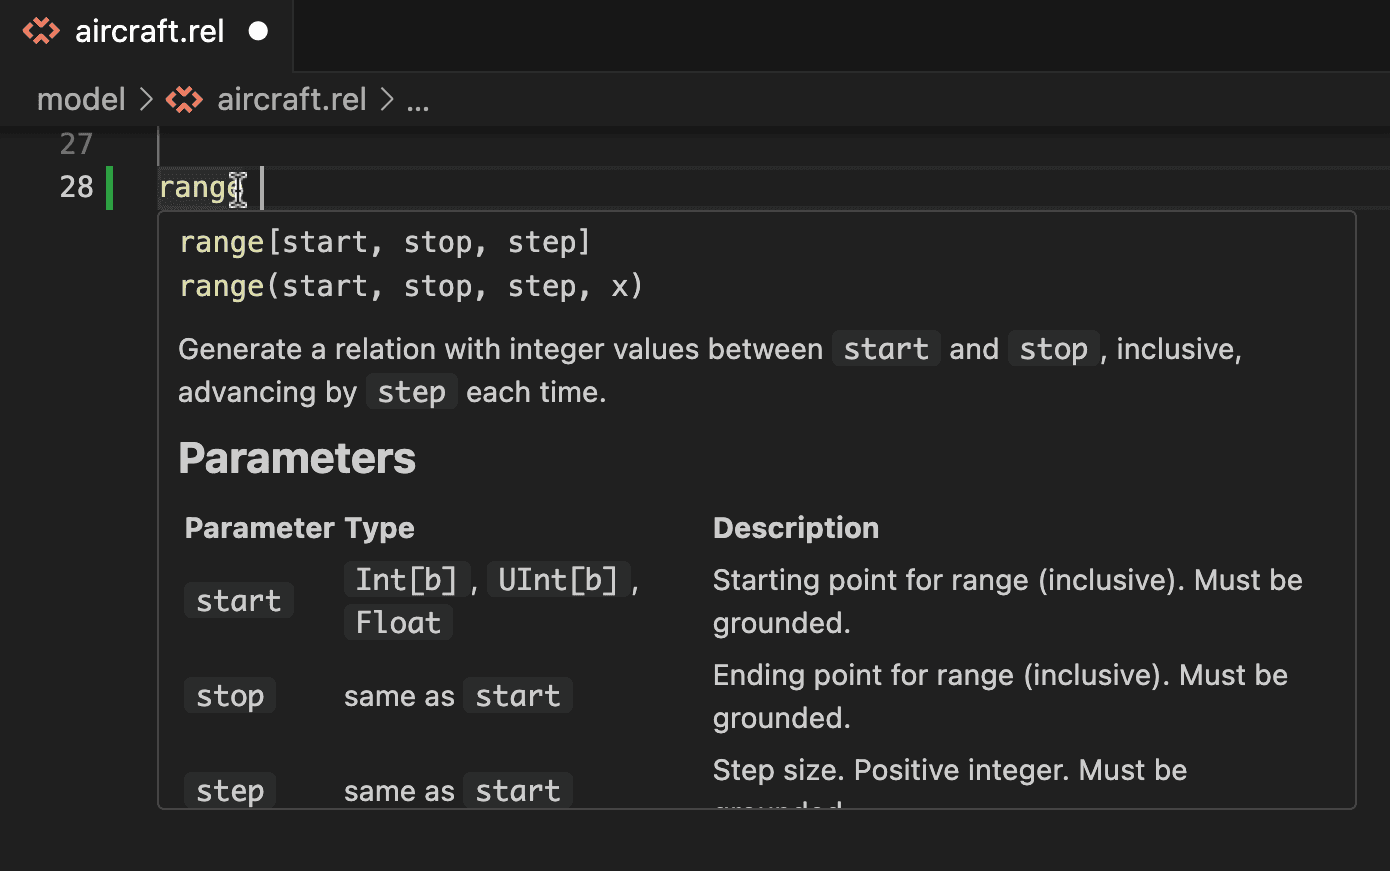
To learn more about how you can use built-in relations — Standard Library relations and user-defined base and derived relations — you can use the hover feature:
- Type the name of the built-in relation, such as
range. - Place your pointer over the relation.
This opens a window showing the relation’s docstring.
Code Folding
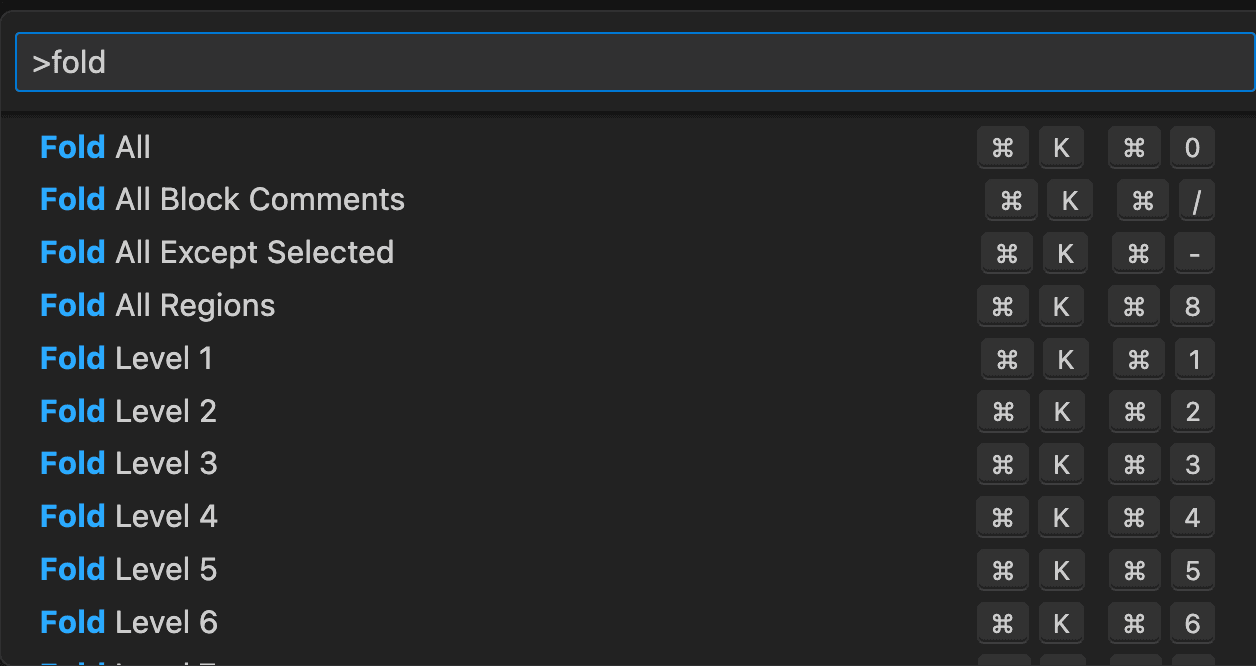
To fold comments in your Markdown file, press Command+Shift+P and type fold to see the available options.
You can also fold code and comments manually in your open Editor:
- Move your pointer to the code you want to fold. An expander arrow appears.
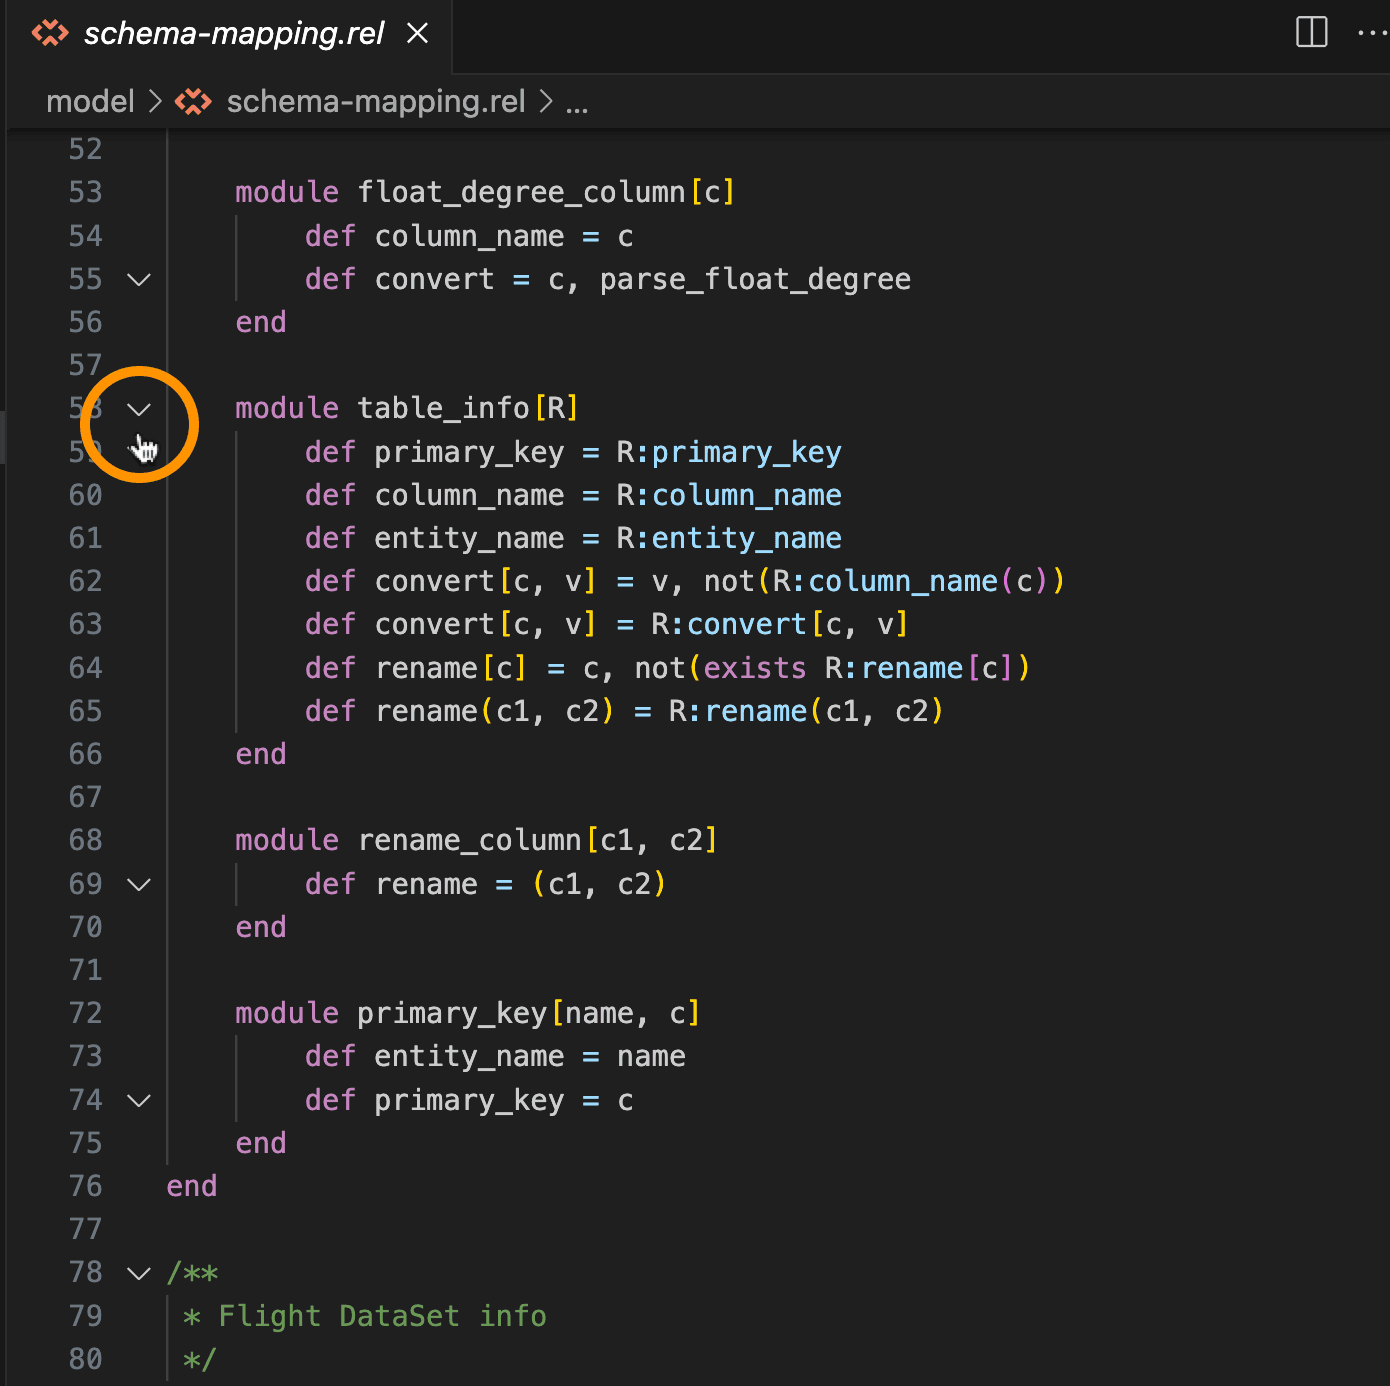
- Click to unexpand the arrow.
The code is then folded.
Sending Code to the Server
Using the Editor, you can execute code and run models in .md and .rel files.
Running Code
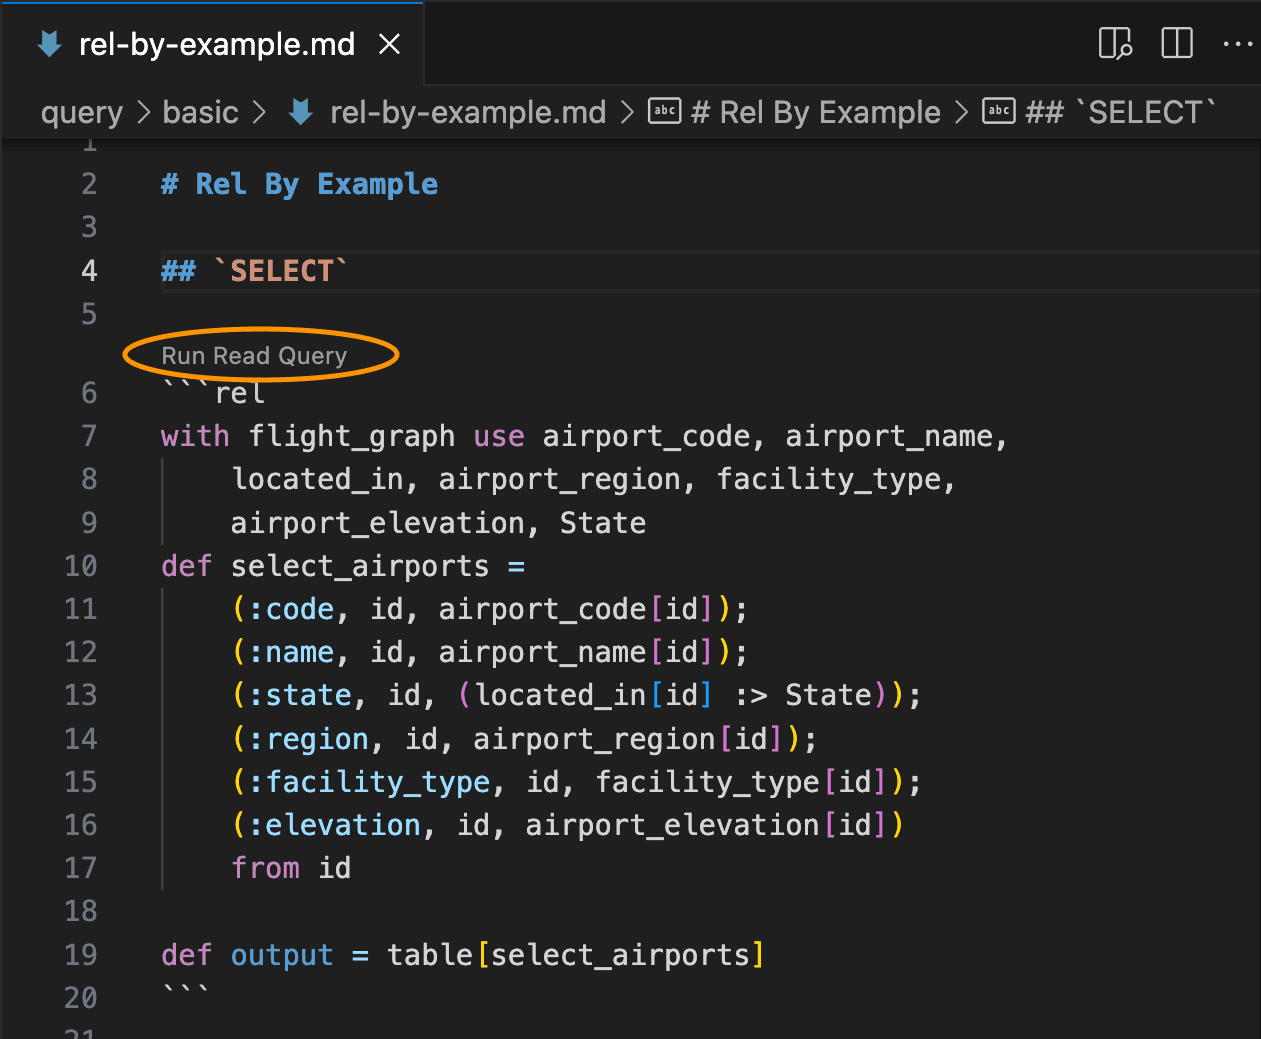
To run code:
- Click Run Read Query or Run Write Query at the top of your open Editor or the fenced code block.
OR
- Select the code or move your pointer anywhere within the fenced code block then press Shift+Enter.
OR
- Select the code, then under RelationalAI View > Admin > Commands, click Run Selection as Query. You can also execute code as a write query by clicking Run Selection as Write Query.
OR
- Select the code, type
RelationalAI: Queryinto the Command Palette, and press Enter (PC) or Return (Mac).
Note that you can cancel running transactions. For more details, see Canceling Running Transactions in the Using the RelationalAI View guide.
Loading Models
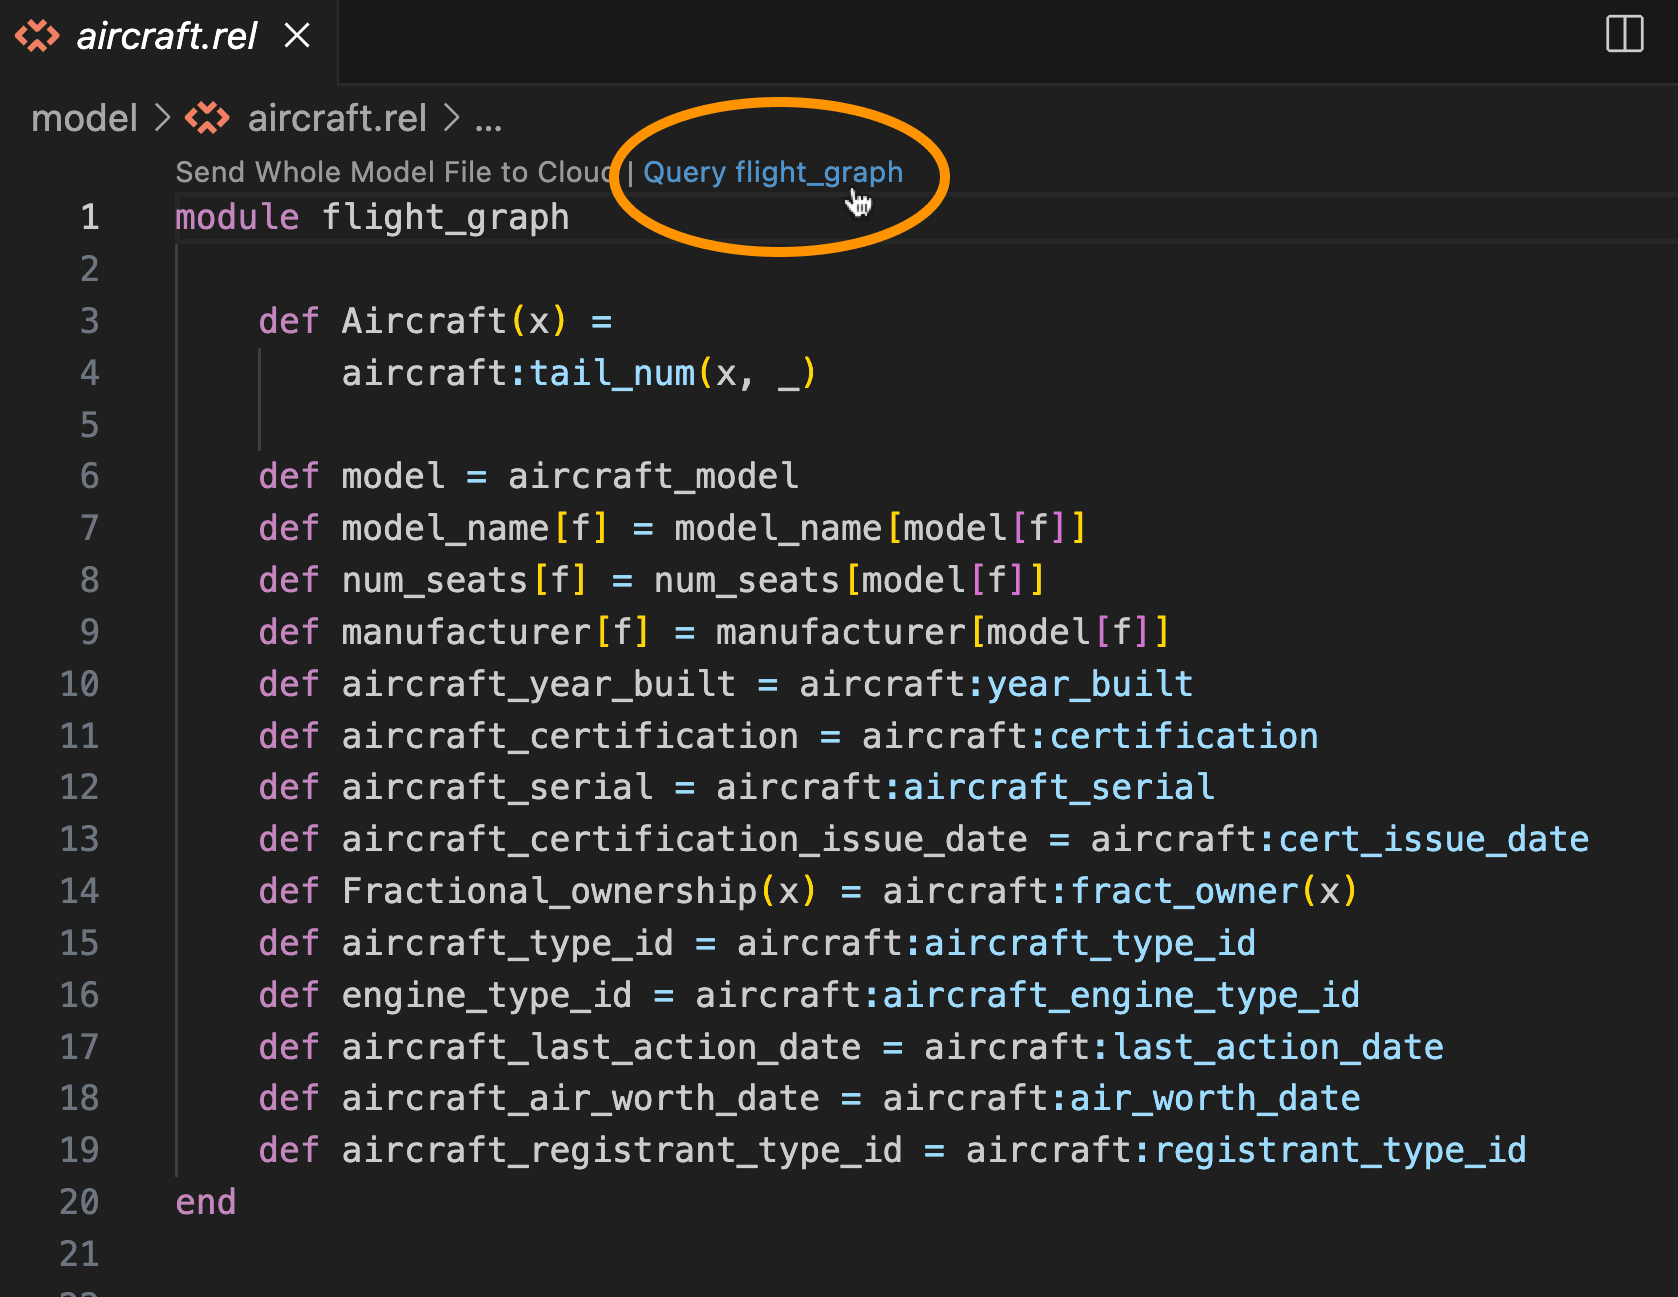
To load a model in your currently open Editor:
- Click Query
<model_name>at the top of your open.relfile.
OR
- Under RelationalAI View > Admin > Commands, click Load Selection as Model.
OR
- In the Command Palette, type
RelationalAI: Load Selection as Modeland press Enter (PC) or Return (Mac).
If you load a model, the model name is determined by the file path of the open Editor relative to the project root (the folder you have open in VS Code).
For example, if you’ve opened ~/my-project/ and the file name is ~/my-project/model/profit.rel, then the model name will be model/profit.rel.
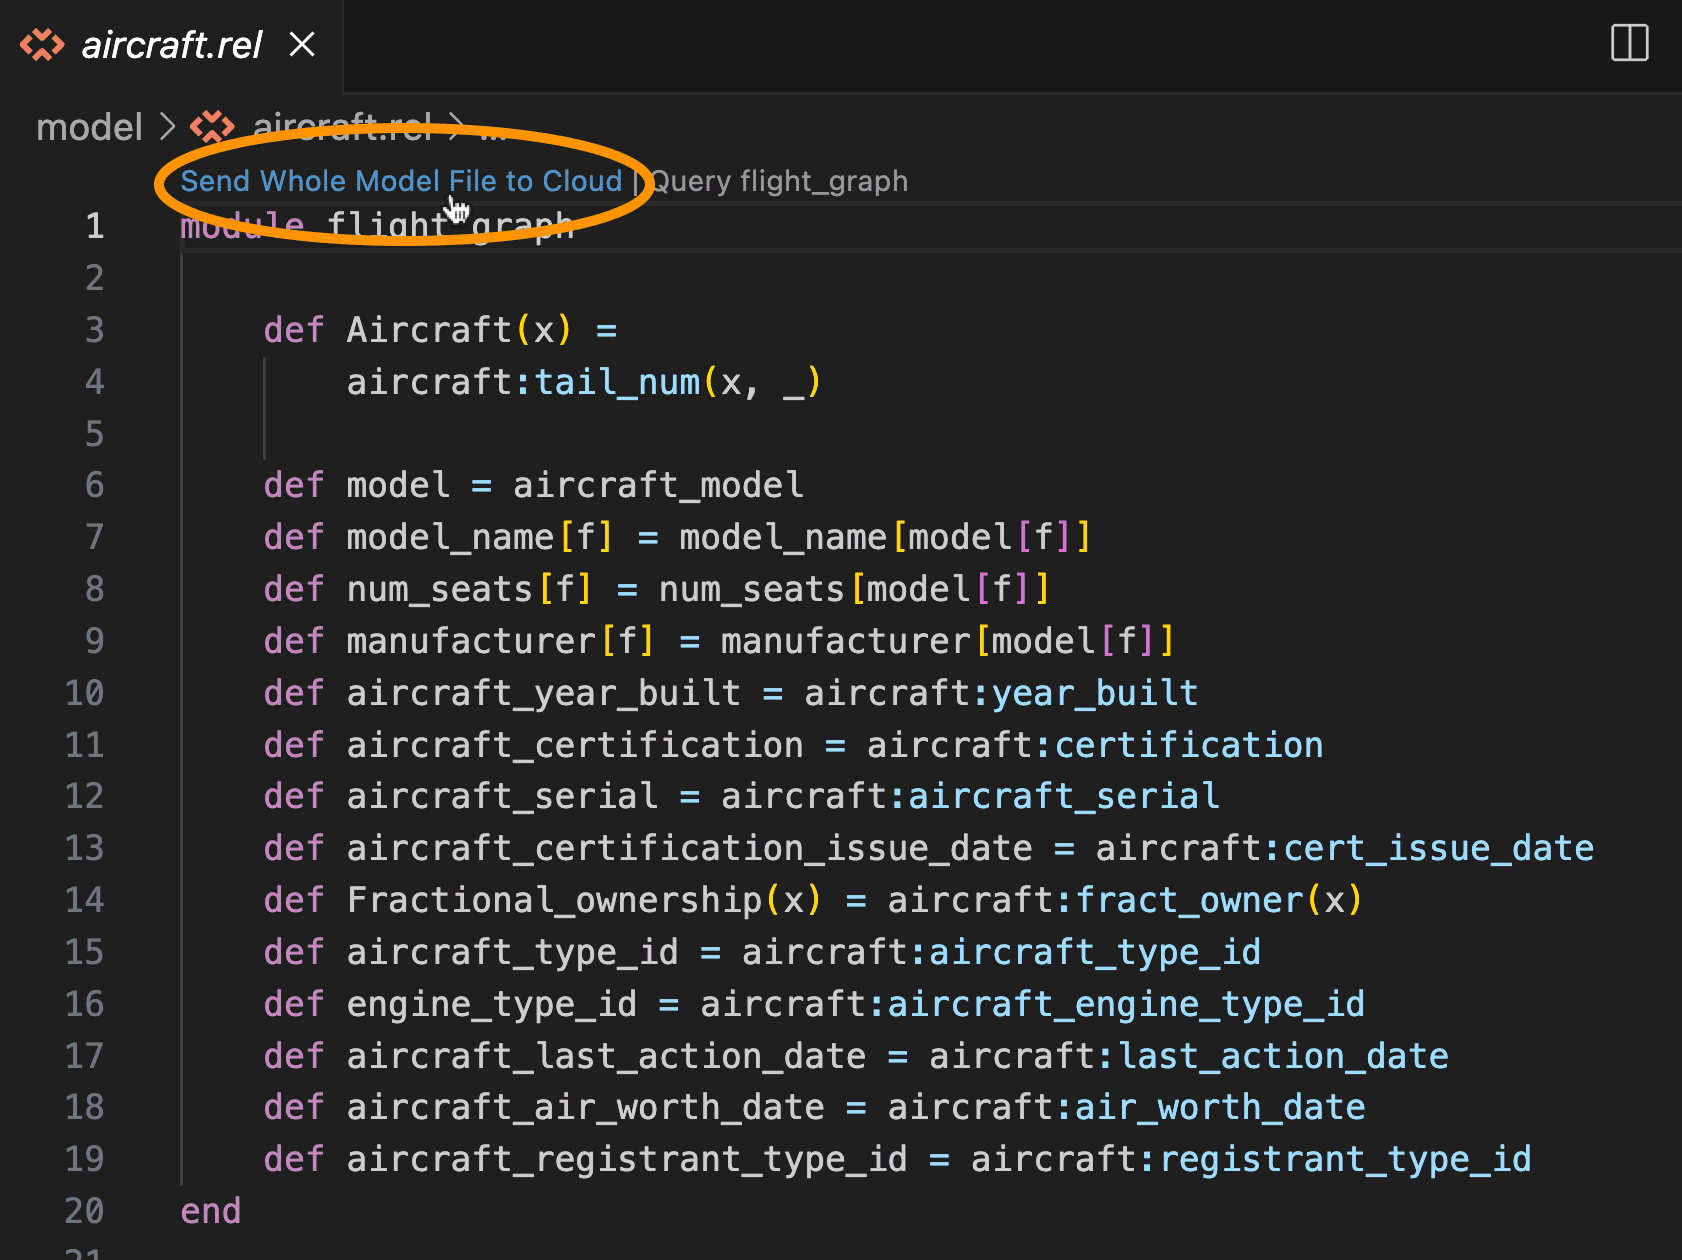
Sending Models to the Cloud
You can send a model to the cloud using your currently open Editor.
To do so, click Send Whole Model File to Cloud.