Setting Up the RelationalAI VS Code Extension
To start using the RelationalAI VS Code Extension, you first need to install it, connect to RelationalAI, and select a project.
Installing the Extension
After downloading VS Code:
- Click the Extensions icon in the Activity Bar.
- Type
RelationalAIinto the Search field. - Click Install to install the extension.
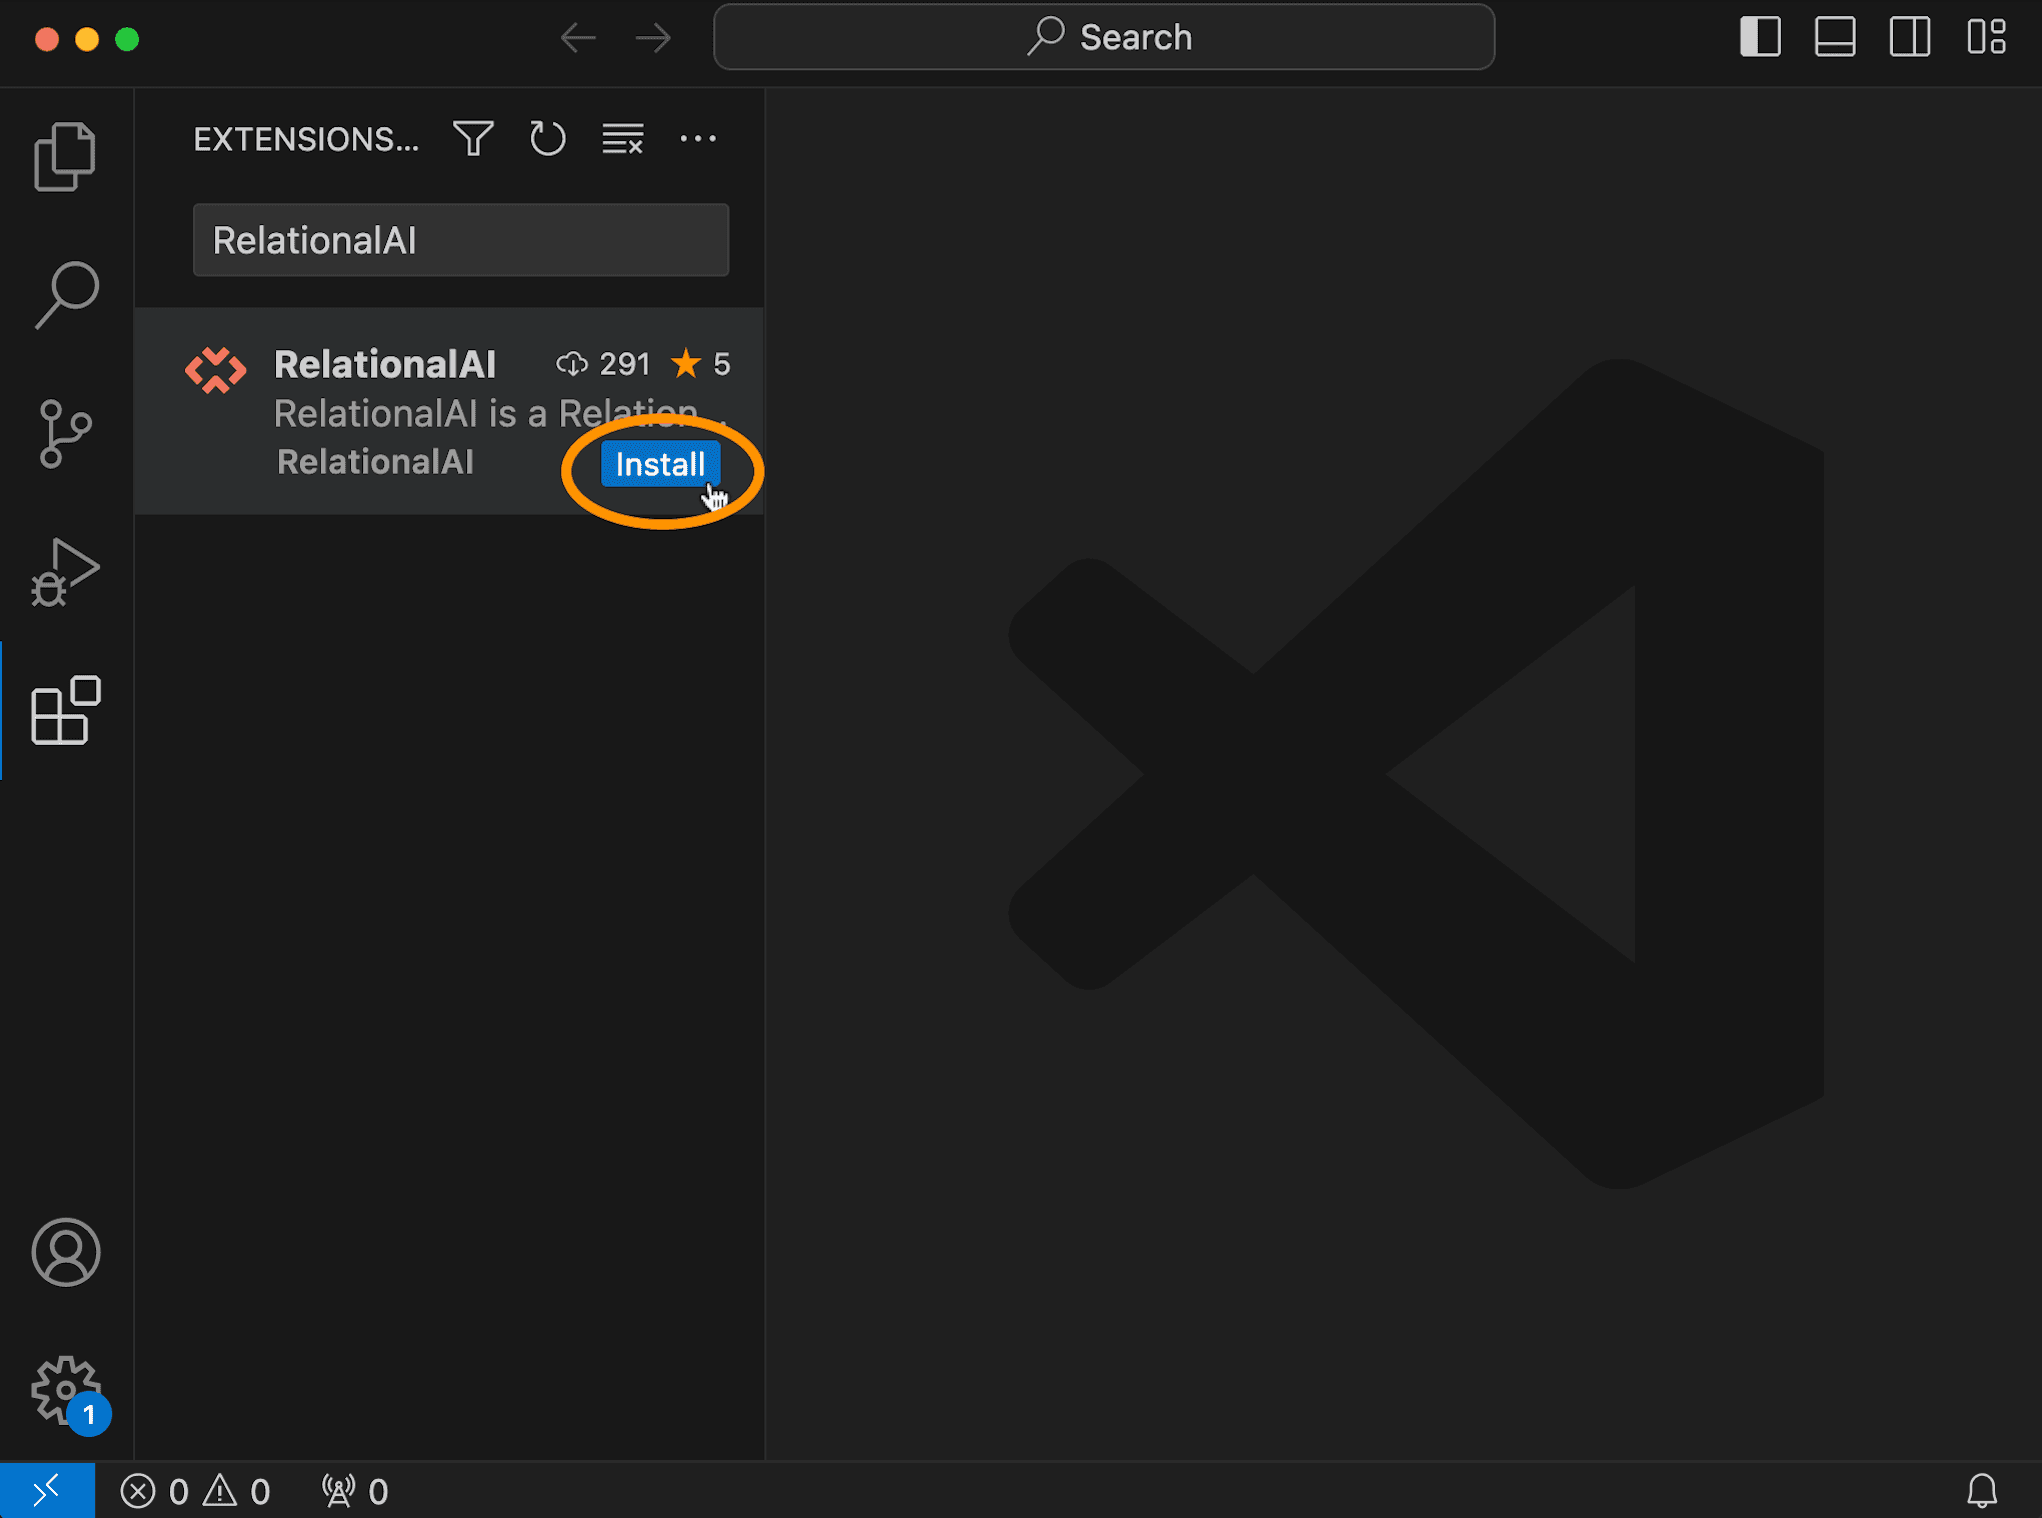
The extension then appears in the Activity Bar.
Connecting to RelationalAI
Now it’s time to configure your profile and connect to your RelationalAI account. You can do that either from the Admin section under the RelationalAI View or from the Command Palette.
To add your credentials from the Admin section:
- Click the RelationalAI icon in the Activity Bar. The RelationalAI View opens.
- Click Admin. A pull-down menu appears.
- Click Profile and select Edit Profiles. This opens a file called
configin a folder called.raiin your home directory on your computer. - Enter your client ID and client secret to connect securely to RelationalAI.
- Press Control+S (PC) or Command+S (Mac) to save your information.
To add your credentials from the Command Palette:
- Press Command+Shift+P to activate the Command Palette.
- Type
RelationalAI: Set Up or Edit Credentialsand select the command from the list by clicking it. This creates and opens theconfigfile. - Enter your client ID and client secret to connect securely to RelationalAI.
- Press Control+S (PC) or Command+S (Mac) to save.
This allows the RelationalAI SDKs and the RelationalAI VS Code Extension to find your credentials and connect to the service.
To view all the commands supported by the extension, click Commands under the Admin section. See Accessing Commands in the Using the RelationalAI View guide for more details.
Choosing a Project
Now you need to open a directory containing a RelationalAI project you want to work on. You can either select an existing project on your machine or clone a new one from GitHub.
Selecting an Existing Project
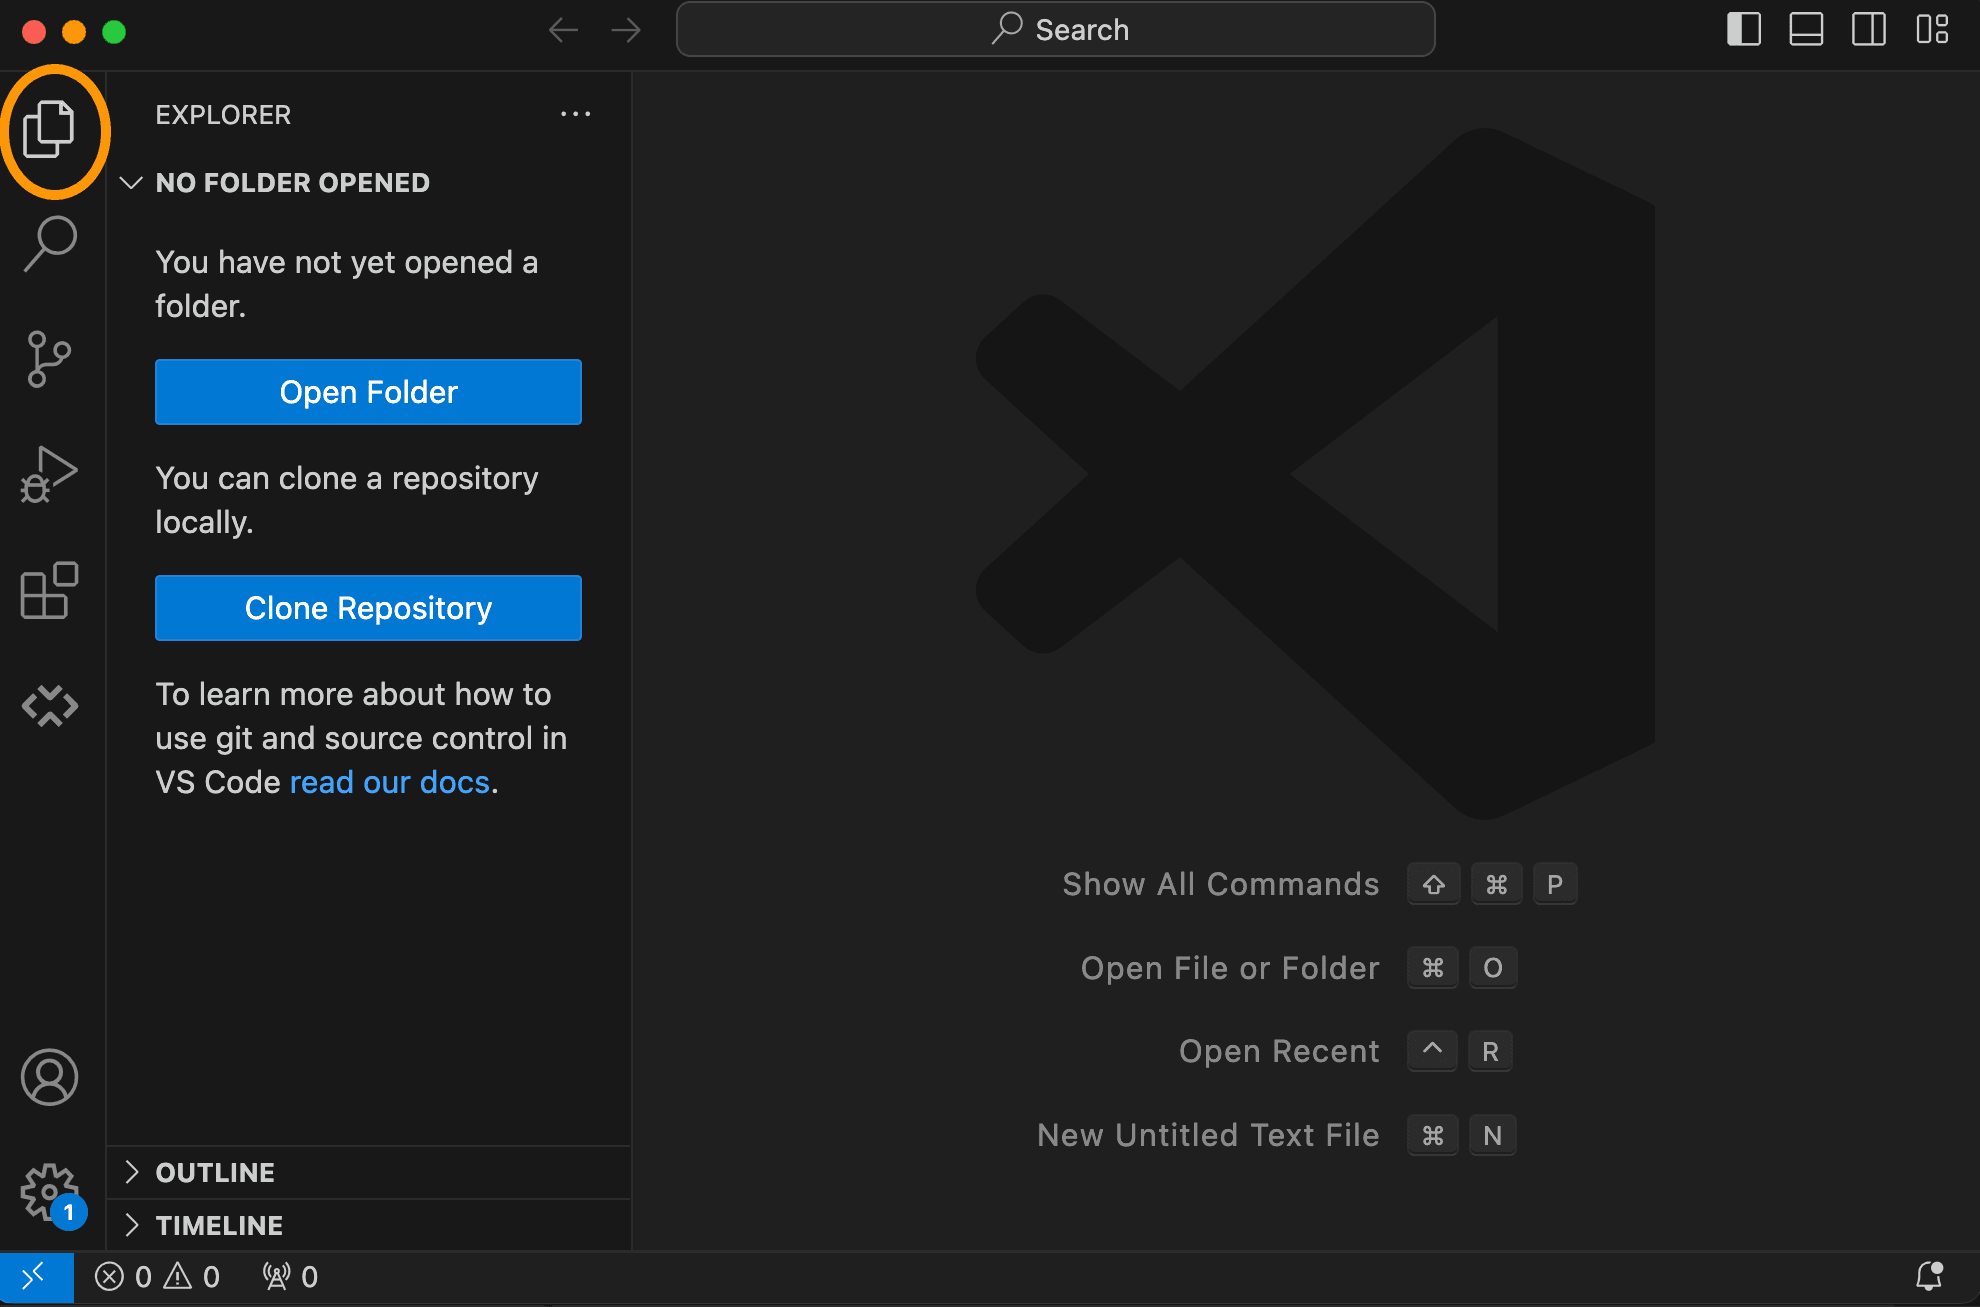
To open an existing project:
- Click the Explorer icon in the Activity Bar.
- Click Open Folder.
- In the window that opens, browse to the location of your project folder.
- Click Open.
This extension is designed to work with your project directory as the workspace folder in VS Code. If you have a different directory open in VS Code — perhaps a parent directory which contains multiple projects – then open the project you want to work on in another VS Code window. Your models should be saved in a directory called model (or another directory of your choosing).
Cloning a New Project
You can clone a new project either from the Explorer section or by using the integrated terminal.
To clone a new project from the Explorer:
- Click Clone Repository.
- Provide the repository’s URL.
- In the window that opens, choose a location for your folder and click Select as Repository Destination.
- In the window that opens, click Open.
To clone a new project from the integrated terminal:
- Under Terminal, type
git clone <project URL>. For example,git clone https://github.com/sswatson/faa-flights. - Once the project is cloned, click File and choose Open Folder.
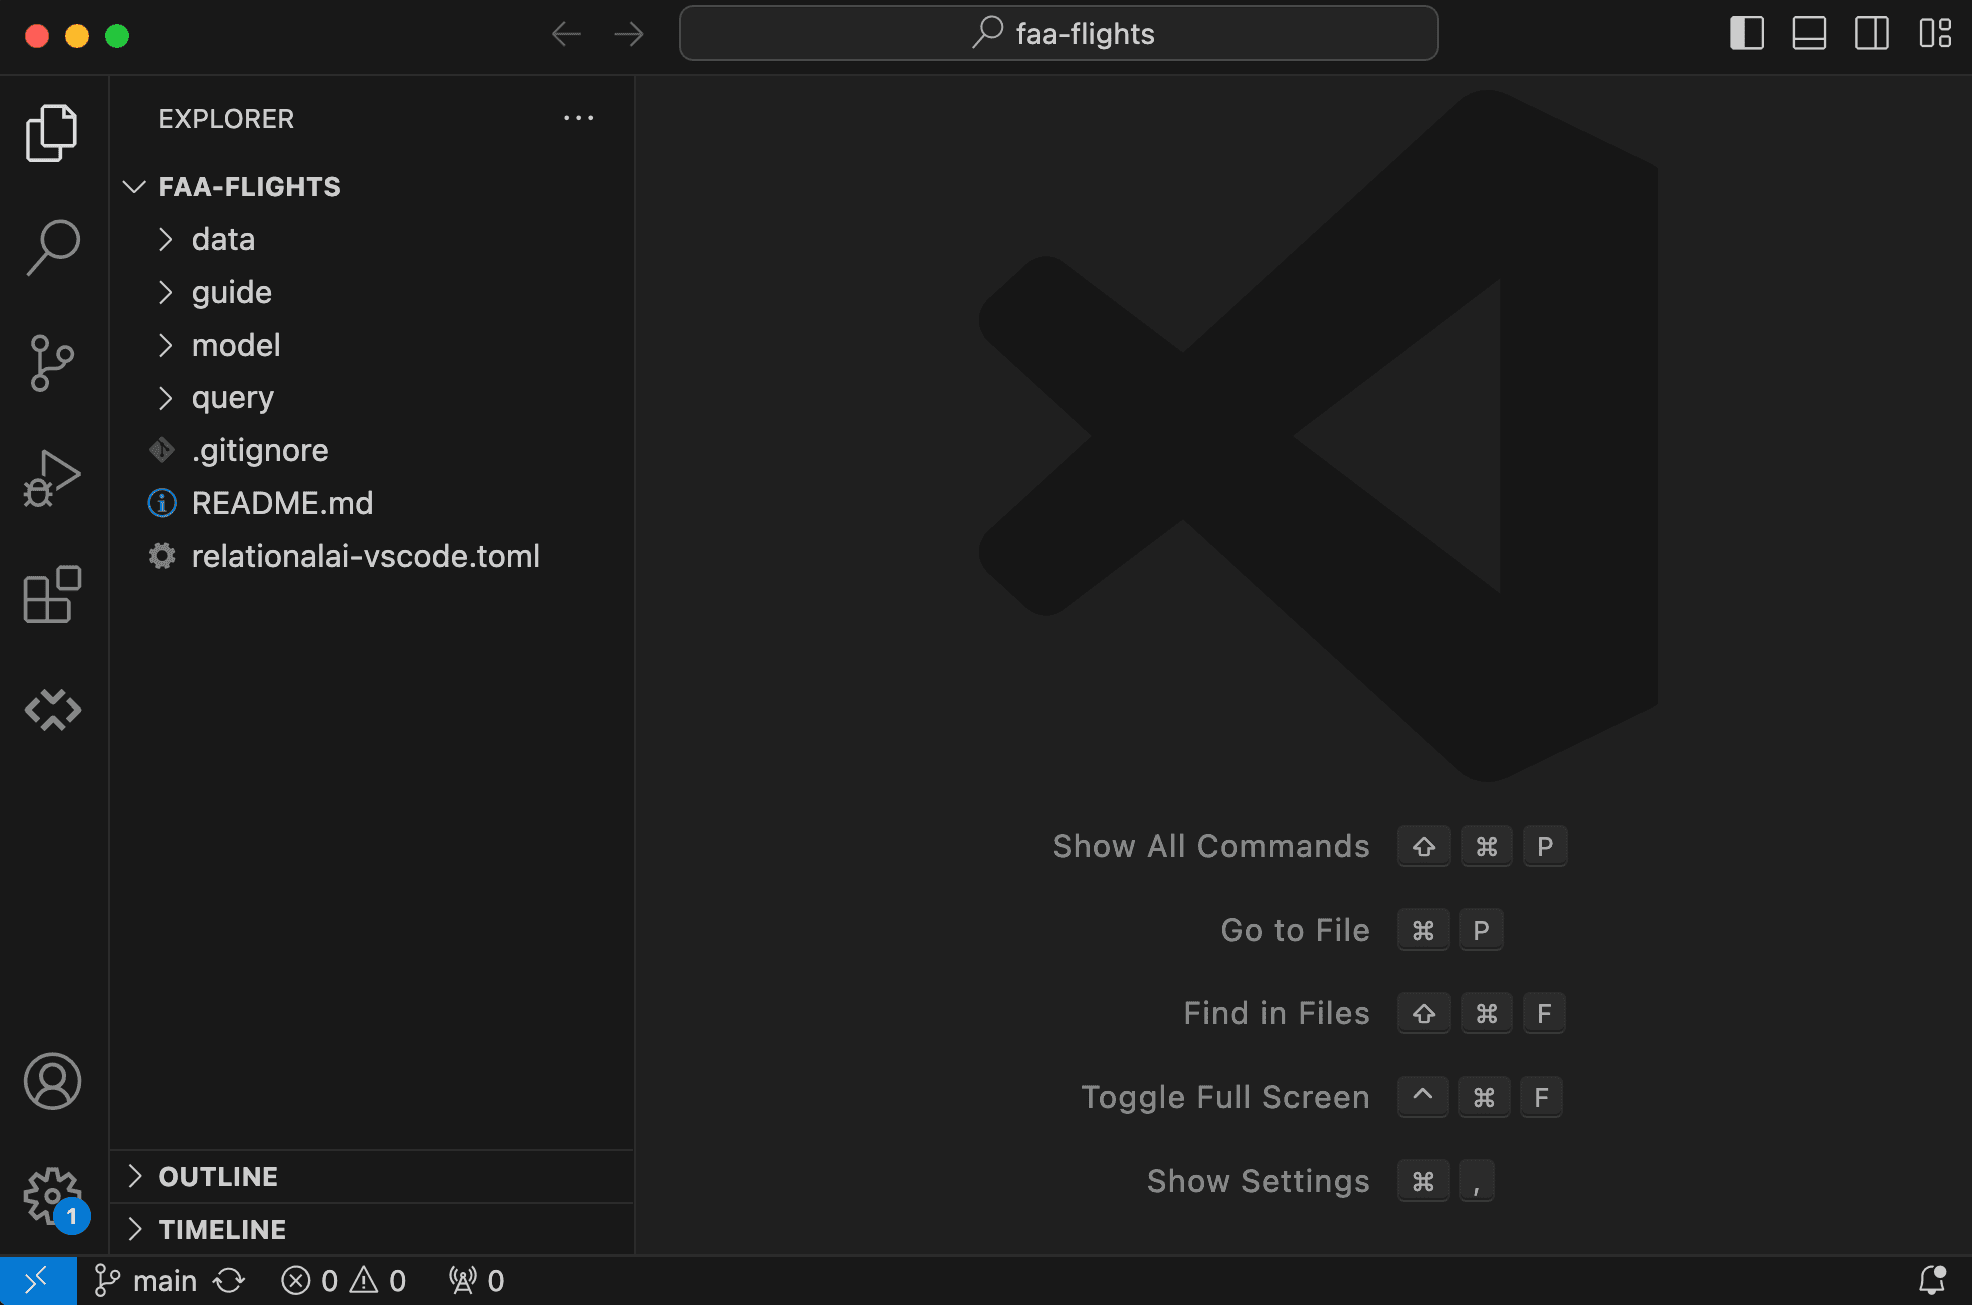
- In the window that opens, browse to the location of the project you just cloned.
- Click Open.
This opens the project folder in VS Code.
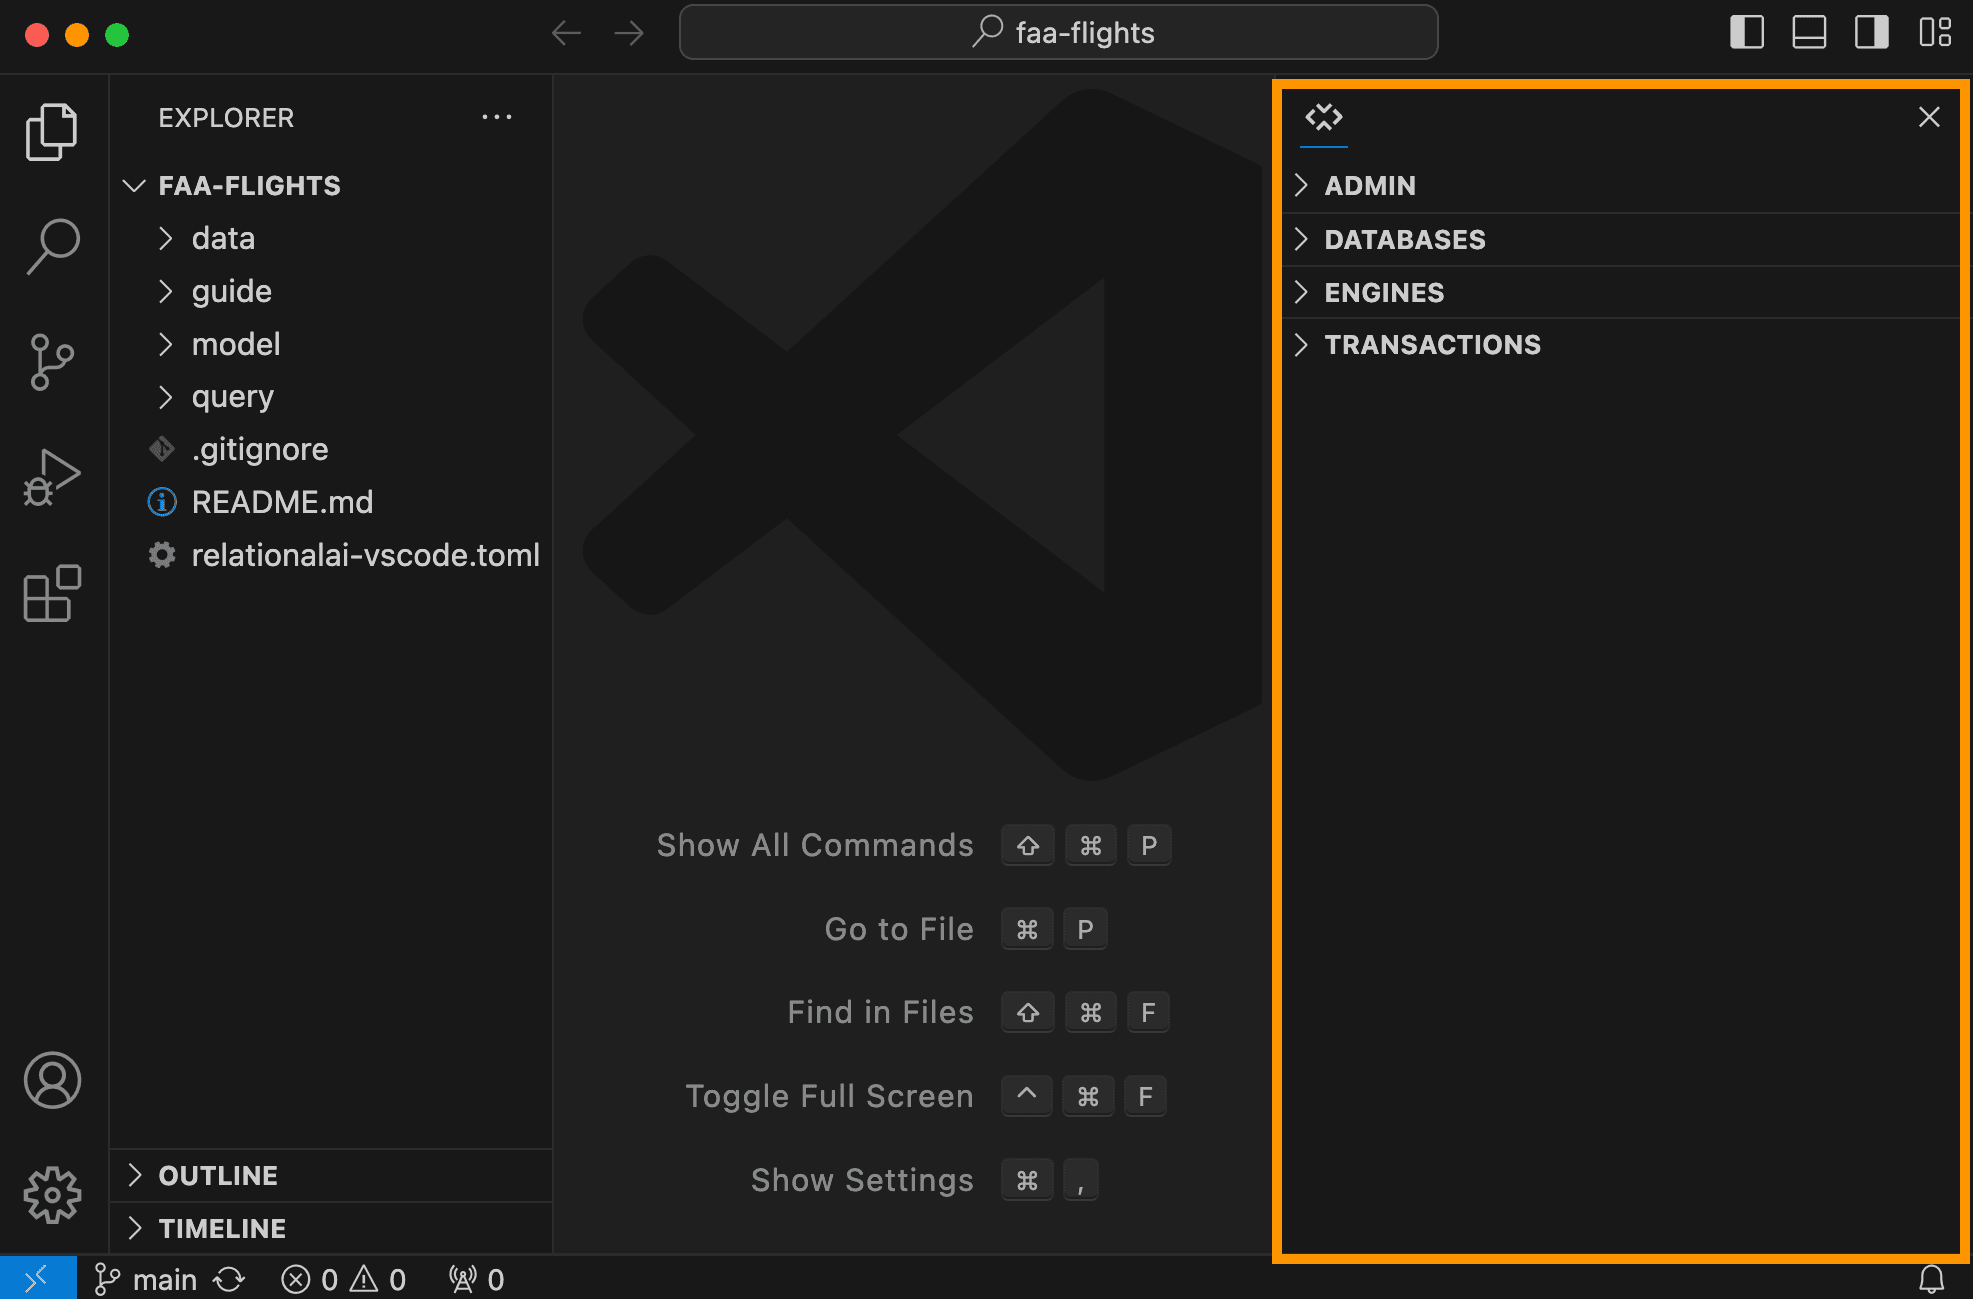
Creating a Separate View
Clicking the RelationalAI icon in the Activity Bar opens the RelationalAI View in the Primary Side Bar — the space designated for the project folder.
You can move the RelationalAI View and view it independently of the project you’re working on. To do so:
- Click the Toggle Secondary Side Bar icon.
- Click the RelationalAI icon and drag it to the right-hand sidebar.
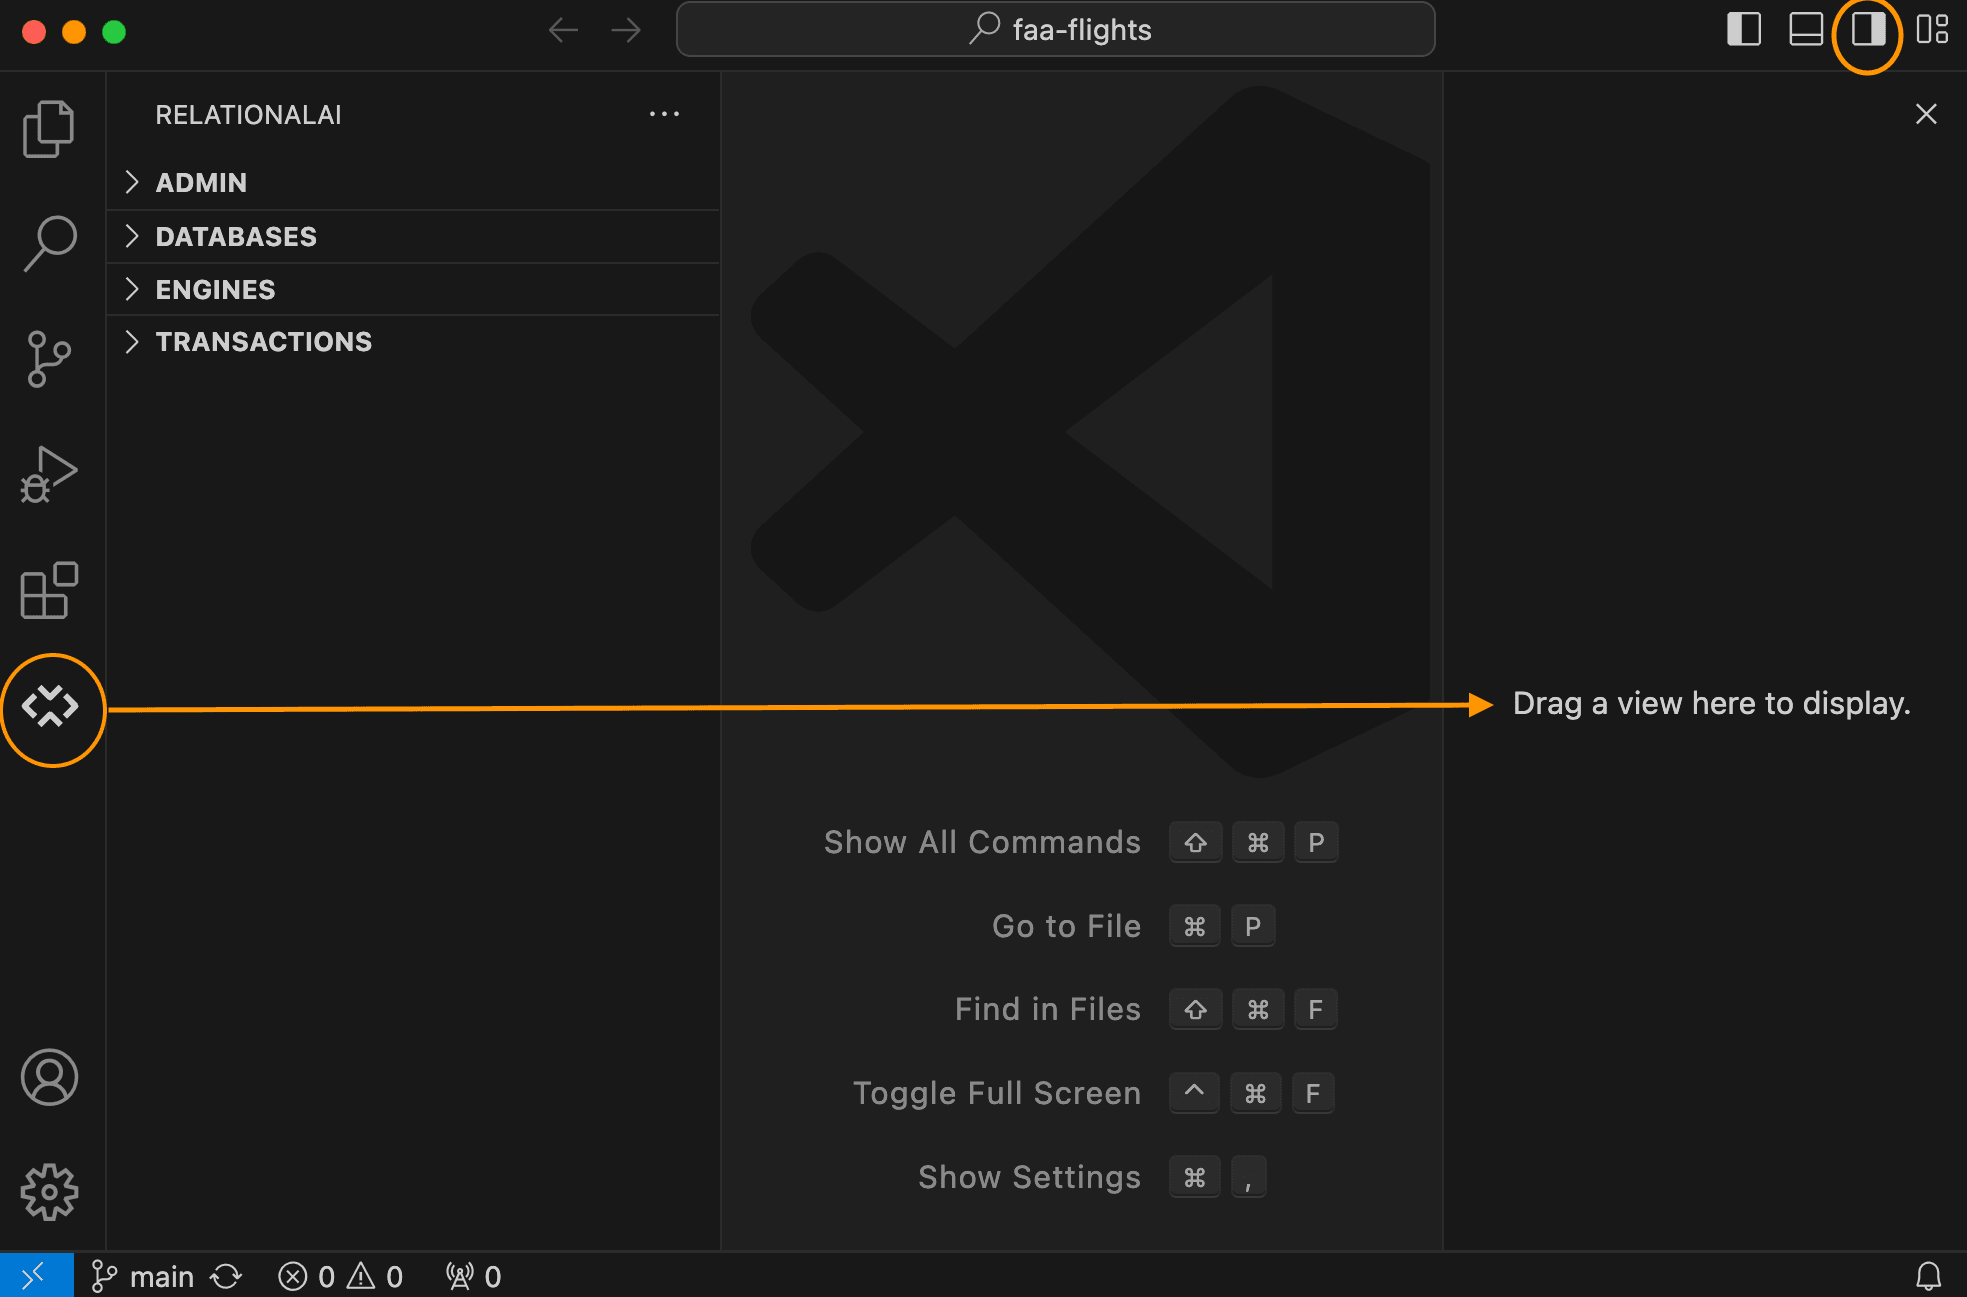
You can now view and navigate through the sections from the Secondary Side Bar.