Managing Relations
When you load data from and sync models with the cloud, you populate your local database with base relations, derived relations, and models.
This guide shows you how to access and manage these relations and models.
Accessing Relations and Models
To access the base relations, derived relations, and models in your local database:
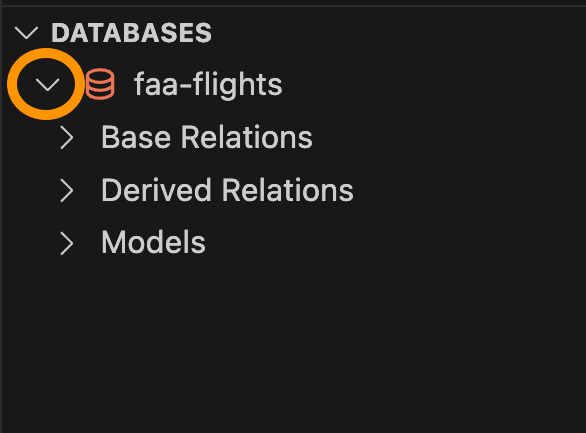
- Under the RelationalAI View, click Databases. A pull-down menu appears with a list of databases associated with your RelationalAI account.
- Select your desired database by clicking it.
- Click > next to your selected database. This displays the Base Relations, Derived Relations, and Models subsections.
Using Local and Remote Versions
The RelationalAI VS Code Extension enables you to make changes to models, base relations, and derived relations either locally in your directory or remotely in the cloud.
When you make local changes, they are exclusively saved in your local directory, while cloud edits are saved solely in the cloud. This means that the data and contents of your project in the local version will differ from the remote version, unless you enable synchronization.
If you want your local and remote versions to be in sync, either:
- In RelationalAI View > Admin, click Configuration.
- In the pull-down menu that opens, click auto-sync-models.
- In the pull-down menu that opens, click Configure this Option. This opens your
relationalai-vscode.tomlfile and automatically inserts this configuration entry. - Set the entry to
true. - Press Control+S (PC) or Command+S (Mac) to save.
OR
- Press Control+Shift+P (PC) or Command+Shift+P (Mac) to activate the Command Palette.
- Type
RelationalAI: Configure Extensionand press Enter (PC) or Return (Mac). - In the pull-down menu that opens, click auto-sync-models. This opens your
relationalai-vscode.tomlfile and automatically inserts this configuration entry. - Set the entry to
true. - Press Control+S (PC) or Command+S (Mac) to save.
Now, any changes you make to your local directory using the Extension are automatically synchronized with the cloud.
Managing Base Relations
You can list, add, and delete base relations in your selected database.
Listing Base Relations
To view a list of all base relations in your selected database, click > next to Base Relations.
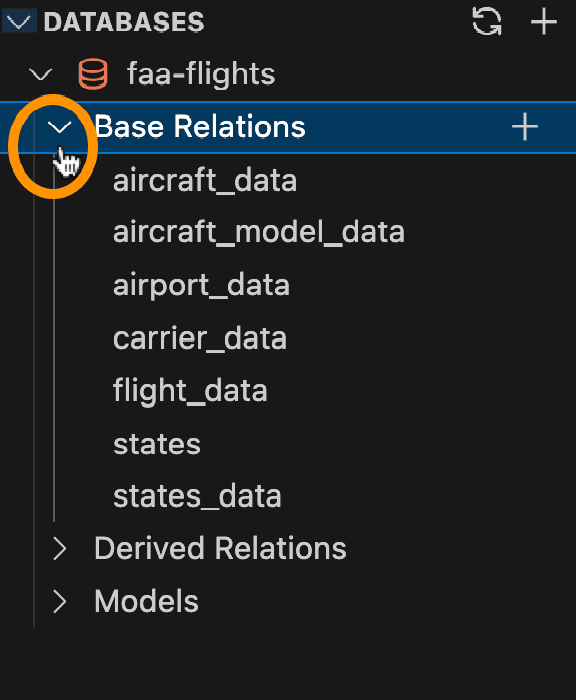
Clicking a base relation opens the RAI Output Viewer and displays the contents of the base relation.
Adding New Base Relations
You can add new base relations either by loading existing files on your machine or by creating new ones.
To load a new base relation:
- Click + next to Base Relations.
- In the top bar, either click Load CSV or Load JSON.
- Give your relation a name and click Enter (PC) or Return (Mac). This opens a file dialog.
- Select the CSV file you want to load and click Load CSV or Load JSON.
To create a new base relation:
- Click + next to Base Relations.
- In the top bar, click Open a New Editor.
- Give your relation a name and click Enter (PC) or Return (Mac). This opens a pull-down menu displaying names of folders in your project directory.
- Select the desired location by clicking it. This adds the new file to your project directory in the specified location and opens an Editor simultaneously.
- Edit as desired.
- Press Enter (PC) or Return (Mac) to save your changes locally.
For more details on loading data, see Loading Data and Models.
If you want to automatically sync changes to the cloud each time you save a file, configure the auto-sync-models option in your relationalai-vscode.toml file to true. See Configuring Options in the Using the RelationalAI View guide for more details.
Deleting Base Relations
To delete a base relation:
- Move your pointer to the base relation you want to delete.
- Click the trash bin icon that appears.
- In the confirmation message that opens, click Yes, delete it.
The base relation will then disappear from the list.
Managing Derived Relations
You can list derived relations and edit their definitions.
Listing Derived Relations
To view a list of all the derived relations defined in your models, click > next to Derived Relations.
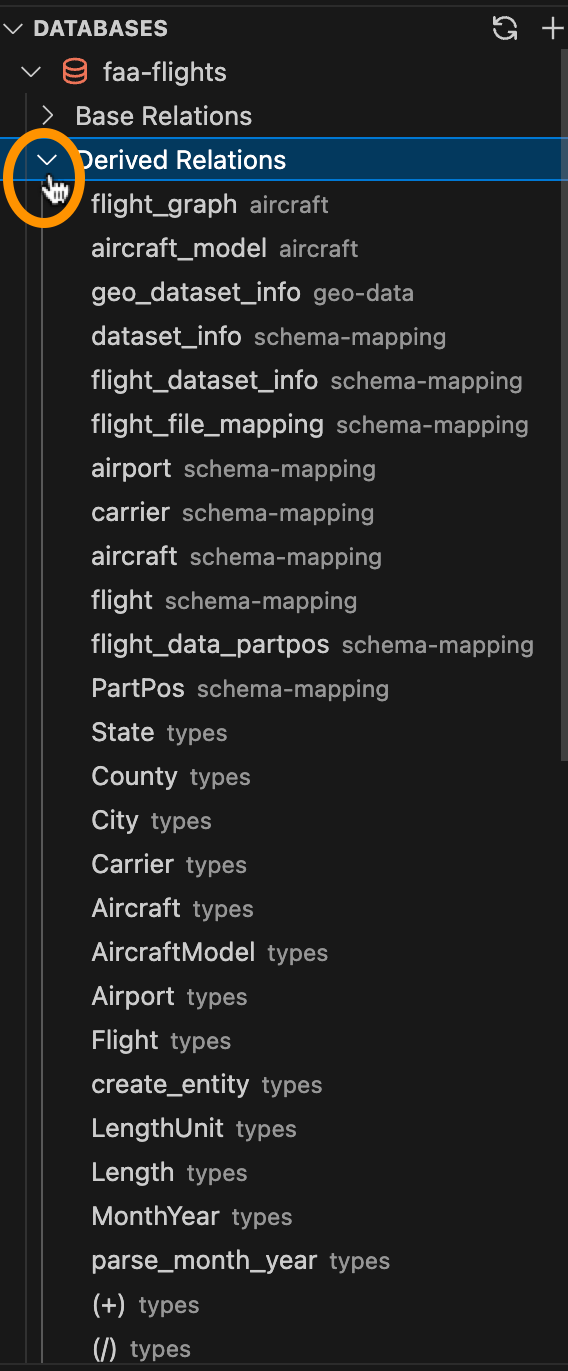
This also displays the model in which each derived relation is defined.
For example, in the image above, the relation flight_graph is defined in the model aircraft.
Clicking a derived relation opens the RAI Output Viewer and displays the derived relation as it appears in the RelationalAI system.
Editing Definitions
You have two options to edit the definition of a derived relation: locally in your directory or remotely in the cloud. See Using the Local and Remote Versions.
To edit a definition locally:
- Select or place your pointer on the derived relation whose definition you want to edit.
- Click the document icon. This opens a local view of the file in which the relation is defined and highlights the definition. If the relation has multiple definitions, the highlighted definition is the first one.
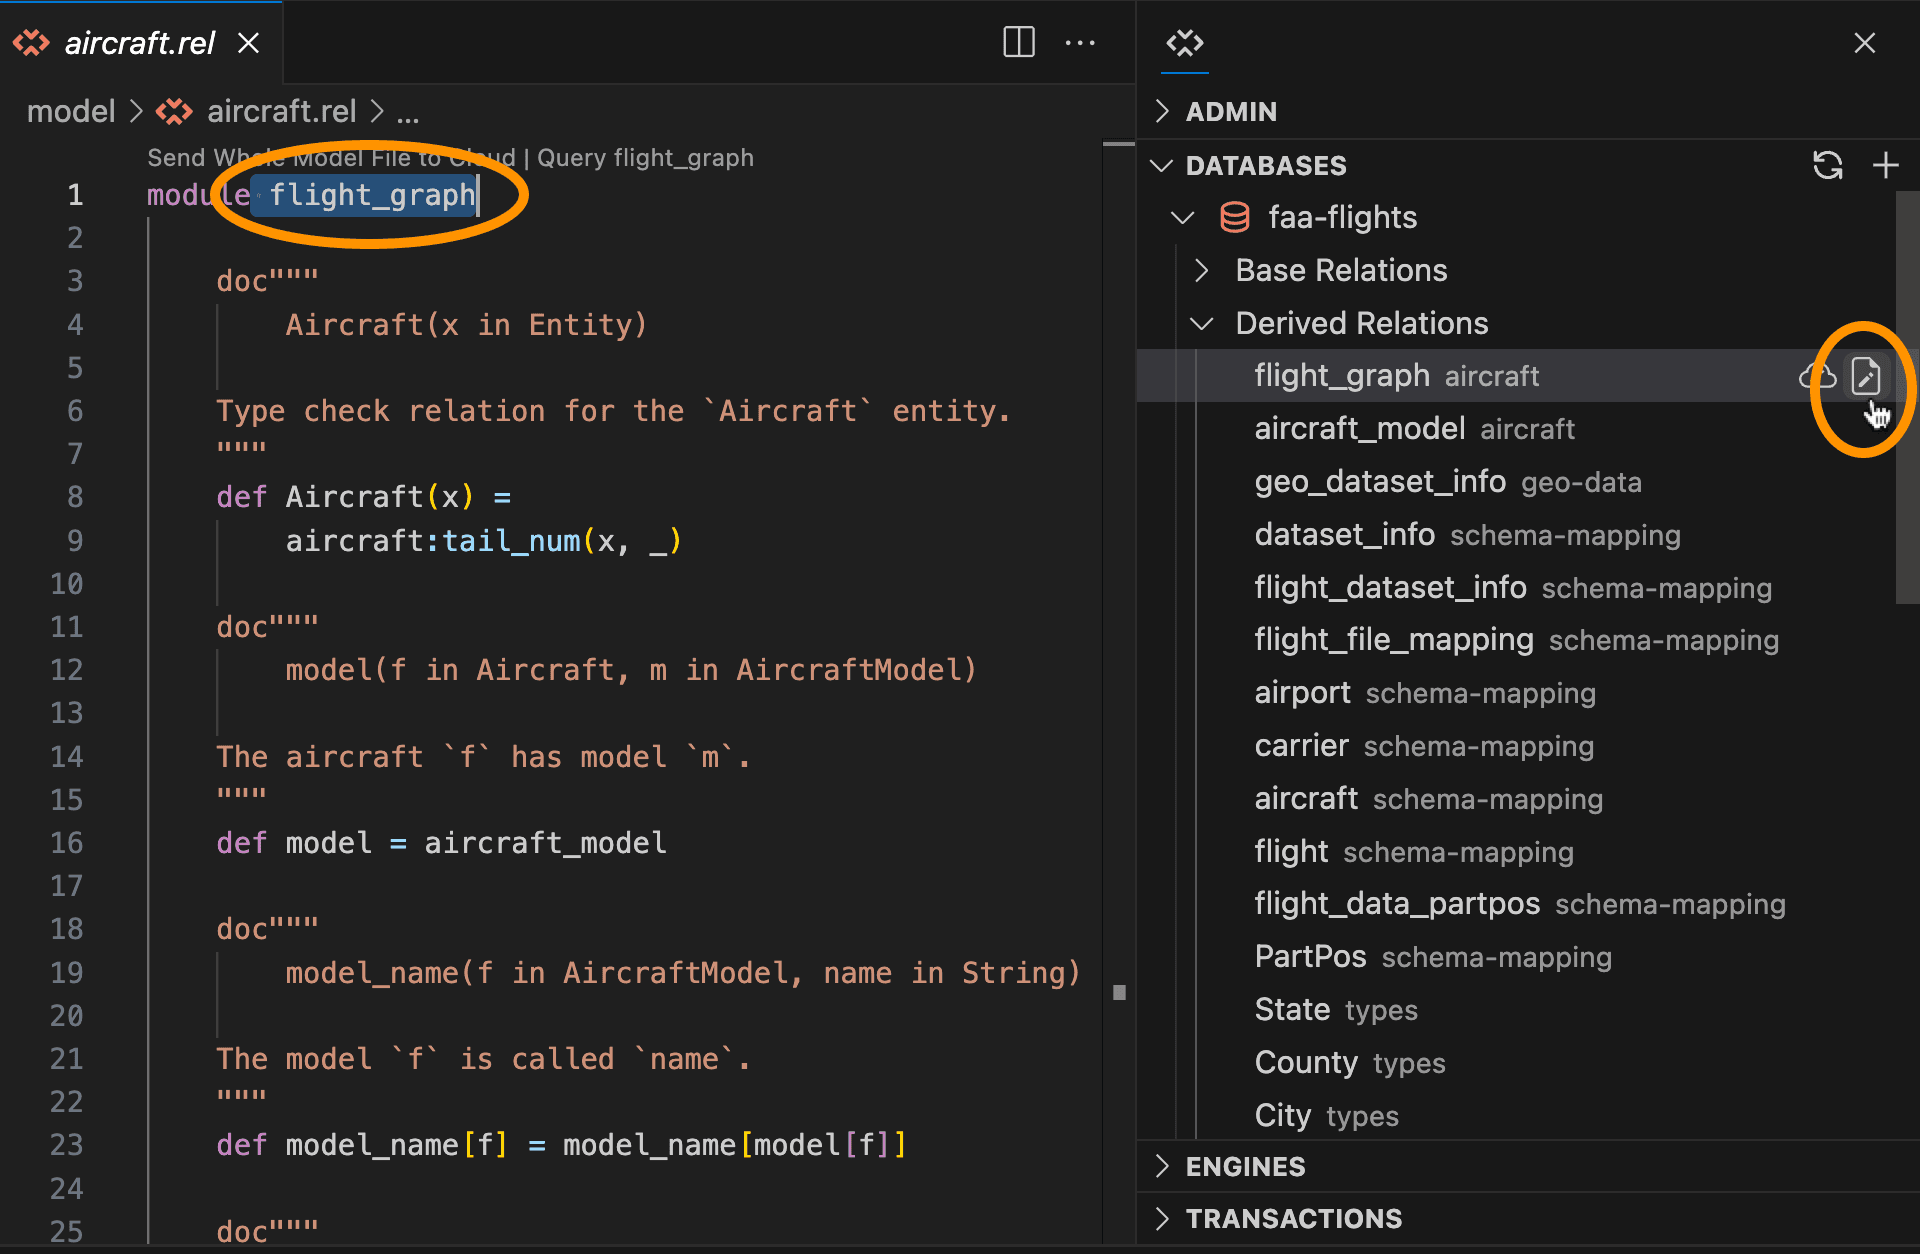
- Edit as desired.
- Press Control+S (PC) or Command+S (Mac) to save your changes to your local directory.
If you want to automatically sync changes to the cloud each time you save a file, configure the auto-sync-models option in your relationalai-vscode.toml file to true. See Configuring Options in the Using the RelationalAI View guide for more details.
To edit a definition in the cloud:
- Select or place your pointer on the derived relation you want to edit.
- Click the cloud icon. This opens a view of the remote version of the relation in a new Editor and highlights it.

- Edit as desired.
- Press Control+S (PC) or Command+S (Mac) to save your changes to the cloud.
If you use the cloud-editing feature, your local directory is bypassed and changes will be made directly in the cloud. For most use cases, the recommended workflow is to edit files locally and sync them to the cloud.
Managing Models
You can list, create, edit, and delete models in your database. You can also view model dependencies.
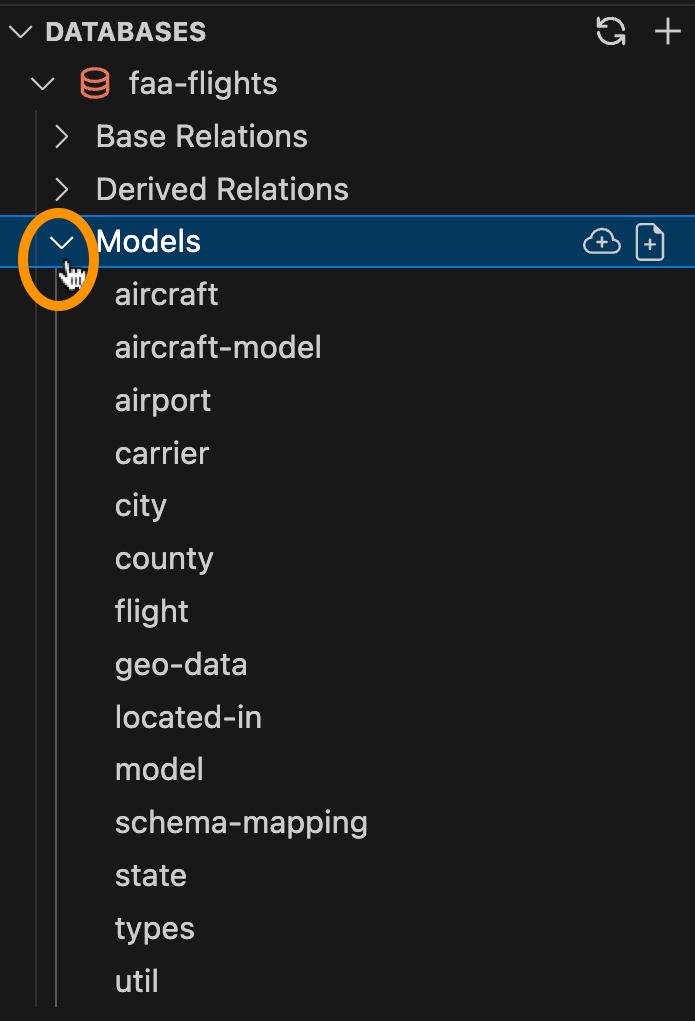
Listing Models
To view a list of all models in your local database, click > next to Models.
Creating Models
You have two options to create models: locally in your directory or remotely in the cloud. See Using the Local and Remote Versions.
To create a new model and add it to your local database:
- Select or move your pointer to Models.
- Click the document icon.
- In the top bar, give your model a name and press Enter (PC) or Return (Mac). This opens a new Editor with the name of your model, where you can write and edit code.
- Edit as desired.
- Press Enter (PC) or Return (Mac) to save your changes locally.
The name of the new model appears in the project directory as a .rel file.
If you want to automatically sync changes to the cloud each time you save a file, configure the auto-sync-models option in your relationalai-vscode.toml file to true. See Configuring Options in the Using the RelationalAI View guide for more details.
To create a new model and add it to the cloud:
- Select or move your pointer to Models.
- Click the cloud icon.
- In the top bar, give your model a name and press Enter (PC) or Return (Mac). This opens a new Editor with the name of your model, where you can write and edit code.
- Edit as desired.
- Press Enter (PC) or Return (Mac) to save your changes to the cloud.
The name of the new model appears in RelationalAI View > Models.
If you use the cloud-editing feature, your local directory is bypassed and changes will be made directly in the cloud. For most use cases, the recommended workflow is to edit files locally and sync them to the cloud.
Viewing Model Dependencies
To view dependencies between the relations defined in a specific model:
- Select or place your pointer on the desired model.
- Click the View Model Dependencies icon. This opens the Relation Dependency Graph Viewer, which displays a graph visualization of the dependency relationships between derived relations.
Editing Models
You have two options to edit models: locally in your directory or remotely in the cloud. See Using the Local and Remote Versions.
To edit data locally:
- Select or place your pointer on the derived relation you want to edit.
- Click the document icon. This opens a local view of the file in which the relation is defined and highlights the relation.
- Edit as desired.
- Press Control+S (PC) or Command+S (Mac) to save your changes to your local directory.
If you want to automatically sync models to the cloud each time you save a file, configure the auto-sync-models option in your relationalai-vscode.toml file to true. See Configuring Options in the Using the RelationalAI View guide for more details.
To edit a model in the cloud:
- Select or place your pointer on the model you want to edit.
- Click the cloud icon. This opens a view of the remote version of the model in a new Editor and highlights it.
- Edit as desired.
- Press Control+S (PC) or Command+S (Mac) to save your changes to the cloud.
Deleting Models
To delete a model:
- Select or place your pointer on the derived relation you want to delete.
- Click the trash bin icon next to the model.
- In the confirmation message that opens, click Yes, delete it.
The model will then be deleted from the list.