Using the RelationalAI SDK for Python Through Visual Studio Code
Learn how to set up a VS Code environment for use with Python and RelationalAI.
This guide describes how to set up a Microsoft VS Code environment to work with the RelationalAI SDK for Python. See the RelationalAI SDK for Python for more information.
Prerequisites
- Python (opens in a new tab). Check the RelationalAI SDK for Python (opens in a new tab) for minimum version requirements.
- The RelationalAI SDK for Python (opens in a new tab).
- Visual Studio Code (opens in a new tab).
You can find useful information on working with Python in VS Code from the official VS Code website (opens in a new tab).
Creating a Configuration File for RelationalAI
In order to connect to RelationalAI from VS Code, you need to create a configuration file with RAI credentials. See SDK Configuration for more details.
Installing Python
Following instructions for your operating system, install Python (opens in a new tab). For the minimum required version, check the RelationalAI SDK for Python (opens in a new tab). You also need to install dev packages (opens in a new tab) and pip (opens in a new tab). Note that these may be included with your Python installation.
Installing Visual Studio Code
You can install Visual Studio Code (opens in a new tab) by following the instructions here (opens in a new tab).
Installing the Python Extension
In order to begin using the RelationalAI SDK for Python, you need to install and enable the Python extension in VS Code.
To install the Python extension:
- Click View > Extensions.
- Enter “Python” in the Search Box.
- Under Python, click Install.
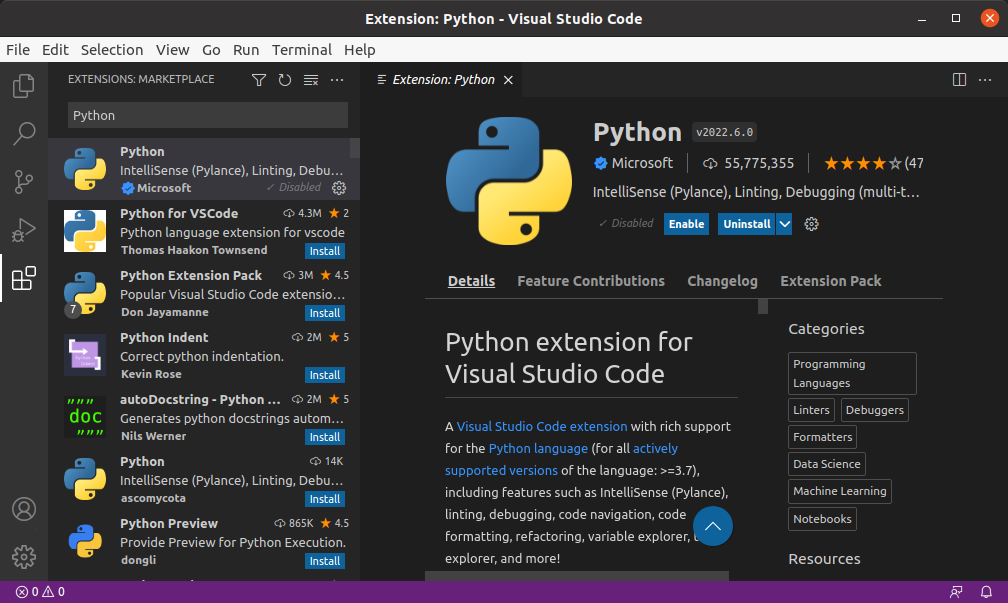
Once installed, you will see something like this:
Installing the Rel Extension
RelationalAI provides a Rel extension for VS Code. This extension highlights Rel syntax.
To install the Rel extension:
- Click View > Extensions.
- Enter “Rel” in the Search Box.
- Under Rel, click Install.
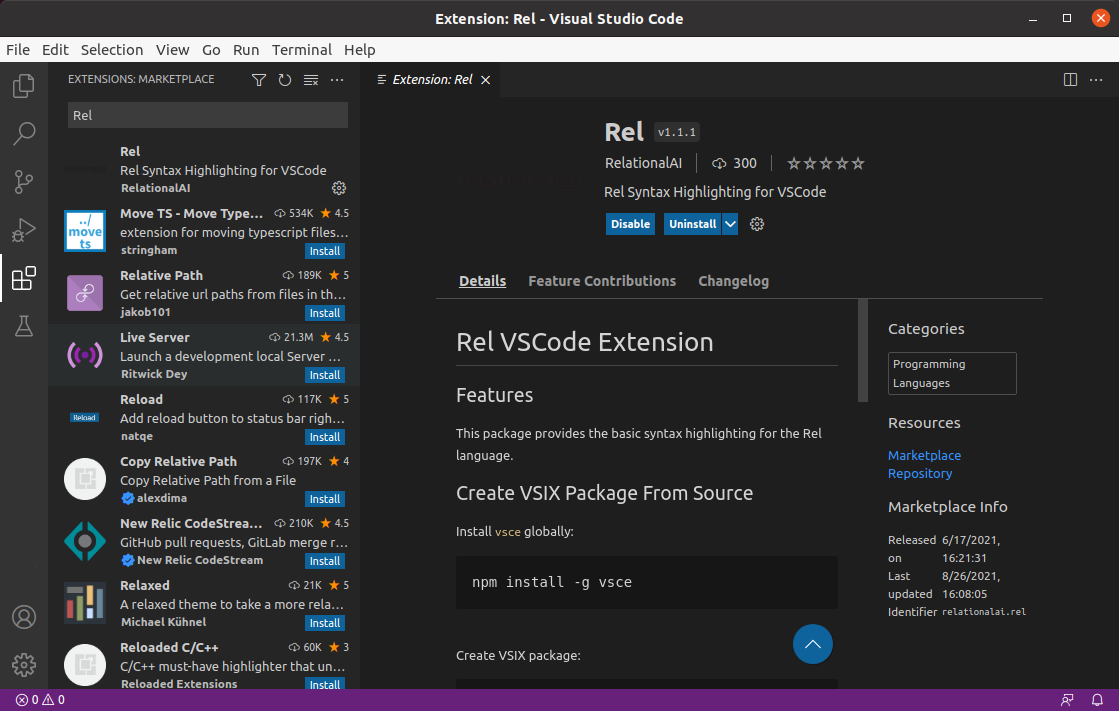
Once installed, you will see something like this:
Verifying the Python Installation
Next, you need to verify that your Python installation is visible from within VS Code.
Open a new terminal window by selecting Terminal > New Terminal.
Depending on your Python installation, enter code along the following lines:
python3 --versionor
python3.7 --versionYou should be using a version along the following lines:
Python 3.7.13Installing the RelationalAI SDK Package for Python
Next, you need to install the RelationalAI SDK package for your Python installation.
Depending on your installation, enter code along the following lines.
Make sure that you are installing the RelationalAI SDK for the correct version of Python.
You may need to use pip3.7 if, for example, you have Python 3.7 installed:
pip3 install rai-sdkInstallation may not work if you do not have the dev package installed for Python.
You should see a message along the following lines:
Successfully installed ed25519-1.5 rai-sdk-0.6.3At this point, you have successfully created a VS Code environment with Python and the RelationalAI SDK for Python.
Writing Python for the RelationalAI SDK
You can now begin writing Python code that will execute against the RelationalAI SDK.
Creating a Python File
To create a Python file, follow the steps below:
- Choose File > New File.
- Enter “Python” in the dialog box that opens.
- Click Python.

A new Python file opens.
- Choose File > Save and save the file with a name such as
myrel.py.
Testing Python
Next, you can write some simple Python code to ensure things work properly.
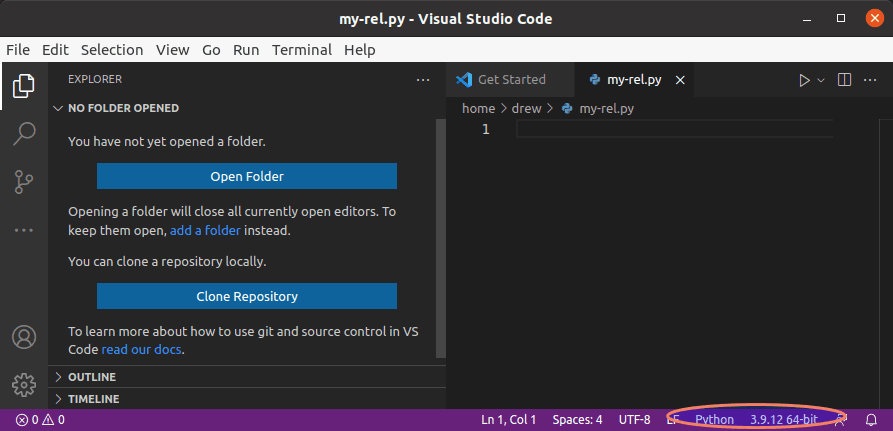
First, make sure that the correct version of Python is selected in the Interpreter in the lower right-hand corner of VS Code:
Next, enter the following code into the Python file you created:
# this is a simple file
for i in range(3):
   print("Hello World")
Click the run triangle button in the top right-hand corner:
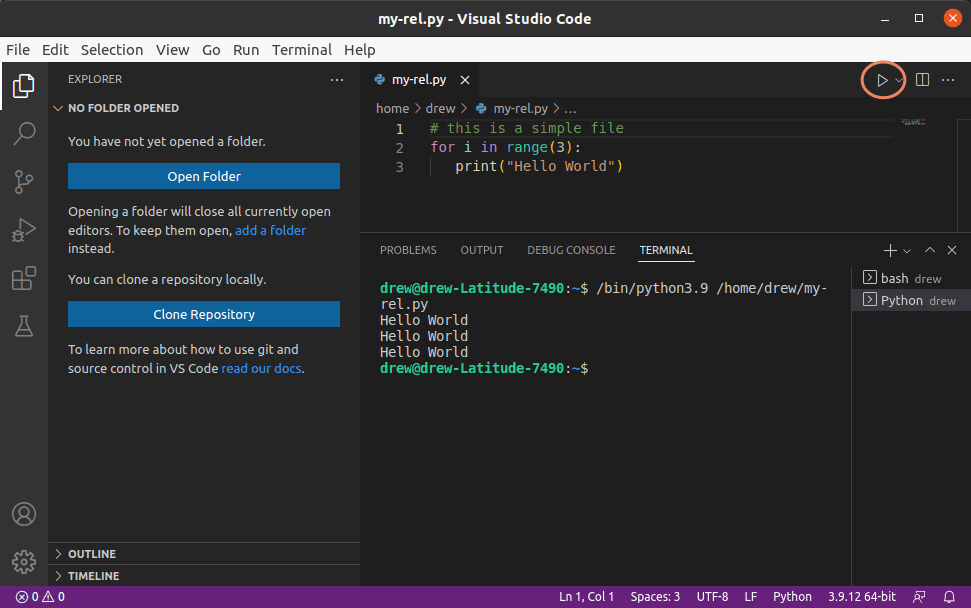
The following should return in the terminal in the bottom right of the VS Code editor:
Hello World
Hello World
Hello World
Creating a Simple Rel File
To create a Rel file, follow the steps below:
- Choose File > New File.
- Click Enter or Return to create a new file.
- In the file that opens, click Select a Language.
- Enter “Rel” in the Select Language Mode dialog box.
- Click Rel.
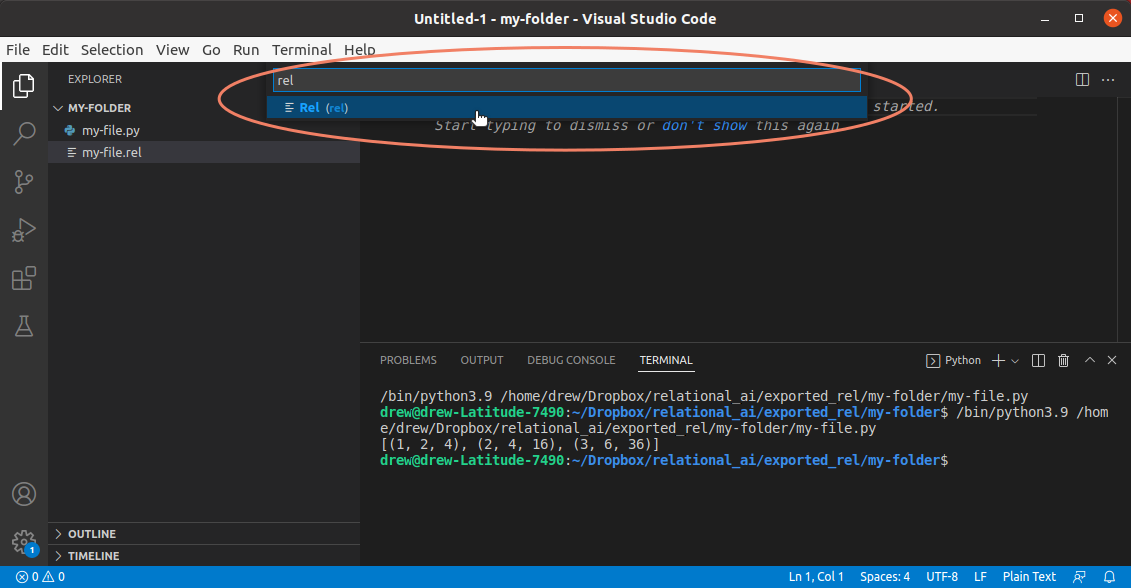
A new Rel file opens.
You can now add some simple Rel code to the file:
def output[x in {1;2;3}] = 2*xThe file appears with Rel syntax highlighting:
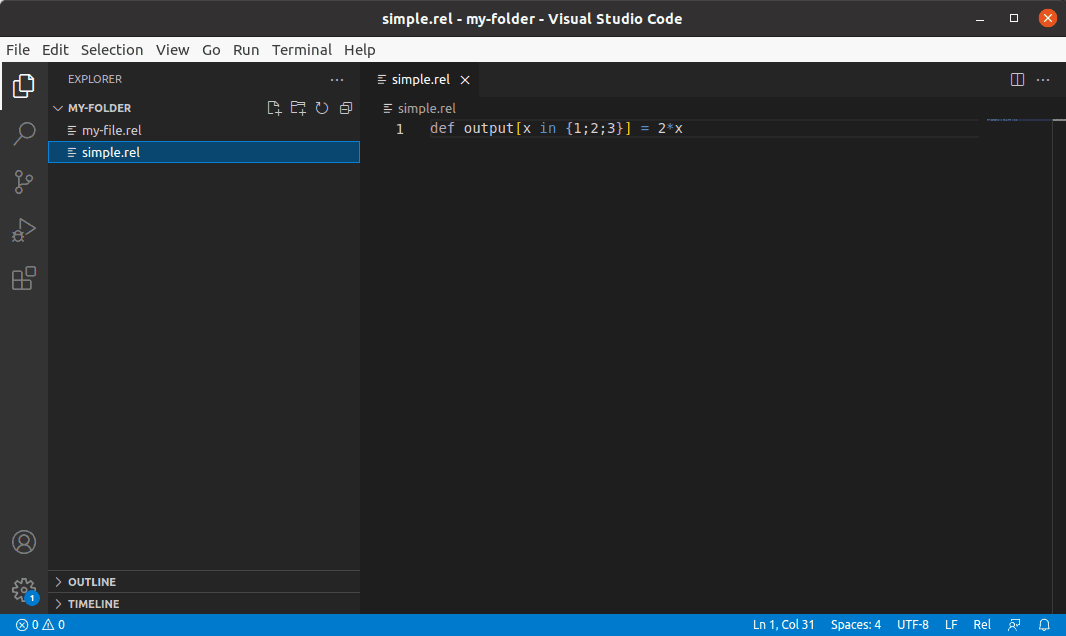
- Choose File > Save and save the file with a name such as
simple.rel.
You can now read in this file from Python and send it over to RelationalAI.
Connecting to a Database in RelationalAI
You can now write code that connects to a database and engine in RelationalAI and issues a simple query. Both the database and engine need to have been added to RelationalAI. For more information, see Managing Engines and Managing Databases.
The code below uses python-sdk-engine as the engine name and my-database for the database name.
To create the Python file:
- Choose File > New File.
- In the dialog box that opens, enter “Python” and select Python from the list.
- Save the file in the same directory as the Rel file created above.
- Enter the following code into the file:
import json

from pathlib import Path
from railib import api, config, show
from urllib.request import HTTPError

# read configuration
# you can use cfg = config.read() if both the file and the profile
# have the default values of ~/.rai/config and profile [default]
cfg = config.read("~/.rai/config", profile = "default")

# create a context
ctx = api.Context(**cfg)

# set the engine to connect to (must exist)
engine = "python-sdk-engine"

# set the database to connect to (must exist)
database = "my-database"

# read the Rel program from the simple.rel file
# (you may need to set the correct path of the file)
# and then issue a Rel query and get the results back
try:
    rel_code = Path("simple.rel").read_text()
    # rsp is a dict
    rsp = api.exec(ctx, database, engine, rel_code)
    print(json.dumps(rsp, indent=2))
except HTTPError as e:
show.http_error(e)- Click the run triangle button in the top right-hand corner:

The following should return in the terminal in the bottom of the VS Code editor:
{
  "v1": [
    1,
    2,
    3
  ],
  "v2": [
    2,
    4,
    6
  ]
}
At this point, you are ready to begin using VS Code with the RelationalAI SDK for Python.