Using the RelationalAI View
After connecting to RelationalAI, you need to configure the project’s settings and see what information is available in your VS Code environment.
This section shows you how to use and navigate the RelationalAI View menu items: Admin, Databases, Engines, and Transactions.
Using the Admin Section
When you click Admin, a pull-down menu appears and displays the following submenu items: Profile, Configuration, and Commands.
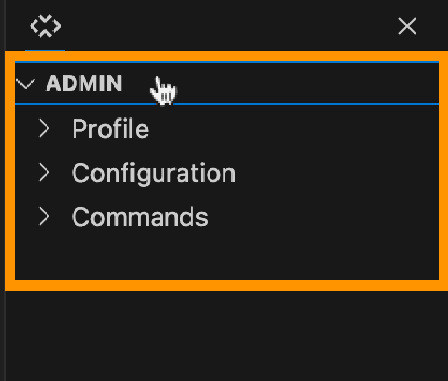
These items allow you to switch and edit profiles, set configuration options, and view a list of supported commands, respectively.
Switching and Editing Profiles
Say you have multiple profiles in ~/.rai/config.
To switch between them:
- Click Profile. This displays the user profiles.
- Select the profile you want by clicking it.
Selecting a profile highlights it in orange.
You can also edit your profiles or credentials:
- Under Profile, click Edit Profiles. This opens your
~/.rai/configfile.
- Edit your profile and credentials as needed.
- Press Control+S (PC) or Command+S to save.
Configuring Options
You can select, filter, and set default options when working on your project.
To do so:
- Click Configuration. A drop-down menu opens with a list of configuration options.
- Select the option you want to configure. This shows you a brief description of the option and a Configure this Option button.
- Click Configure this Option. This opens your
relationalai-vscode.tomlfile — creating it if necessary. It also automatically inserts the option and prompts you for values. - Insert the values as applicable.
- Press Control+S (PC) or Command+S (Mac) to save.
For example, when you set a default profile, database, and engine, the relationalai-vscode.toml file will look like this:
profile = "my_profile"
database = "my_database"
engine = "my_engine"The Extension will remember your selected profile, database, and engine for each project and use them when you reopen a project folder in VS Code.
Accessing Commands
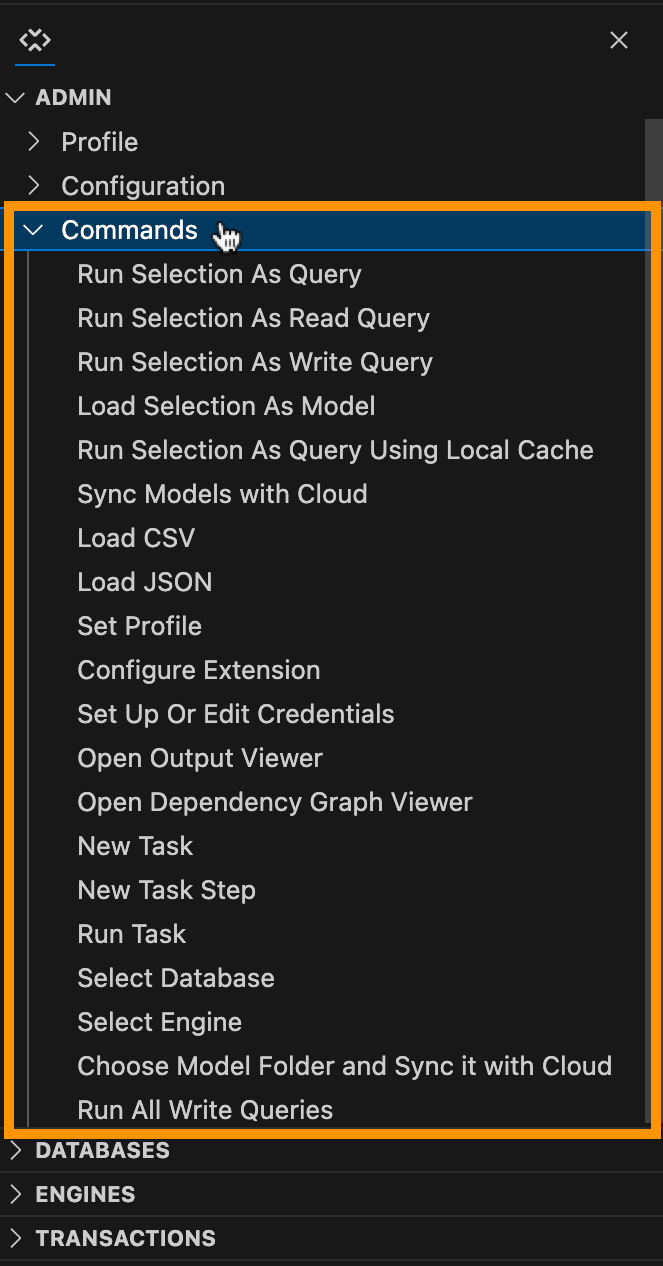
To view a list of all supported Commands, click Commands. You can click on any command to run it.
You can also view commands from the Command Palette by pressing Control+Shift+P (PC) or Command+Shift+P (Mac) and typing RelationalAI.
Using the Databases Section
To be able to work on your project and start querying in Rel, you need to either select an existing database or create a new one.
Selecting or Creating a Database
To use an existing database:
- Click the down arrow next to the Databases field. A list of databases associated with your account appears.
- Select a database from the list by clicking it.
To create a new database:
- Next to Databases, click +.
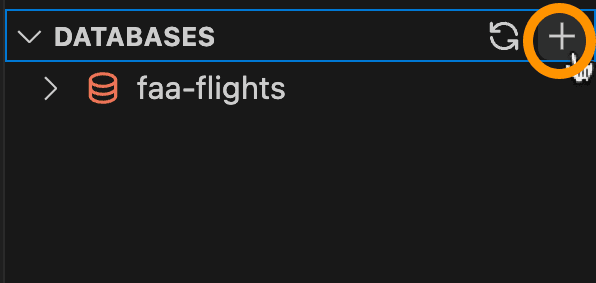
- Give your database a name and press Enter (PC) or Return (Mac).
Creating or selecting a database highlights the database’s name in orange.
Cloning a Database
To clone an existing database:
- Click the clone icon next to the database you want to clone.
- In the top bar, give the clone database a name.
- Click Enter (PC) or Return (Mac).
The name of your clone database then appears in the list, highlighted in orange. Once you clone a database, the new database functions separately from the original database: Any subsequent changes to either database will not affect the other.
Deleting a Database
To delete a database:
- Click the trash bin icon next to the database you want to delete.
- In the confirmation message that opens, click Yes, delete it.
The database will then disappear from the list.
You can also use the Databases section to manage relations and view relation dependencies. See the Managing Relations guide and Using the Relation Dependency Graph Viewer in Using the Viewers guide, respectively.
Using the Engines Section
All queries require an engine to run. To use a database, you must choose or create an engine.
Selecting or Creating an Engine
To select an engine:
- Click the down arrow next to Engines.
- Select an engine from the list by clicking it.
To create a new engine:
- Next to Engines, click the + icon.
- In the top bar, give the new engine a name and press Enter (PC) or Return (Mac). You need to enter a name that has not been previously used for an engine.
- Select a size for your engine and press Enter (PC) or Return (Mac). Available engine sizes are XS (extra small), S (small), M (medium), L (large), and XL (extra large). For now, start with S. You can increase the size at a later stage should you need to load more data or require more resources for concurrent workloads.
The new engine now appears in the list.
The engine may take a few minutes to be provisioned. You can use the engine once it is successfully provisioned.
Selecting or creating an engine highlights the engine’s name in orange.
Viewing the Engine Status
To view information about an engine, click > next to the desired engine. You get details on the following fields:
| Field | Explanation |
|---|---|
| name | The name of the engine. |
| size | The size of the engine. |
| state | The state of the engine. |
| account name | The RelationalAI account associated with the engine. |
| region | The region in which your engine was created. All RelationalAI engines are set to the us-east region by default. |
| created by | The ID of the client who created the engine. |
| created on | The date and time the engine was created. |
| requested on | The date and time the engine was requested. |
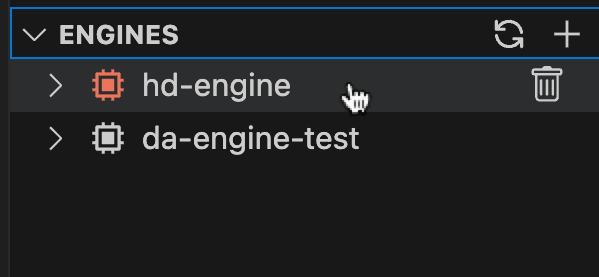
Deleting an Engine
To delete an engine:
- Move your pointer to the engine you want to delete and click the trash bin icon that appears.
- In the confirmation message that opens, click Yes, delete it.
The engine will then be deleted from the list.
Using the Transactions Section
The Transactions section lists the last 100 transactions associated with your RelationalAI account. You can view the details of each transaction and cancel a running transaction. Running transactions are highlighted in orange.
Viewing Transaction Details
To view transactions in your database, click Transactions.
To view a transaction’s details, click > next to the desired transaction. You get a list detailing the following:
| Field | Explanation |
|---|---|
| id | A unique identifier for the transaction. |
| state | The current state of the transaction. See Transaction States in the Console’s Managing Transactions guide for more details. |
| created on | The date and time the transaction was initiated. |
| finished on | The date and time the transaction finished running. |
| duration | The amount of time a transaction took to run. |
| read only | Whether or not the transaction was read-only. |
| database | The name of the database on which the transaction ran. |
| engine | The name of the engine on which the transaction ran. |
| account name | The RelationalAI account associated with the transaction. |
| query | The contents of the transaction. |
| language | The programming language used to write the query. |
| tags | The metadata attached to a transaction. This is set to ["vscode-user"] by default. |
| Open in Console | A link to open the transaction in the RelationalAI Console. Clicking it redirects you to the Console login page. |
| Find Transaction in Local Cache | A feature allowing you to open this query’s cached data in your Editor. To enable it, set the cache-output configuration option to true. |
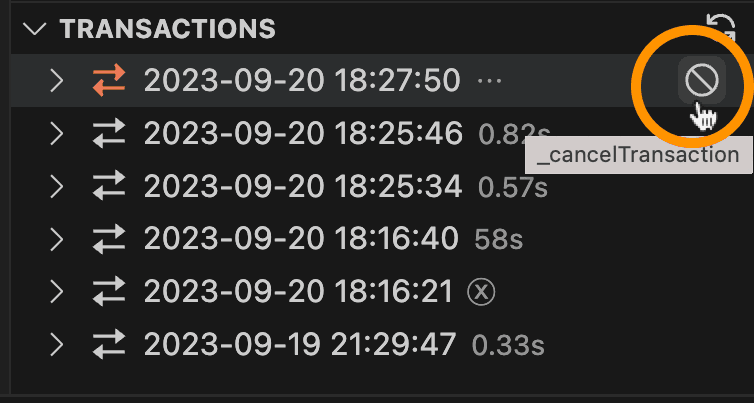
Canceling Running Transactions
Running transactions are indicated by an orange transaction icon. You can cancel a transaction while it’s running. To do so, either:
- In the RAI Output Viewer, click cancel (read) or cancel (write).
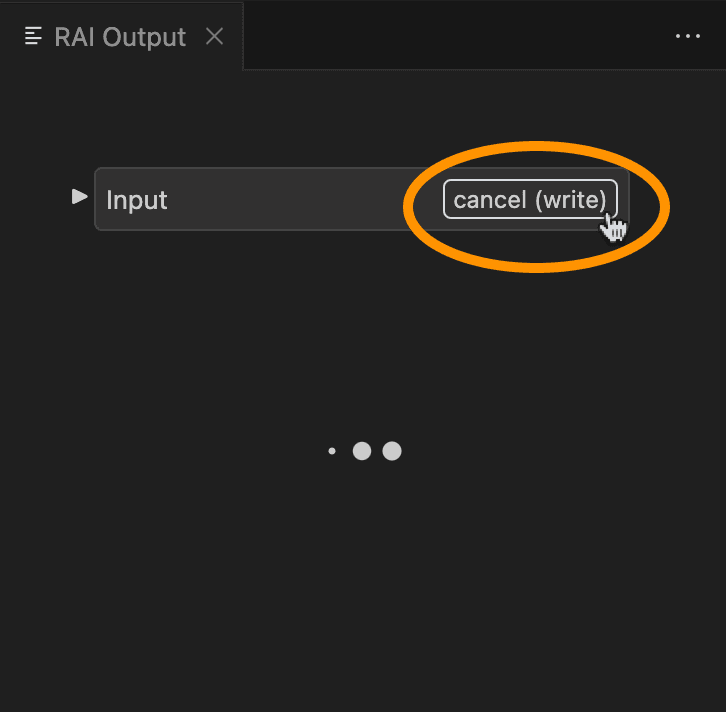
OR
- In the RelationalAI View, under the Transactions section, move your pointer to the running transaction you want to to cancel and click the stop icon that appears.
Filtering Engines, Databases, and Transactions
If you want to limit the results that display in the Databases, Engines, and Transactions sections in the RelationalAI View, you can do that with the database-filter, engine-filter, and transaction-filter settings in your relationalai-vscode.toml file:
database-filter = "^anon.*"
engine-filter = "^anon.*"
[transaction-filter]
    database_name = "^anon.*"
The settings above, for example, show only the databases and engines whose names start with anon, as well as the transactions whose associated database name starts with anon.
The values for filters are treated as regular expressions (opens in a new tab).
You can specify other fields in the transaction filter table (opens in a new tab), including engine_name, database_name, id, query, state, and tags.
By default, transaction-filter is set to tags = "vscode-user", meaning that you only see the transactions you issued from the RelationalAI VS Code extension.
To view other filters, use the RelationalAI: Configure command for a list of available options.