Working With Data in the RAI Console
You can use the RAI Console to import CSV or JSON data into base relations. Base relations are stored on disk, and generally contain data from external sources; they are the “raw data” as far as the database is concerned. By contrast, derived relations are generally derived from logic applied to base relations.
For more details, see Working With Base Relations.
Note that it is also possible to manage data through the RelationalAI SDKs.
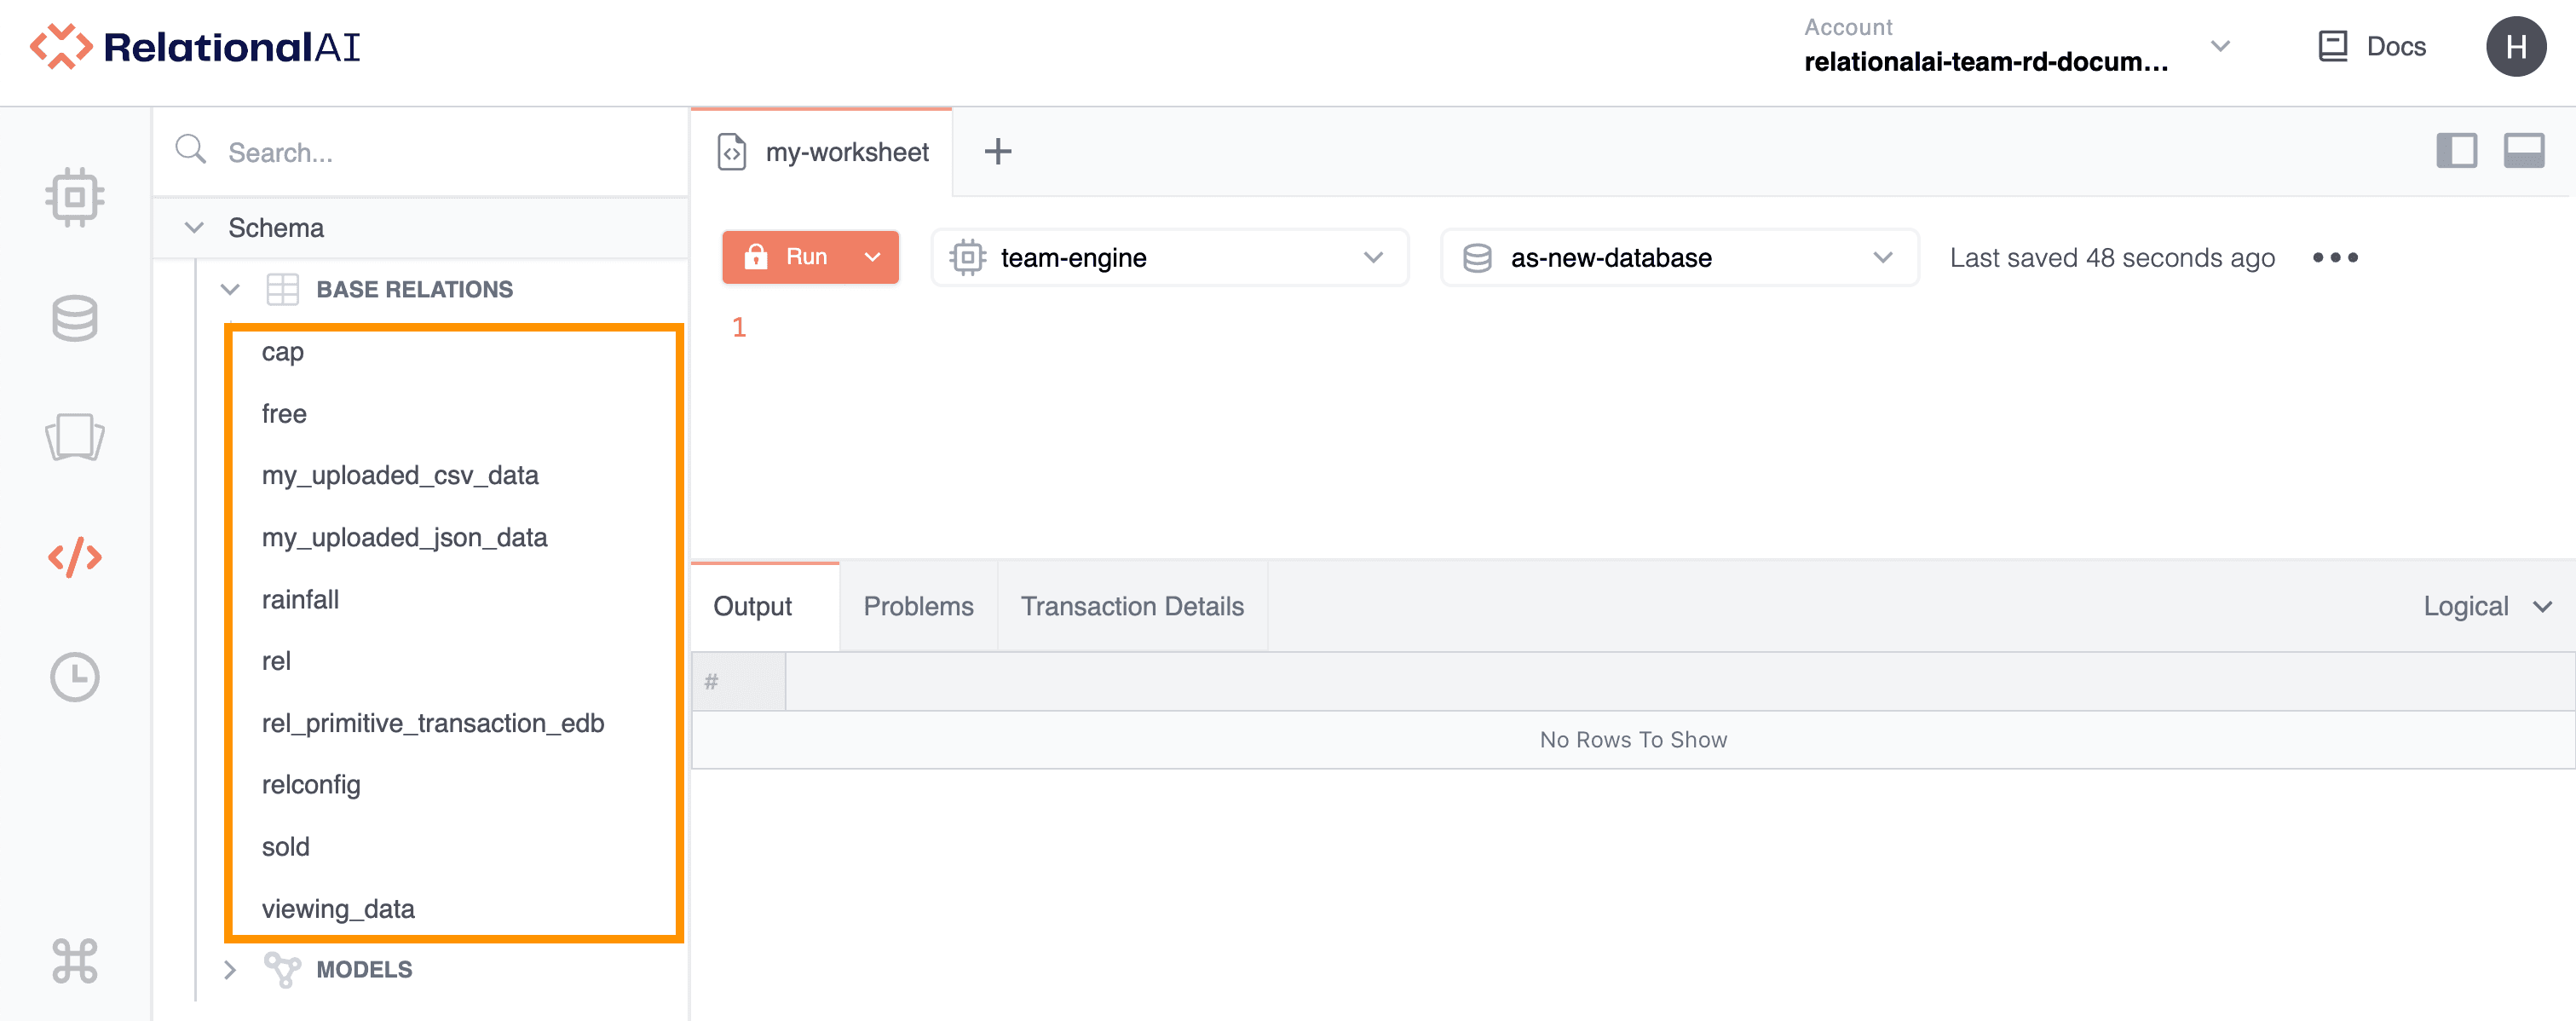
Base relations are accessible when you expand Base Relations under Schema in the Object Tree.
Listed base relations include:
- Data that you or others have added to the database.
- Built-in data used by the system.
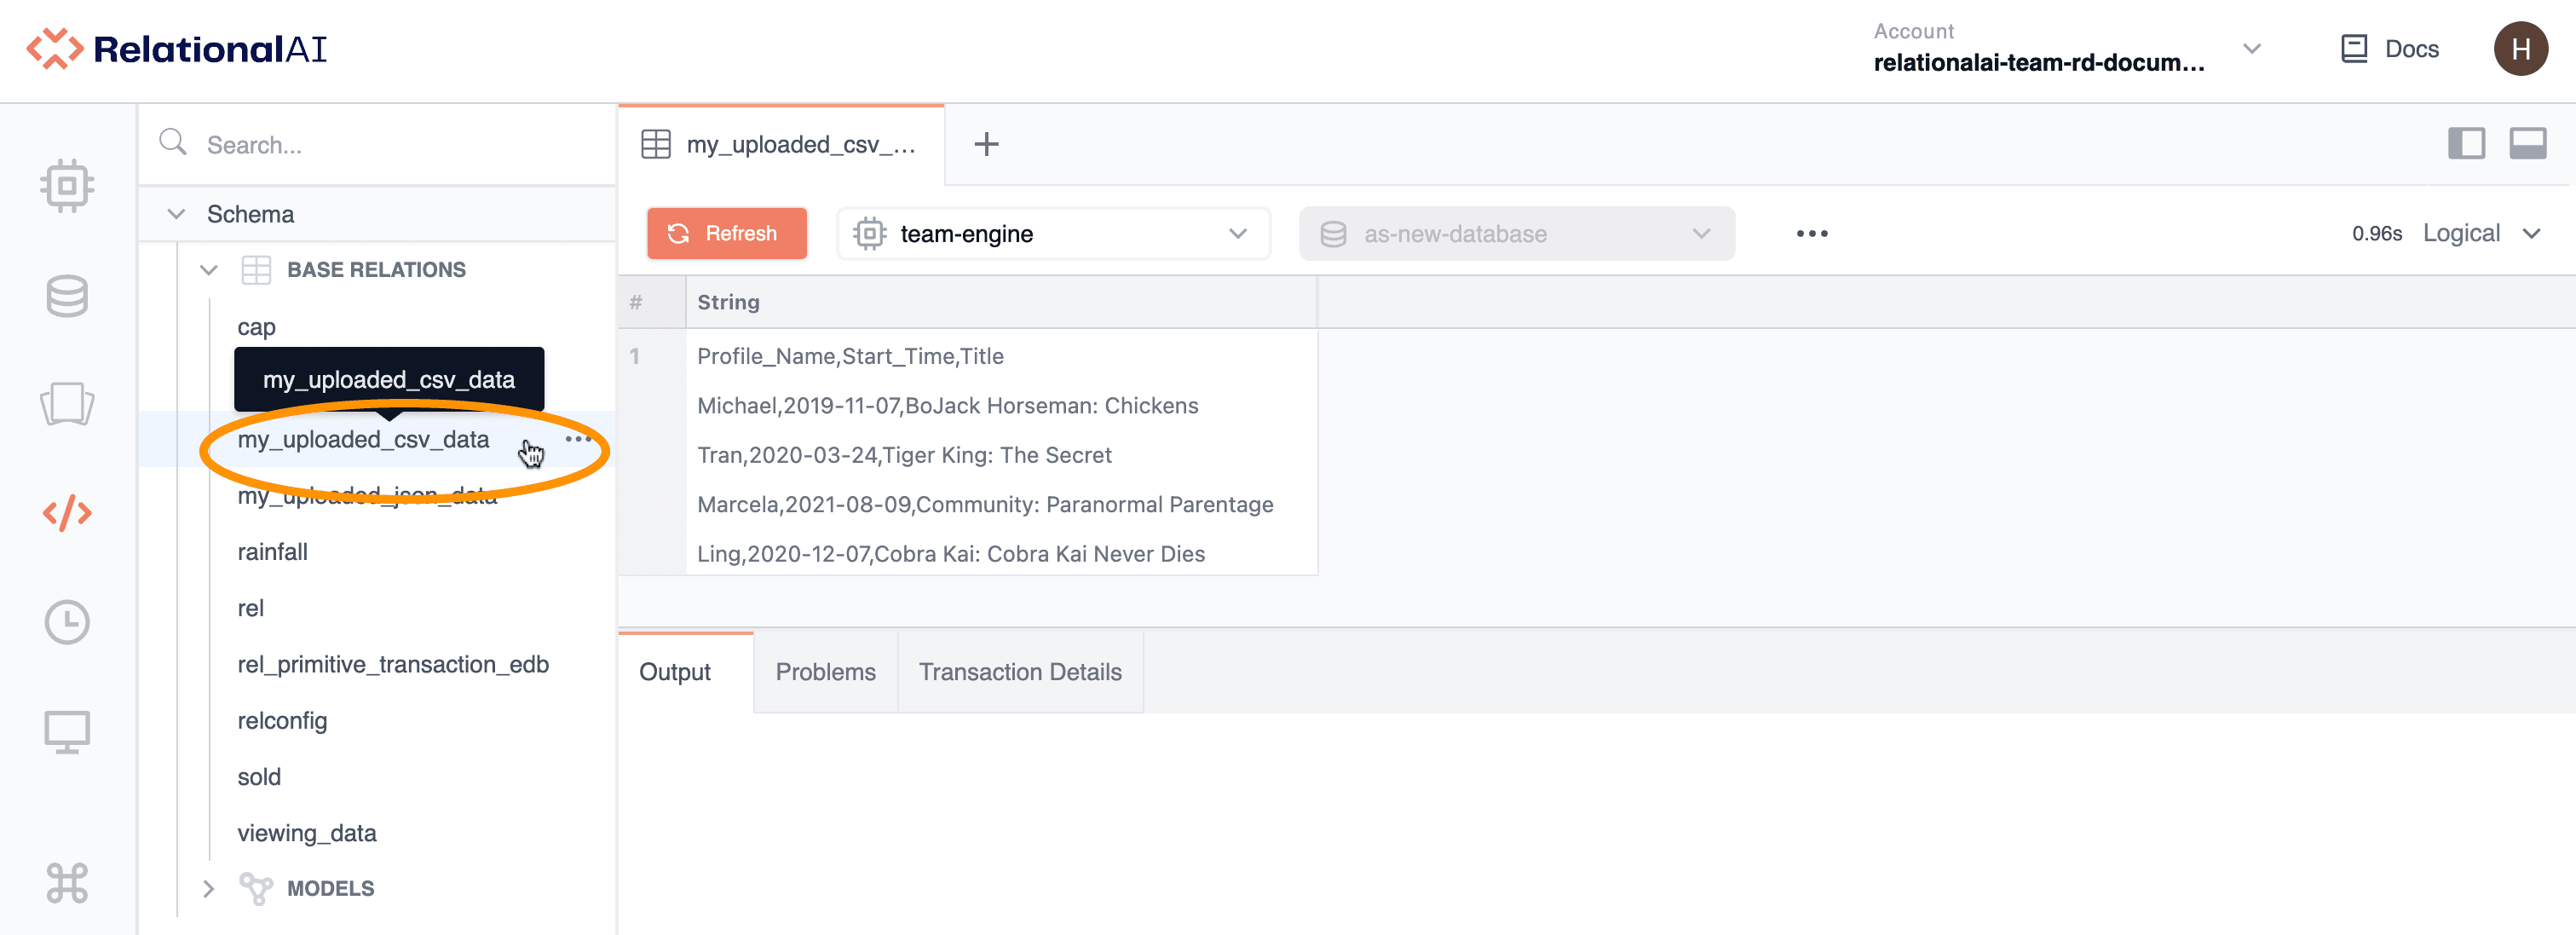
Using the Object Tree, you can view, upload, and delete base relations. Unlike with models, you cannot view substructures for base relations in the Object Tree.
Viewing Data
To view base relation data, click a base relation under Schema > Base Relations in the Object Tree. Data appear in the Viewer.
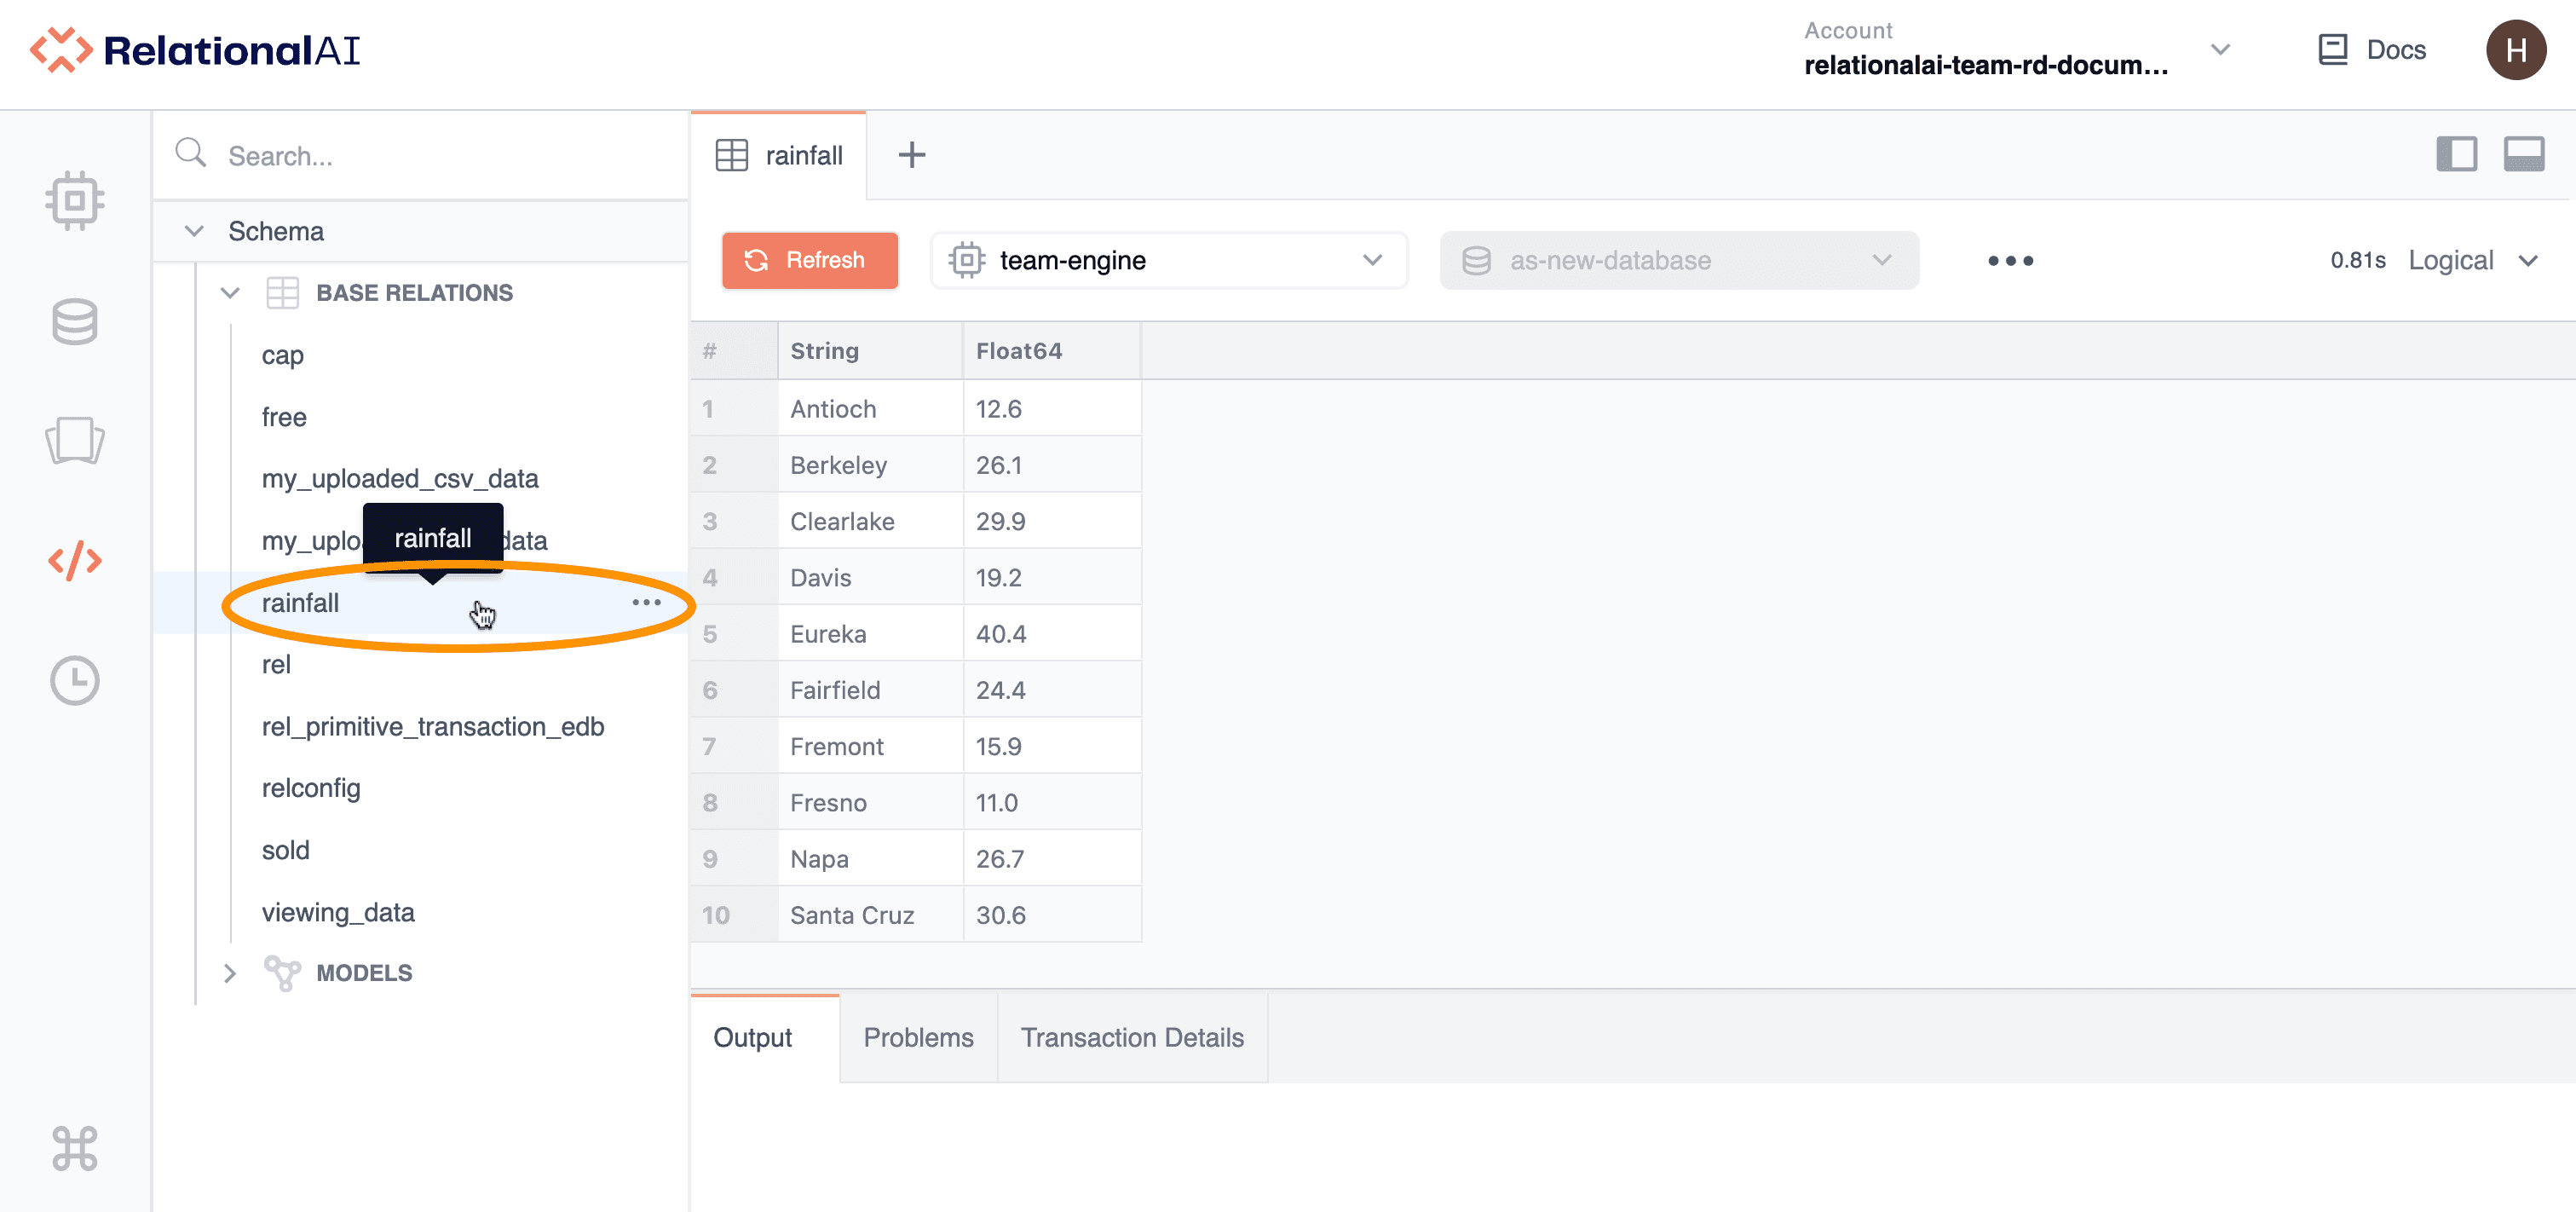
The Viewer can display multiple base relations at once. You can switch between Viewer tabs to see each base relation.
To distinguish between open worksheet, model, and Viewer tabs, check the icons displayed on the tabs as follows:
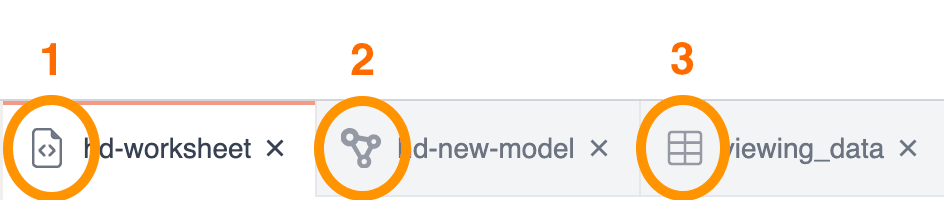
- Icon for worksheet tabs.
- Icon for model tabs.
- Icon for Viewer tabs.
To cycle through different open tabs, click the tab or press Alt+Shift+N (PC) or Option+Shift+N (Mac).
Note that you cannot make changes to code using the Viewer. Updates to base relations are made in a worksheet. To view updates made to a base relation since you opened it, click Refresh in the upper left corner of the Viewer.
You can use the Viewer to make changes to the display of the results similarly to how you use the Output tab. You can rearrage columns, rearrange elements in a column, resize columns, show/hide columns, export, and copy results.
However, unlike in the Output tab, you can only choose between Logical, Physical, and Raw modes in the Viewer. For more details, see Using the Output Tab in the Working With Worksheets guide.
To discard all changes made in the Viewer, click Refresh.
Sharing Data in the Viewer
Each base relation in the Viewer has a unique URL. To share a base relation in the Viewer, you can copy the URL and send it to another user.
The user will need to have access to the RAI Console in order to view the model.
The user will also need to select an engine from the Engines pop-up menu. The Databases pop-up menu will be grayed out but will display the name of your database.
Importing Data
In order to import data, you need to assign the data to a named relation. This is the name that appears in the Object Tree, and is also the name that you will use to reference the data when coding in Rel.
To upload data:
- Open the database into which you want to import data. This automatically takes you to the Editor page.
- In the Object Tree, go to Schema > Base Relations and either right-click Base Relations or hold the pointer over Base Relations then click the three dots that appear.
- Click Upload.
- In the Upload Files box that opens, provide a name for the relation that will be associated with the uploaded data, such as
my_uploaded_csv_data. You will use this name to work with the base relation later.
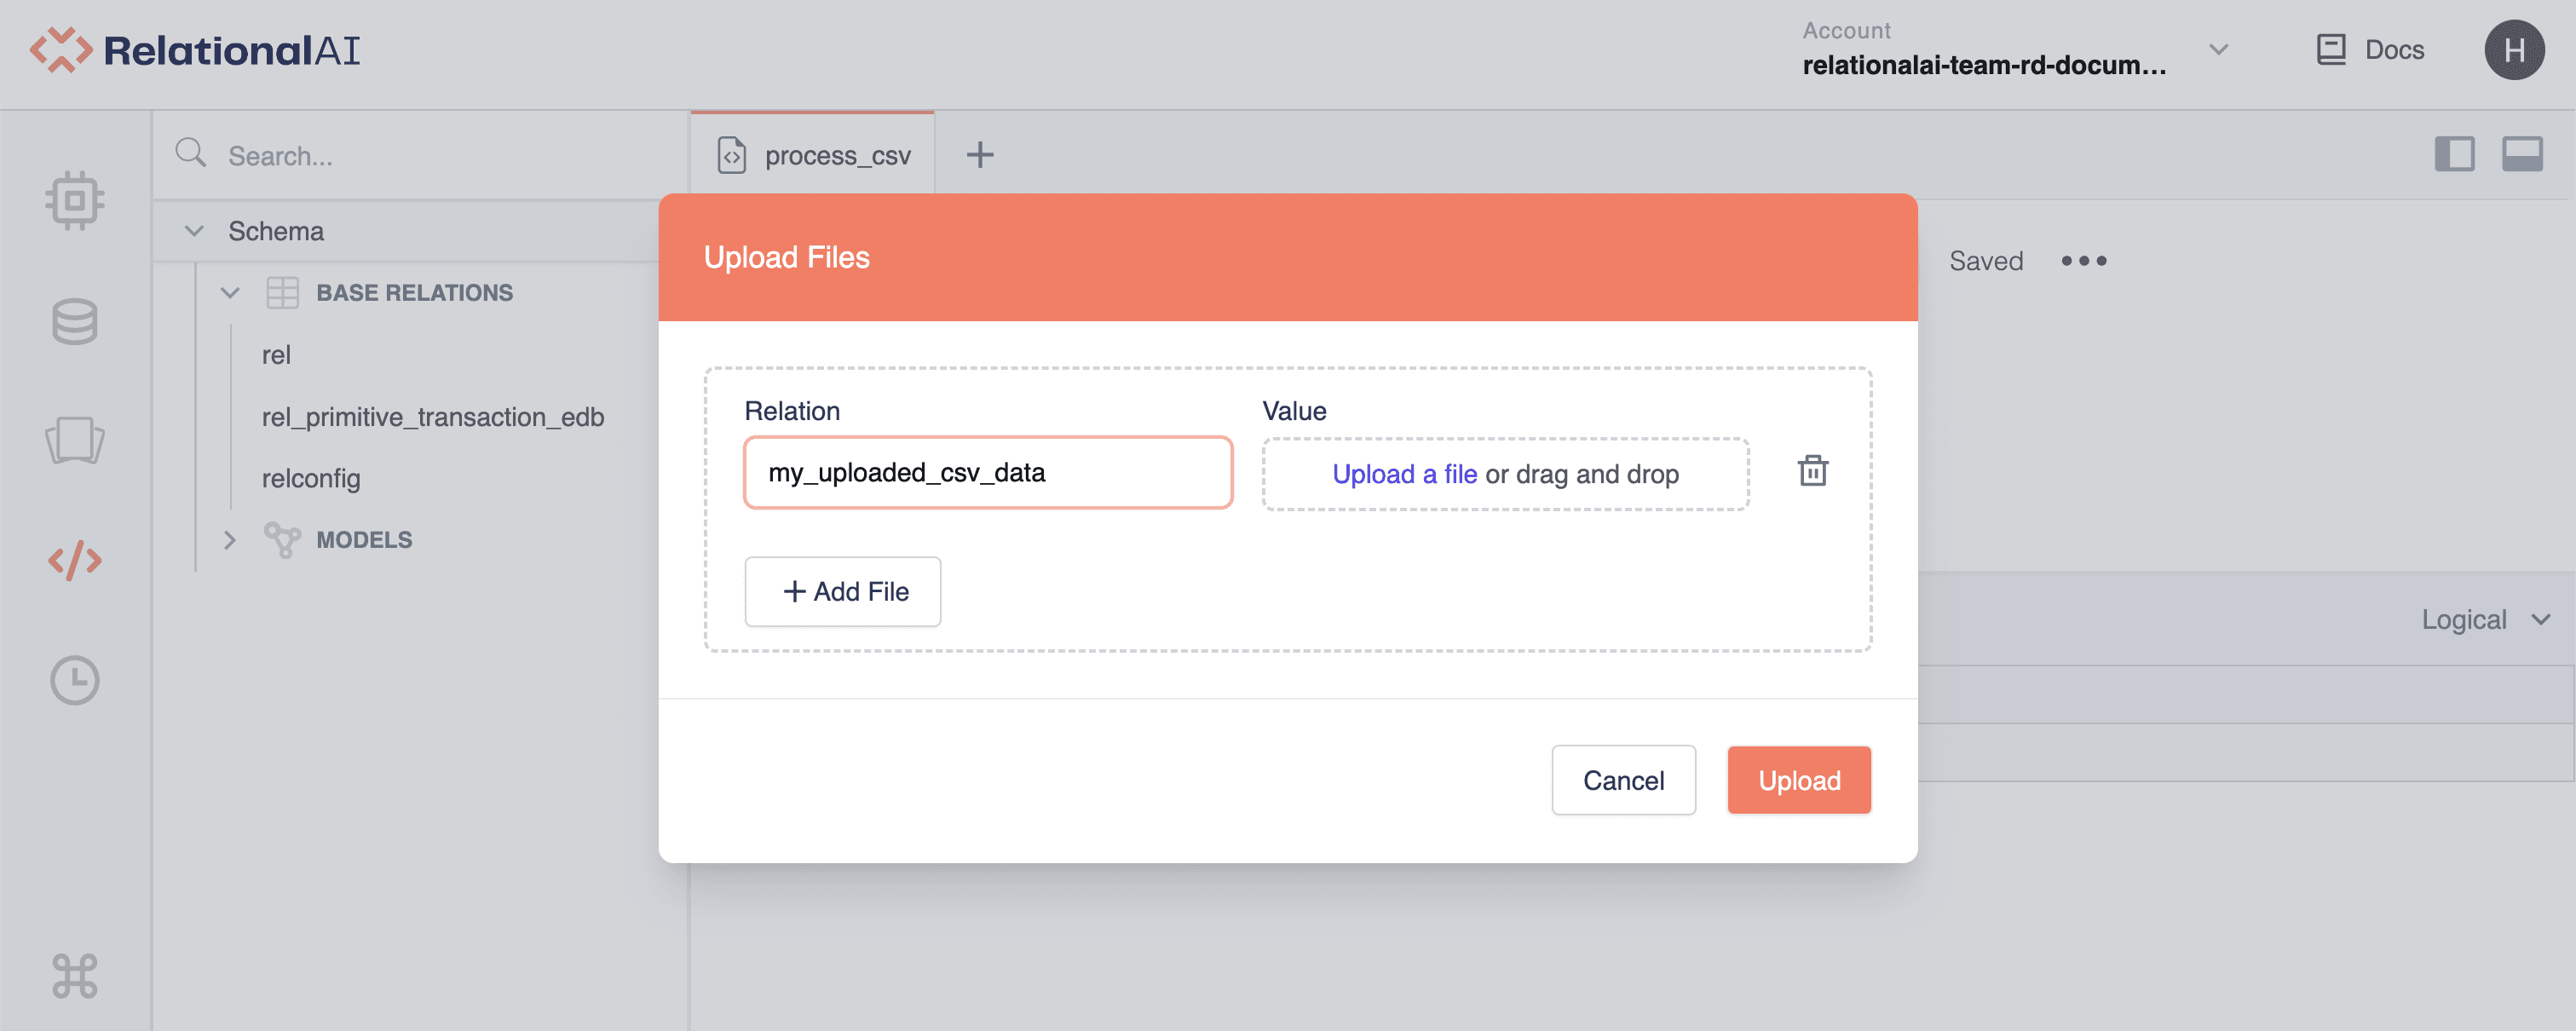
- Under Value, click Upload a file and browse to the location of the local file that you want to import. You can also upload multiple files at once into separate relations by clicking Add File.
- Click Upload. A message appears indicating whether the upload was successful.
- Click Cancel or click outside the Upload Files box to close it.
On Mac computers, right-click is equivalent to Control+Click.
The new base relation appears in the Object Tree.
Processing CSV Data
When you upload CSV data, they are initially loaded as a string.
To process CSV data into a form that can be queried, you need to run some Rel code using the relation load_csv.
To process CSV data:
- Follow the steps above to load data into the Console.
- In the Editor, add a new worksheet.
- Enter code along the following lines, where
my_uploaded_csv_datais the name of the relation into which you loaded data:
// write query

def config:data = my_uploaded_csv_data
def insert:my_data = load_csv[config]- Click the down arrow attached to the Run button, and choose Read/Write.
- Click Run.
To view the processed data:
- Enter code along the following lines in the worksheet:
// query

def output = ::std::display::table[my_data]- Click Run.
You can also specify a schema for the CSV data, as well as other import options. For details on specifying import options, see Defining Import Options in the CSV Import guide.
For example, say you upload the following CSV data, which contain information on television shows watched through a streaming service:
Profile_Name,Start_Time,Title
Michael,2019-11-07,BoJack Horseman: Chickens
Tran,2020-03-24,Tiger King: The Secret
Marcela,2021-08-09,Community: Paranormal Parentage
Ling,2020-12-07,Cobra Kai: Cobra Kai Never Dies
After processing, queried data will appear as follows:
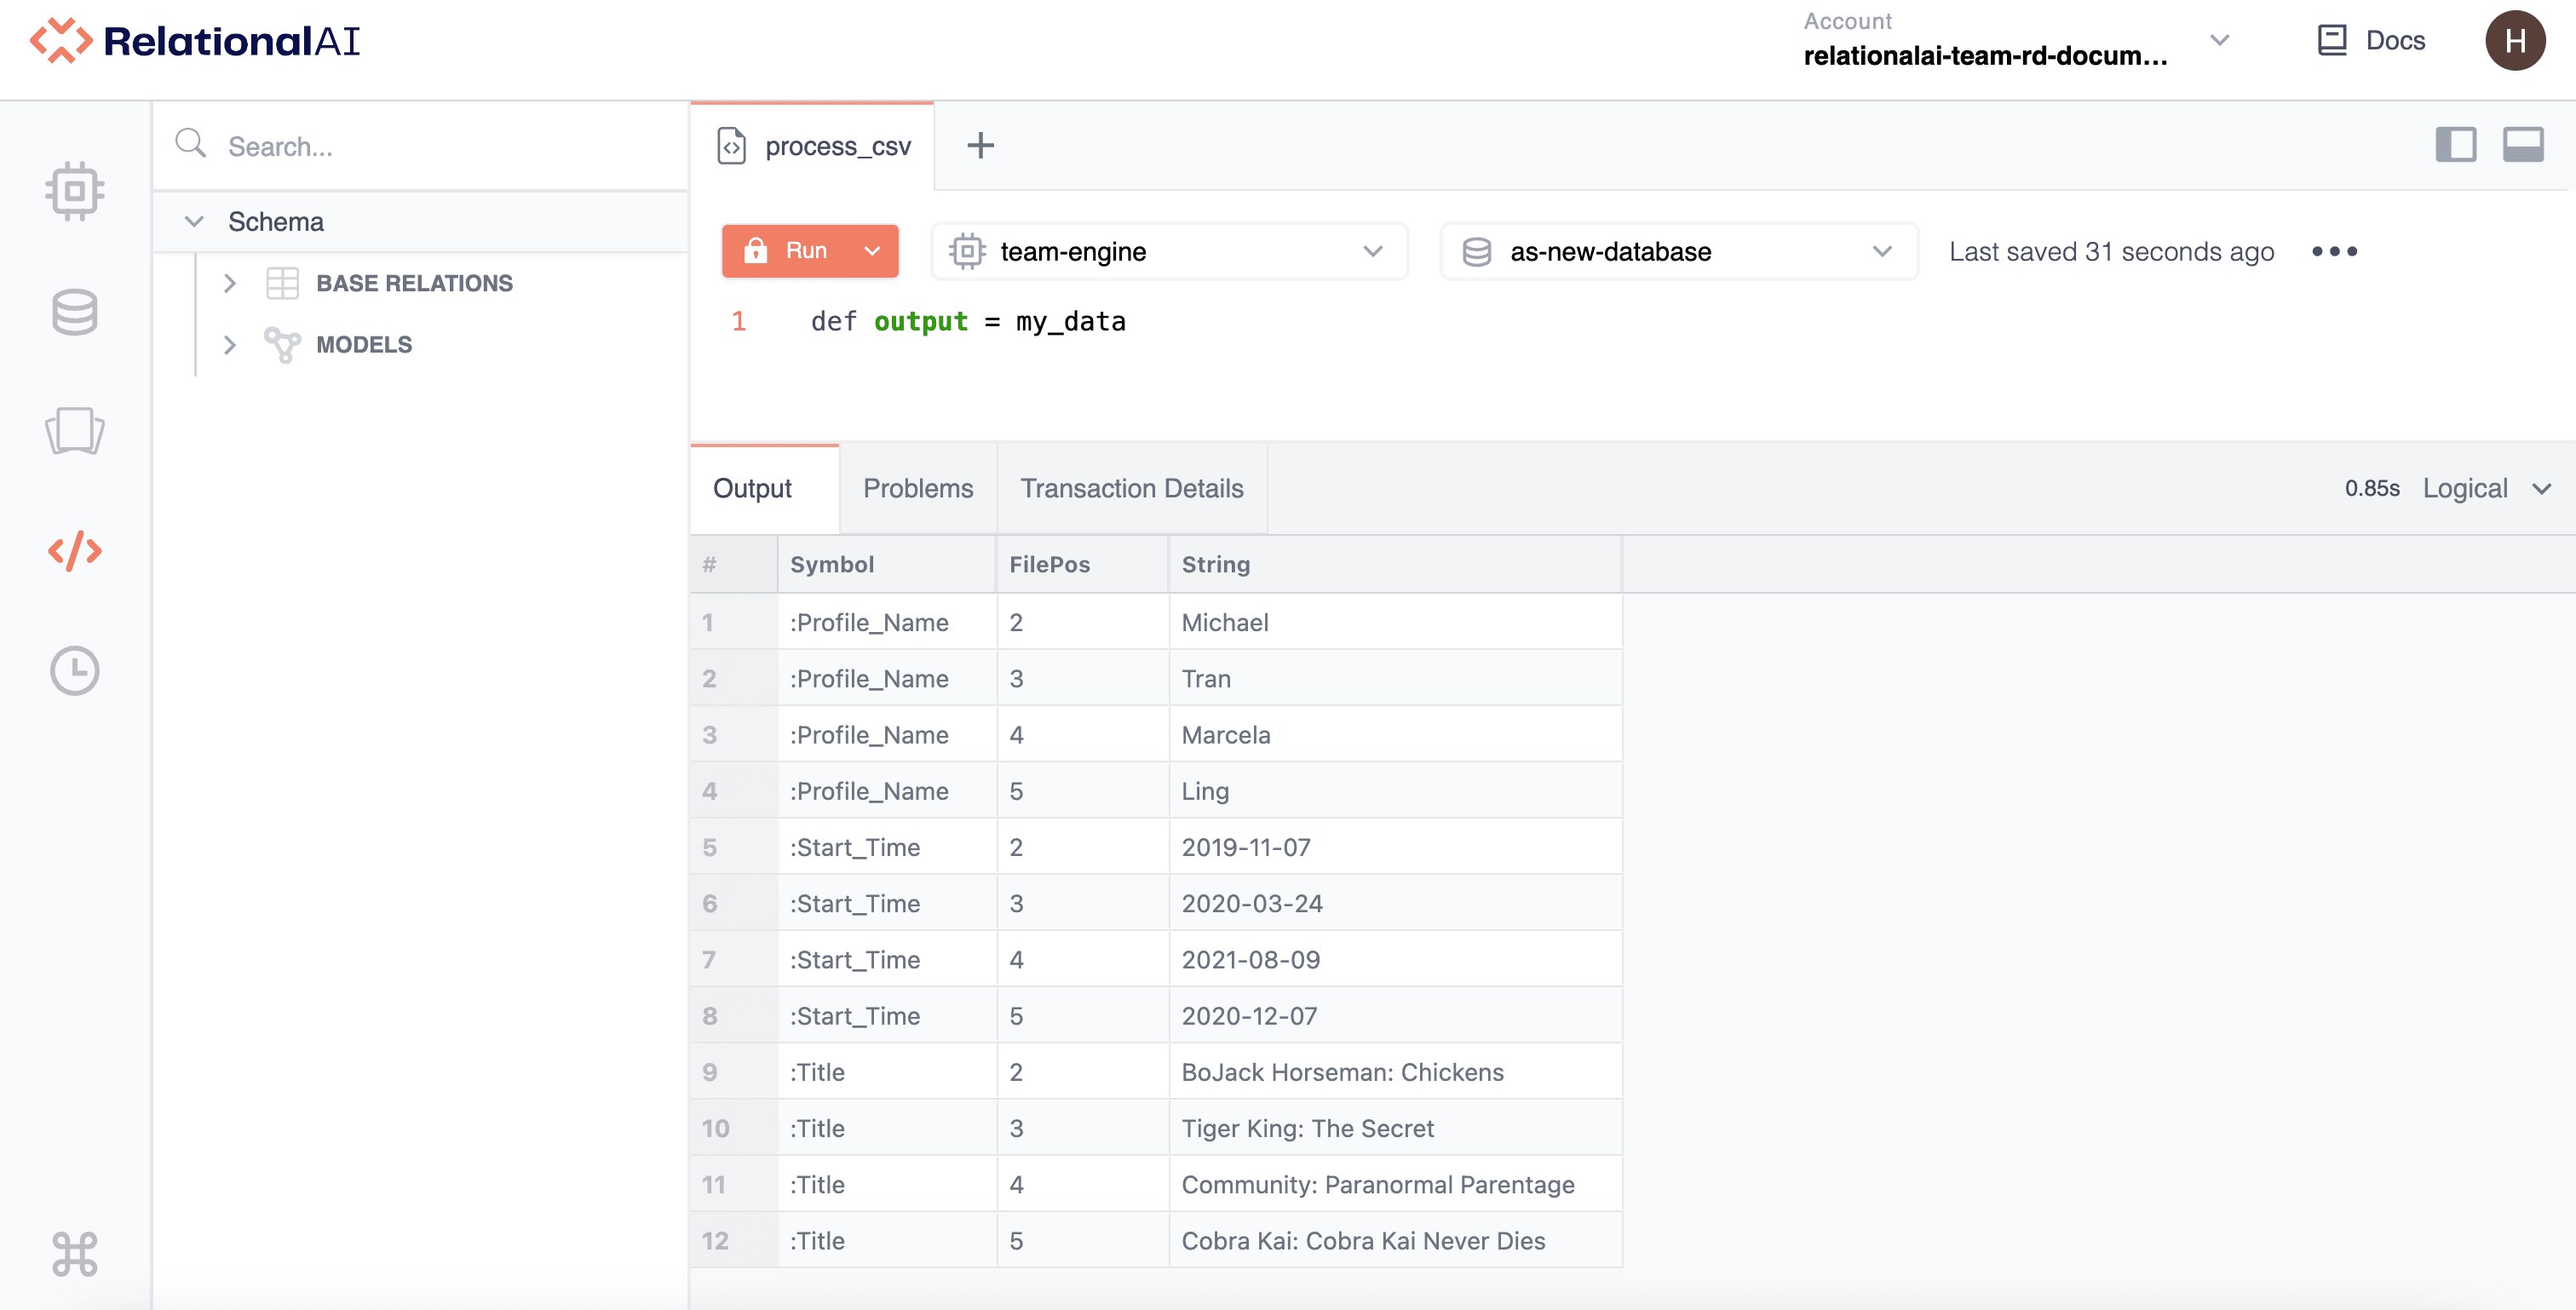
Each relation is a separate “table” with the same data in the first column. Note that the RKGS uses a file position for each row.
To query just one field from the processed CSV data, you could use code along the following lines:
// read query

def output = my_data:Title
This code instructs the RKGS to show the output of all the fields called Title.
For details on querying imported data, see Querying CSV Data in the CSV Import guide.
Loading JSON Data
When you upload JSON data directly via the Console, the Console automatically converts JSON data to a form that is usable in queries.
After processing, JSON keys turn into Symbols.
JSON arrays turn into relations that use :[] as the relation name.
For example, imagine that you uploaded the following JSON data into a relation called my_uploaded_json_data.
The JSON data contain the same information on streaming television shows from the CSV example above:
[
 {
   "Profile_Name": "Michael",
   "Start_Time": "2019-11-07",
   "Title": "BoJack Horseman: Chickens"
 },
 {
   "Profile_Name": "Marcela",
   "Start_Time": "2021-08-09",
   "Title": "Community: Paranormal Parentage"
 },
 {
    "Profile_Name": "Ling",
    "Start_Time": "2020-12-07",
    "Title": "Cobra Kai: Cobra Kai Never Dies"
  },
  {
  "Profile_Name": "Tran",
  "Start_Time": "2020-03-24",
  "Title": "Tiger King: The Secret"
  }
]
When you query the relation, the imported data appear in the fully normalized Graph Normal Form:
// query

def output = my_uploaded_json_data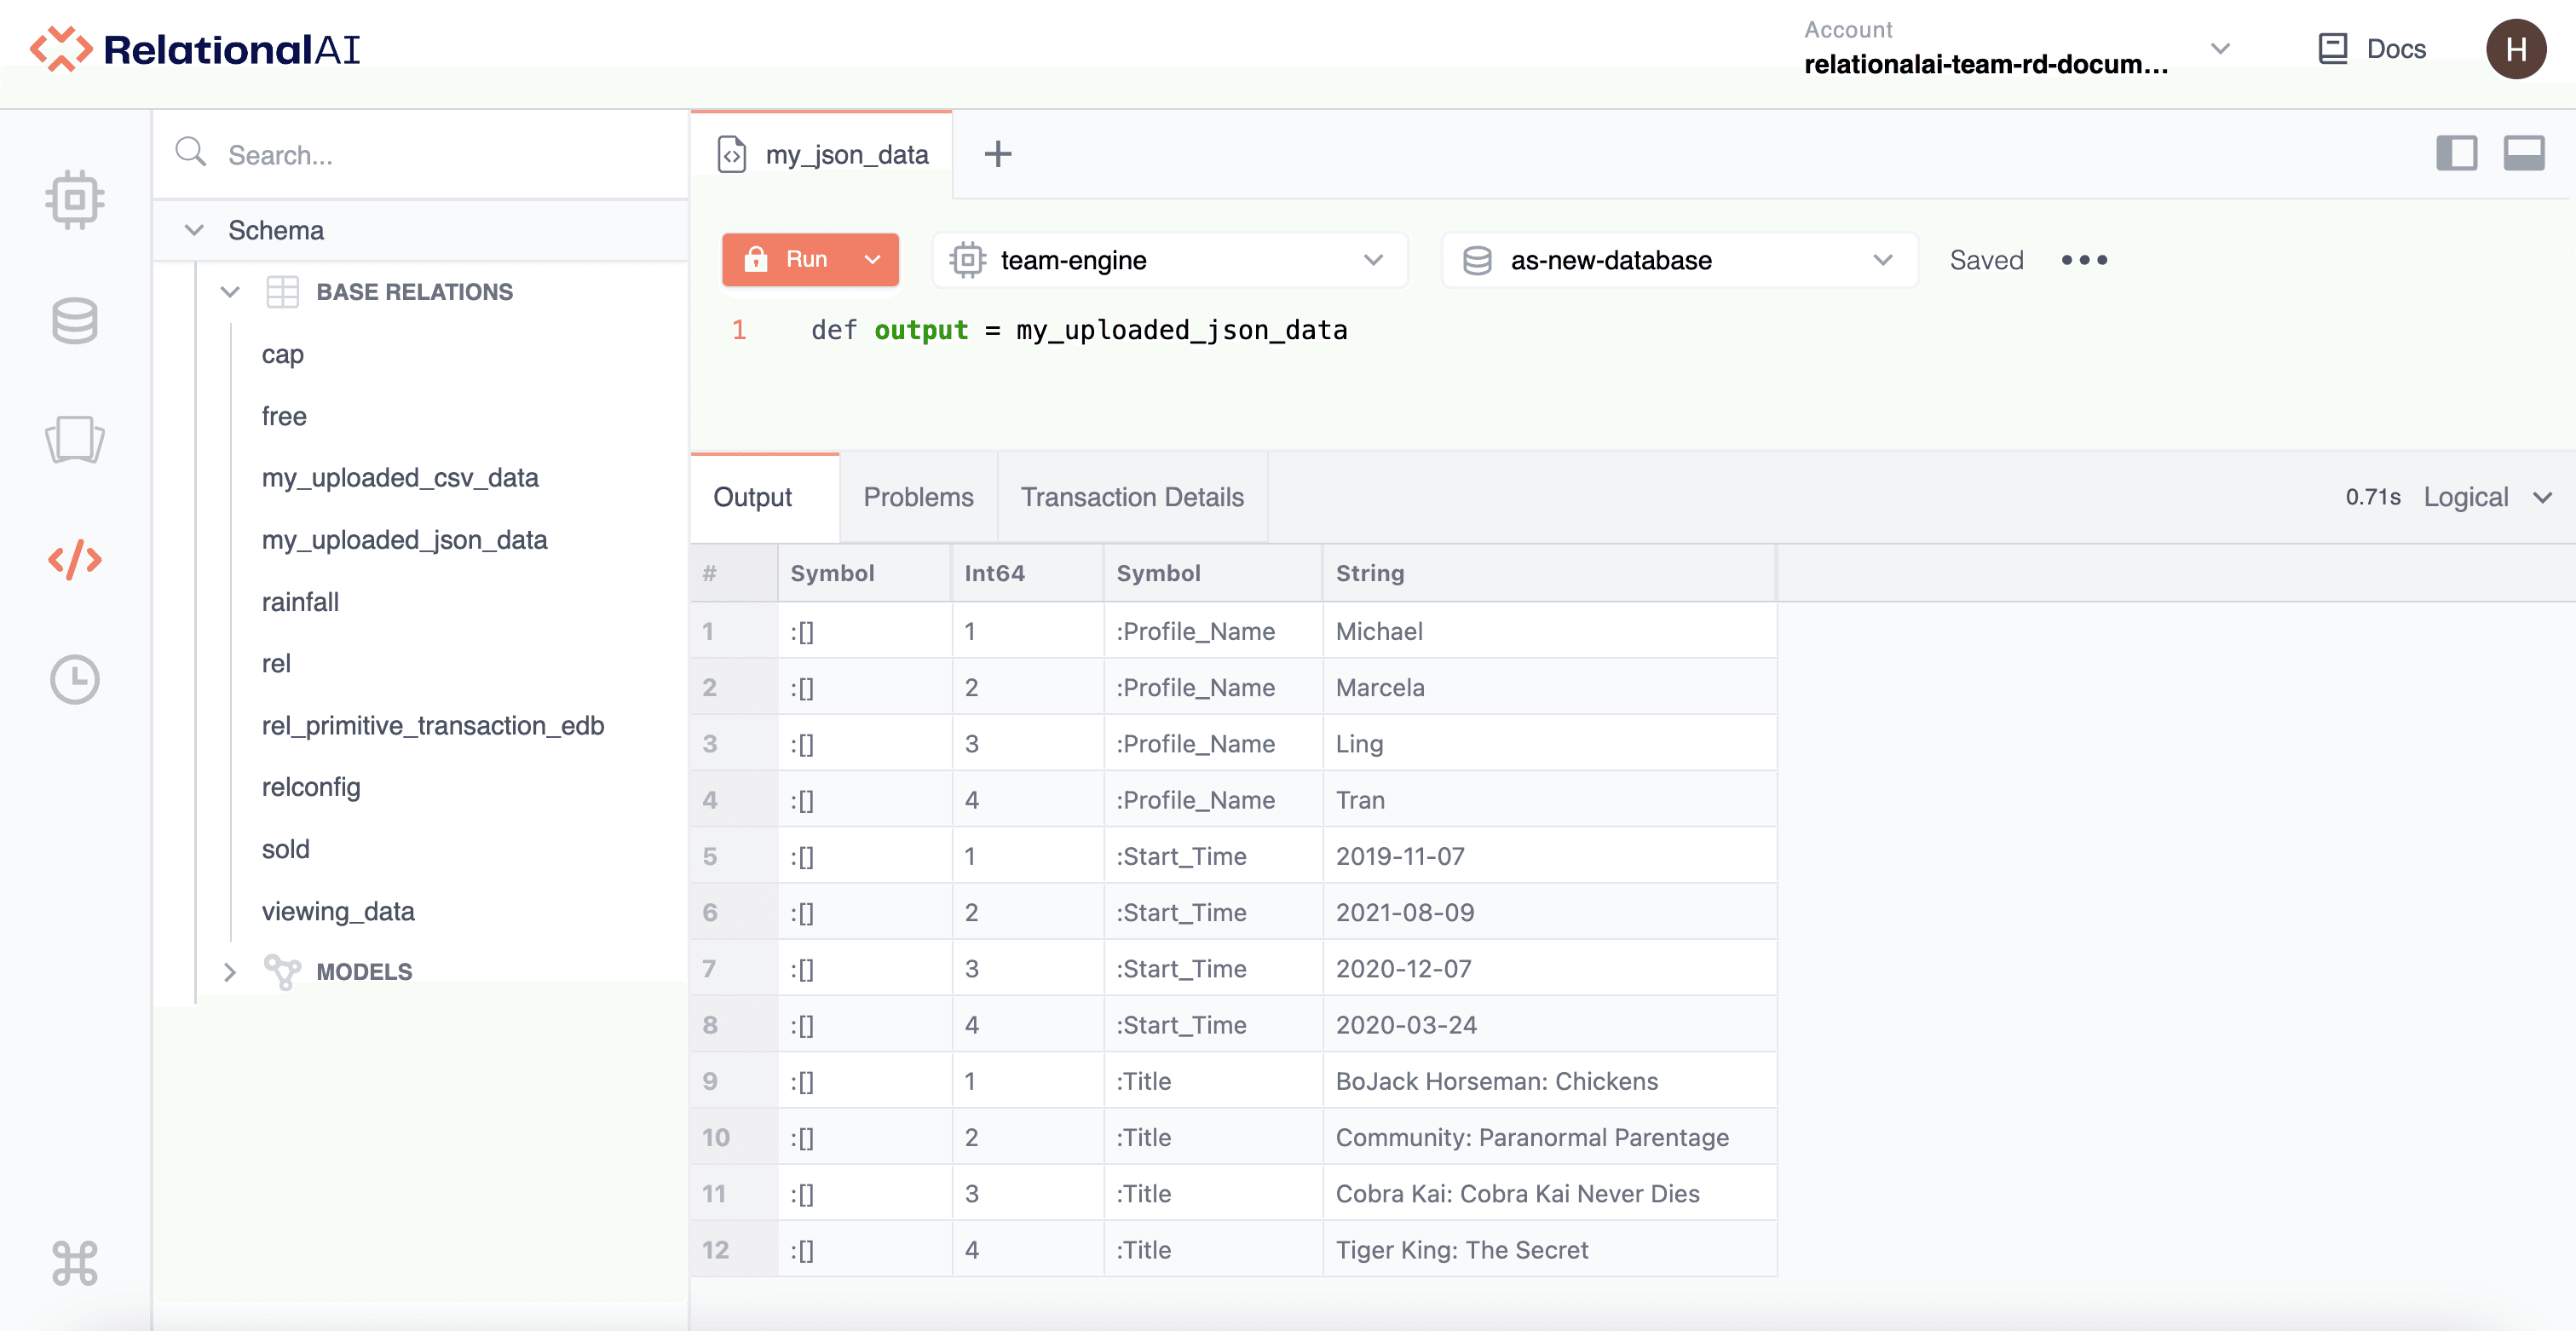
You can query just one of the fields by using code similar to the example below.
Because the data above derive from a JSON array, you need to use the :[] symbol:
// read query

def title = i : my_uploaded_json_data[:[], i, :Title]
def output = title
The code above displays all of the values of the Title field, indexed by their position in the JSON array.
For more information on working with JSON data, see the Working With JSON Data guides.
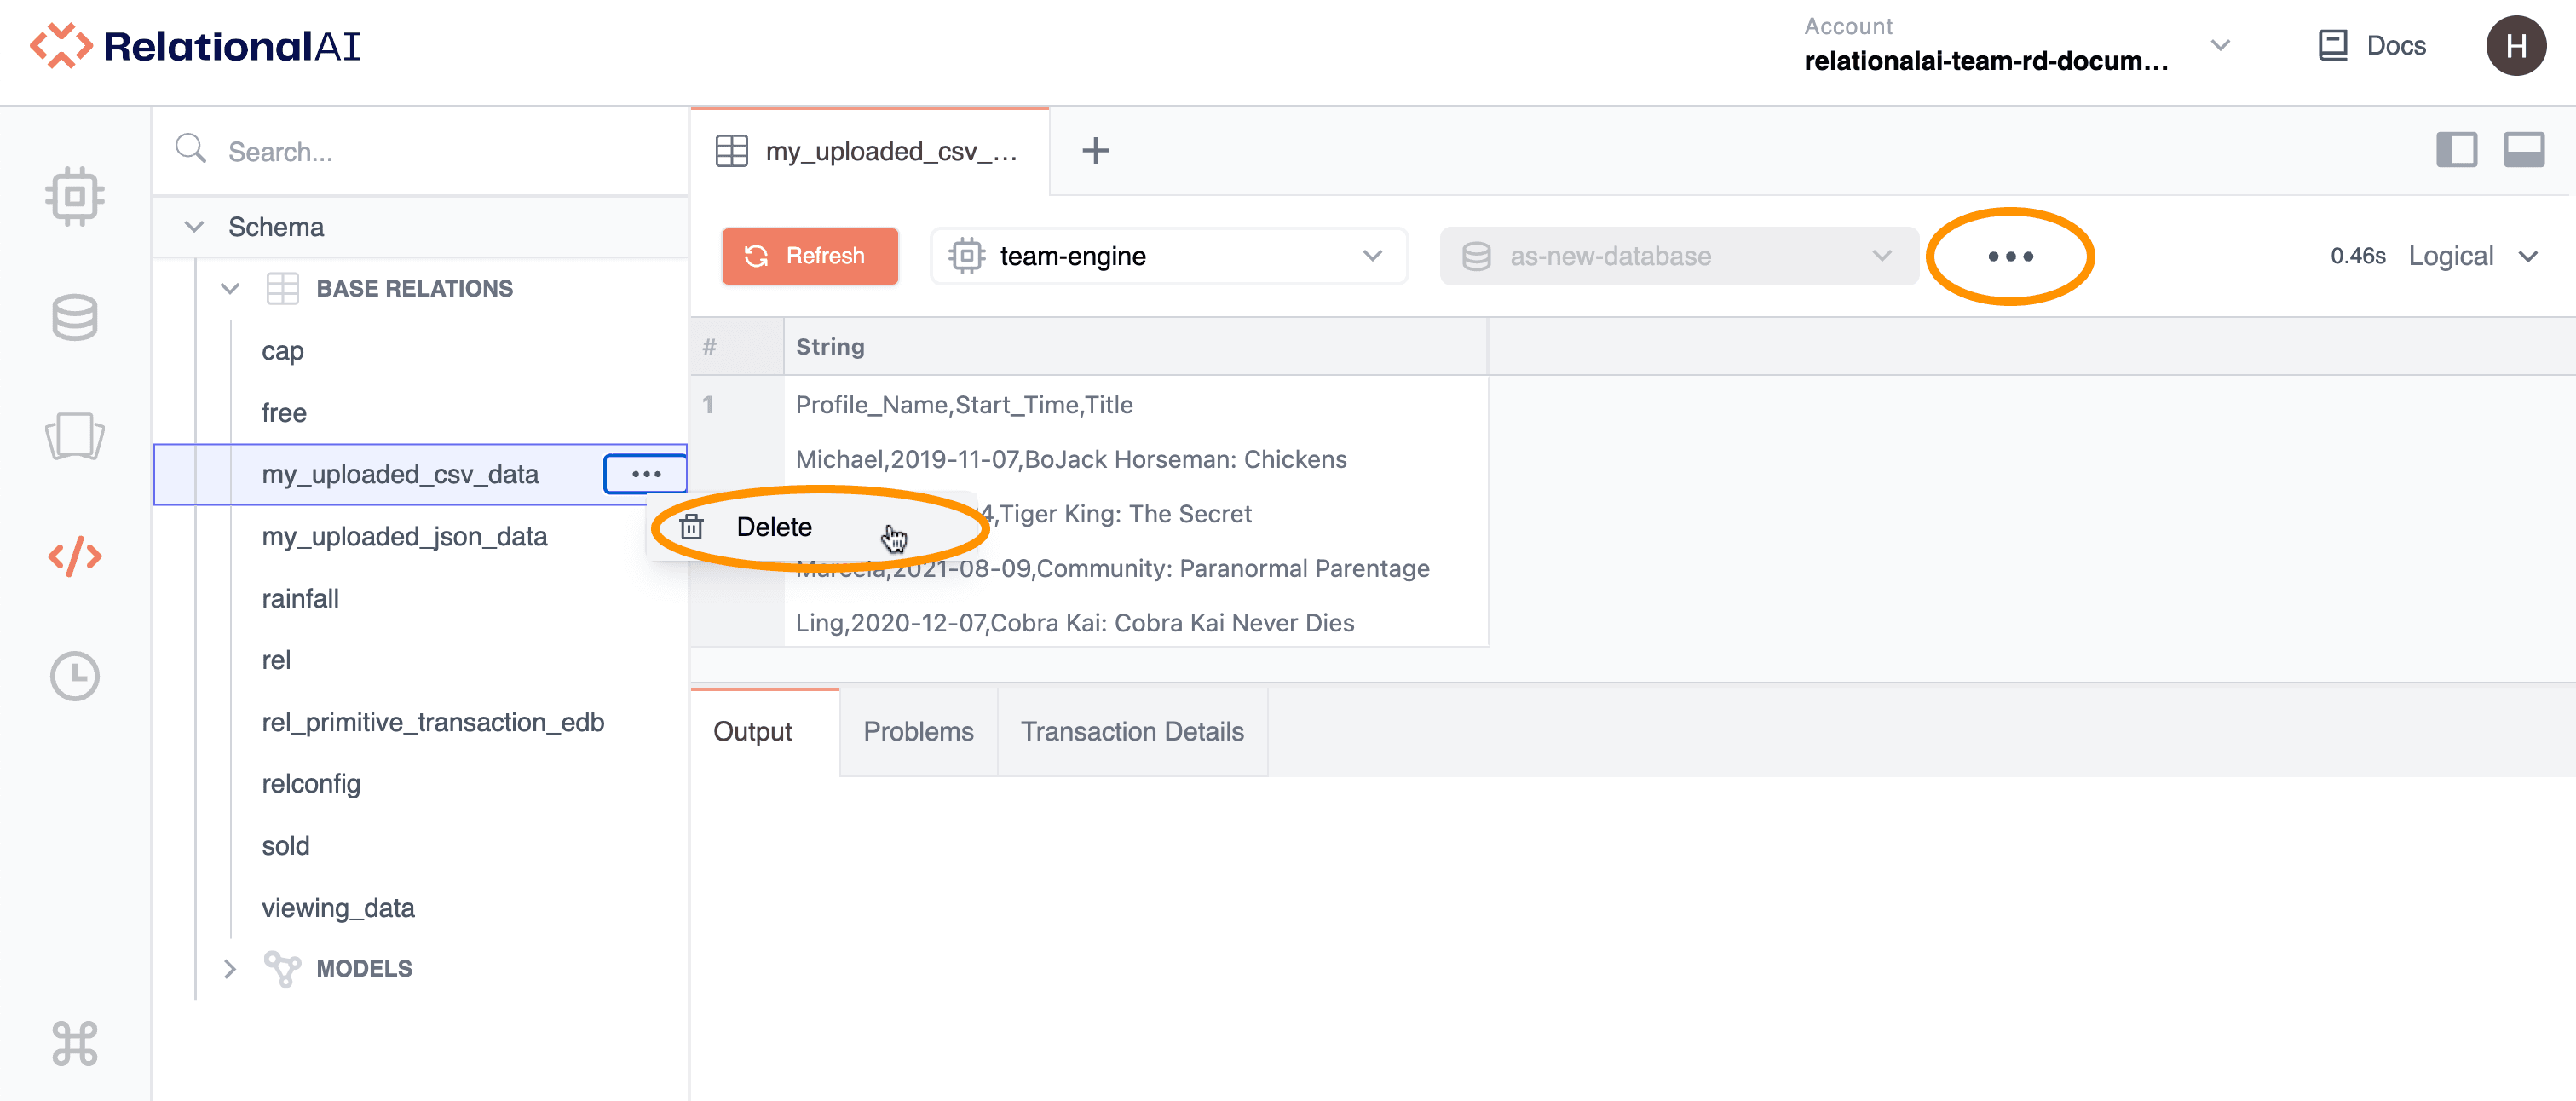
Deleting Base Relations
You can delete base relations from the Object Tree and the Viewer.
Before doing so, it’s best practice to:
- Export the data so that you can access them later if necessary.
- Check with other team members to make sure they are not using the data. The data will be unrecoverable once deleted.
To delete a base relation:
-
In the Object Tree, hold the pointer over the base relation you want to delete, then click the three dots that appear and choose Delete.
OR
In the Object Tree, right-click the base relation you want to delete.
OR
In the Viewer, click the three dots and choose Delete.
-
In the Confirmation message that appears, click Delete.
The base relation disappears from the Object Tree and is removed from the database.
A message box then appears in the upper right-hand corner of the page to indicate whether the deletion was successful.
When you delete a base relation, it disappears instantly from the Object Tree, sometimes before underlying transactions have completed. To ensure your results are accurate, it’s advisable to wait for the message box to confirm the deletion before proceeding with any subsequent transactions.