Using the RelationalAI CLI Through Visual Studio Code
This guide describes how to set up a Microsoft Visual Studio Code environment to work with the RelationalAI Command-Line Interface (CLI). For more information on the RAI CLI, see RelationalAI CLI.
Prerequisites
Setting up VS Code
Installing Visual Studio Code
You can install Visual Studio Code (opens in a new tab) by following the instructions here (opens in a new tab).
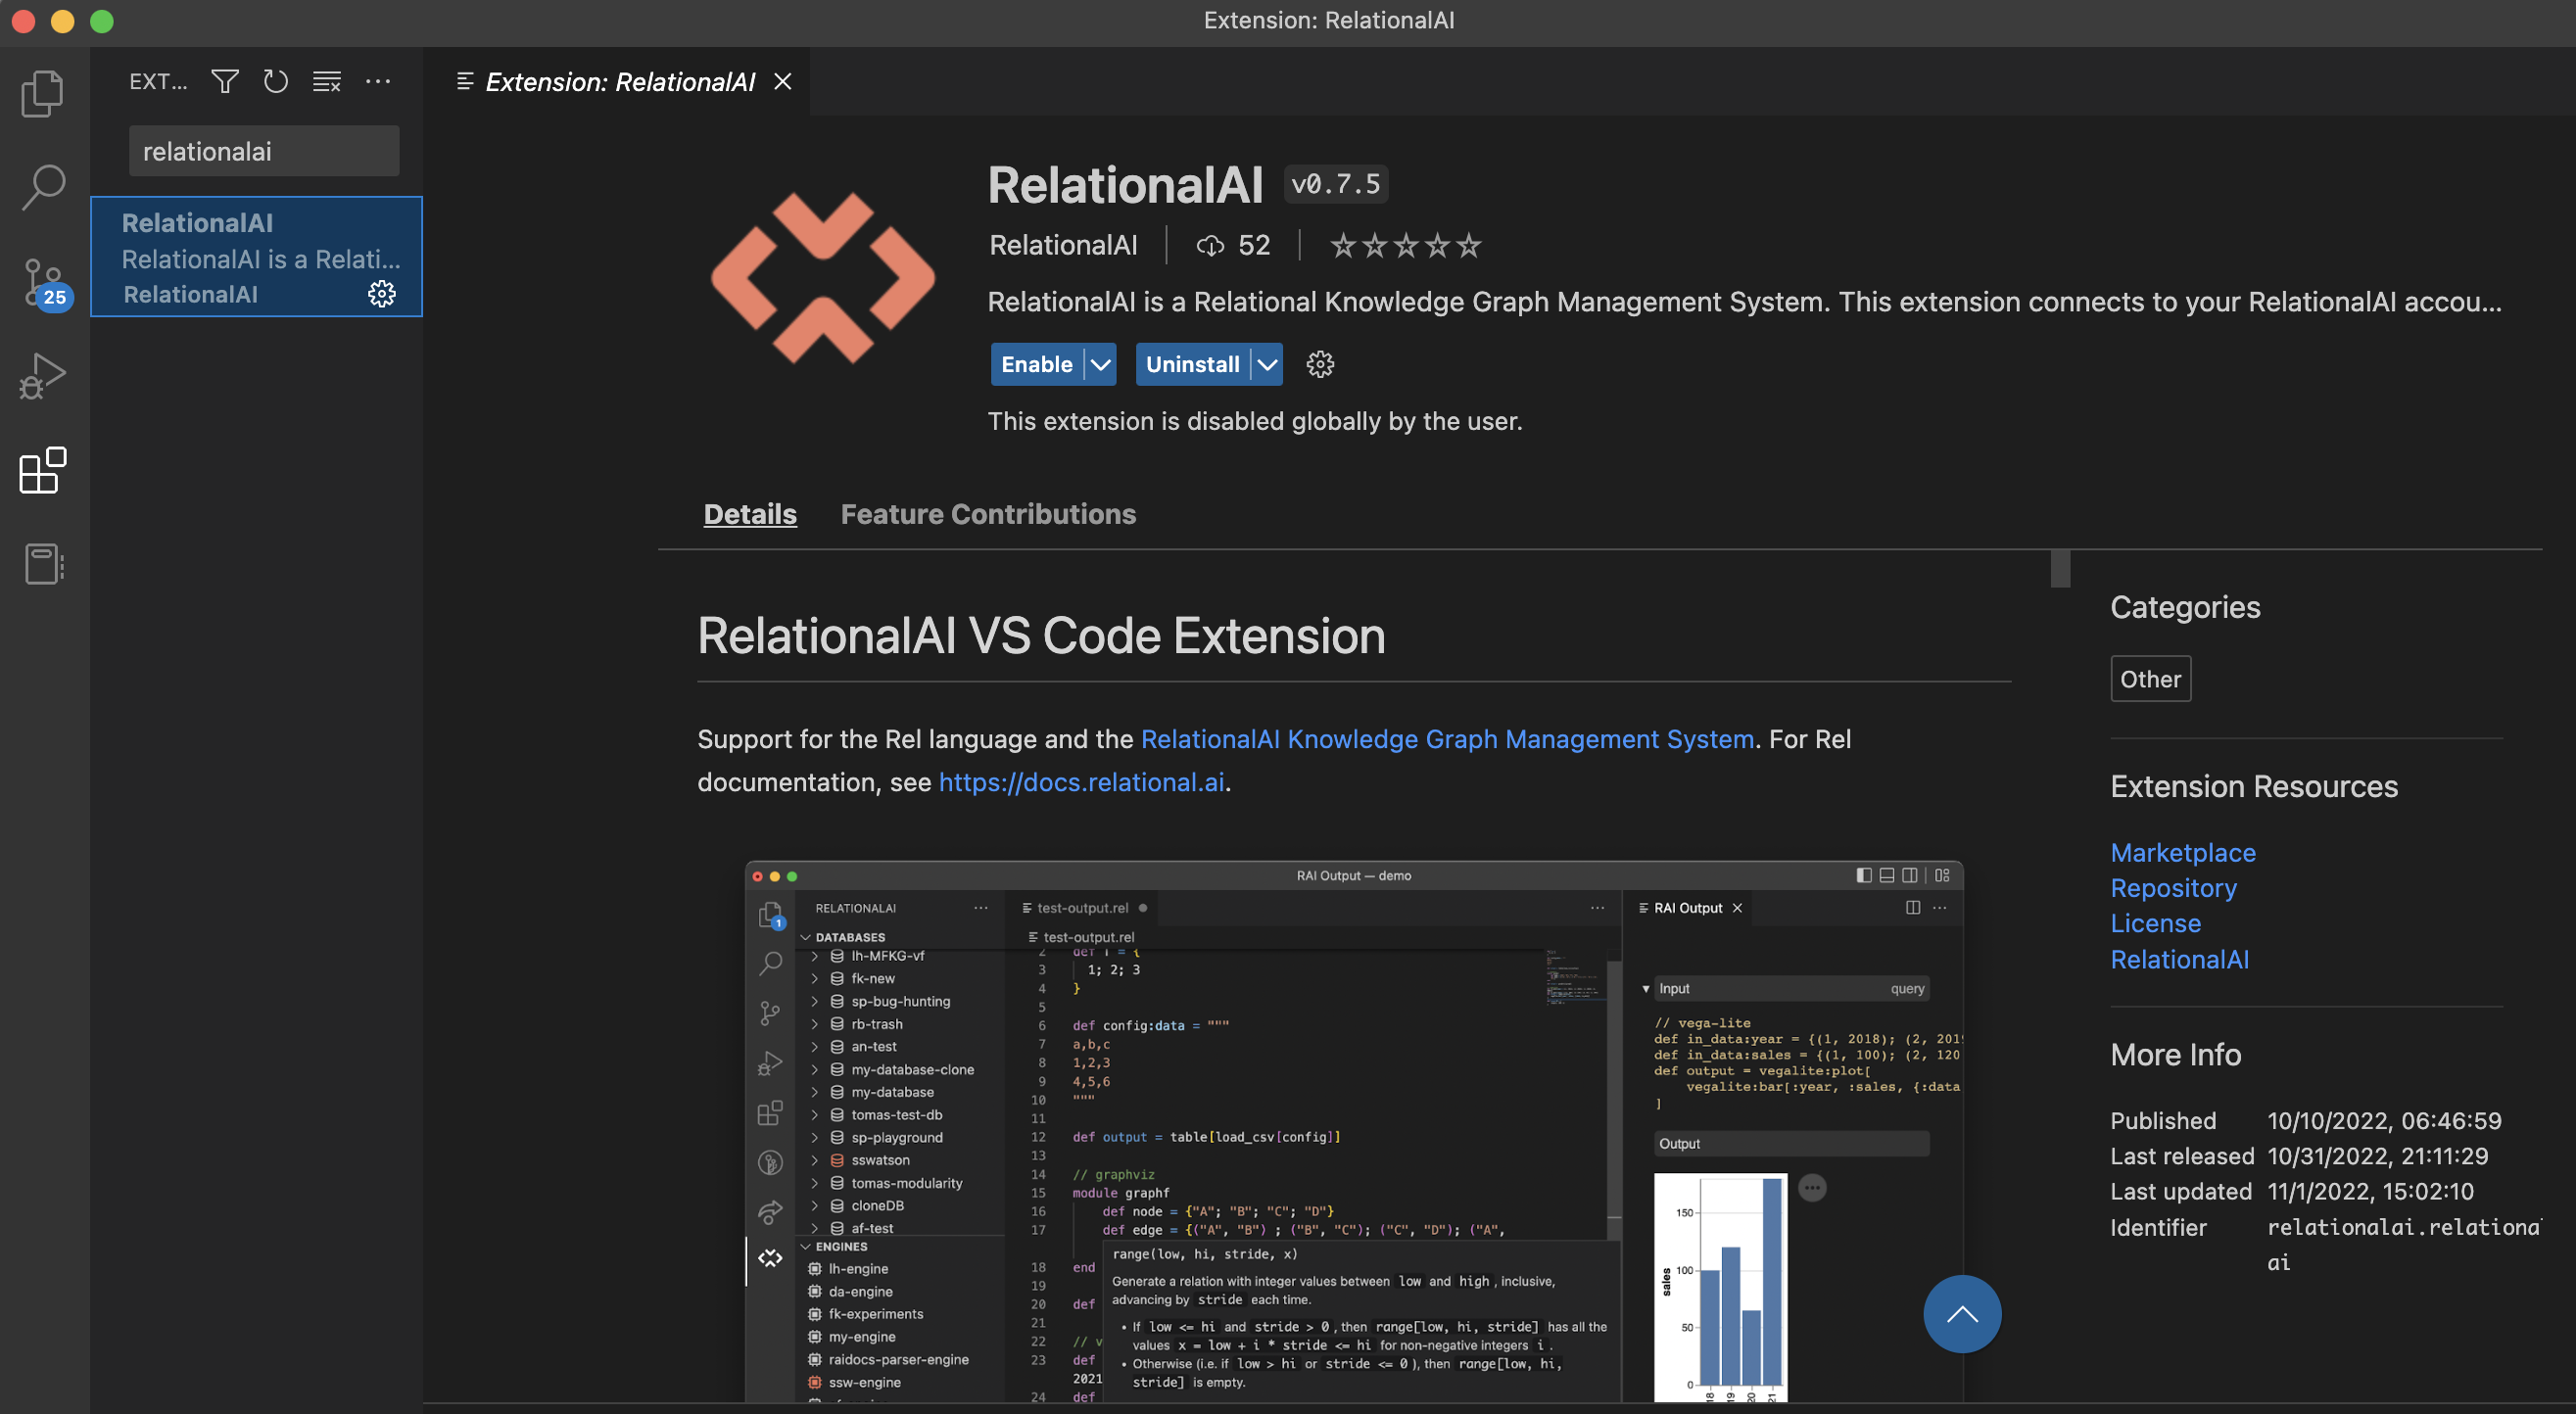
Installing the RelationalAI Extension
RelationalAI provides a RelationalAI extension (opens in a new tab) for VS Code. This extension highlights Rel syntax.
To install the RelationalAI extension:
- Click View > Extensions.
- Enter “RelationalAI” in the Search Box.
- Under RelationalAI, click Install.
Once installed, you will see something like this:
Setting up the RAI CLI
Creating a Configuration File
In order to connect to RelationalAI from VS Code, you need to create a configuration file with RAI credentials. See SDK Configuration for more details.
Installing the RelationalAI CLI
To use the CLI, you can directly download a binary for your installation from the rai-cli releases (opens in a new tab).
You can find precompiled binaries for MacOS, Linux, and Windows for different architectures. After selecting the one that fits your system, you can unzip the archive and place the files at the location of your choice.
You also need to include the rai binary in your system’s path.
Verifying the CLI Installation
Next, you need to verify that your CLI installation is visible from within VS Code.
Open a new terminal window by selecting Terminal > New Terminal.
As a test, you can list all engines to verify the CLI installation:
rai list-enginesYou should be able to see something similar to the following:

Creating a Rel Model
To create a Rel file, follow the steps below:
- Choose File > New File.
- Click Enter or Return to create a new file.
- In the file that opens, click Select a Language.
- Enter “Rel” in the Select Language Mode dialog box.
- Click Rel.

A new Rel file opens.
You can now add some simple Rel code to the file:
def output[x in {1; 2; 3}] = 2 * xThe file appears with Rel syntax highlighting:
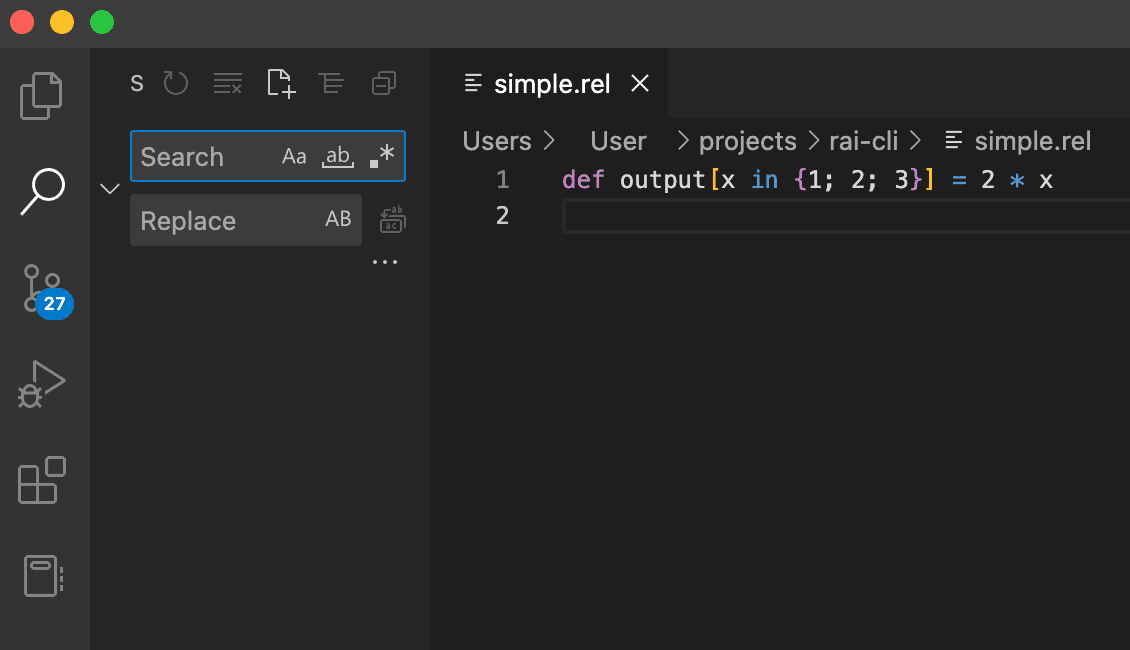
- Choose File > Save and save the file with a name such as
simple.rel.
You can now use the CLI to send this file over to RelationalAI.
Executing the Code
In the Terminal
You can now use the terminal to send commands over to RelationalAI using the CLI.
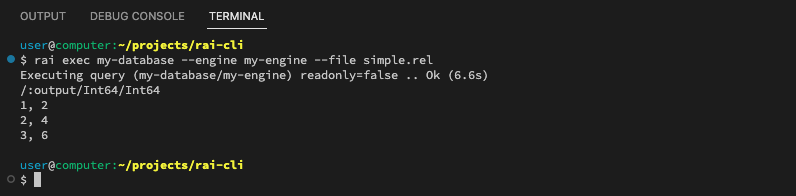
As an example, you can execute the simple.rel file using my-database and the my-engine engine as follows:
rai exec my-database --engine my-engine --file simple.relNote that this example assumes that both my-database and my-engine already exist.
For more information on how to create an engine and a database you can refer to the Creating an Engine and Creating a Database sections in the Relational CLI SDK Guide.
Once you execute this command you can see an output similar to the following:
In VS Code
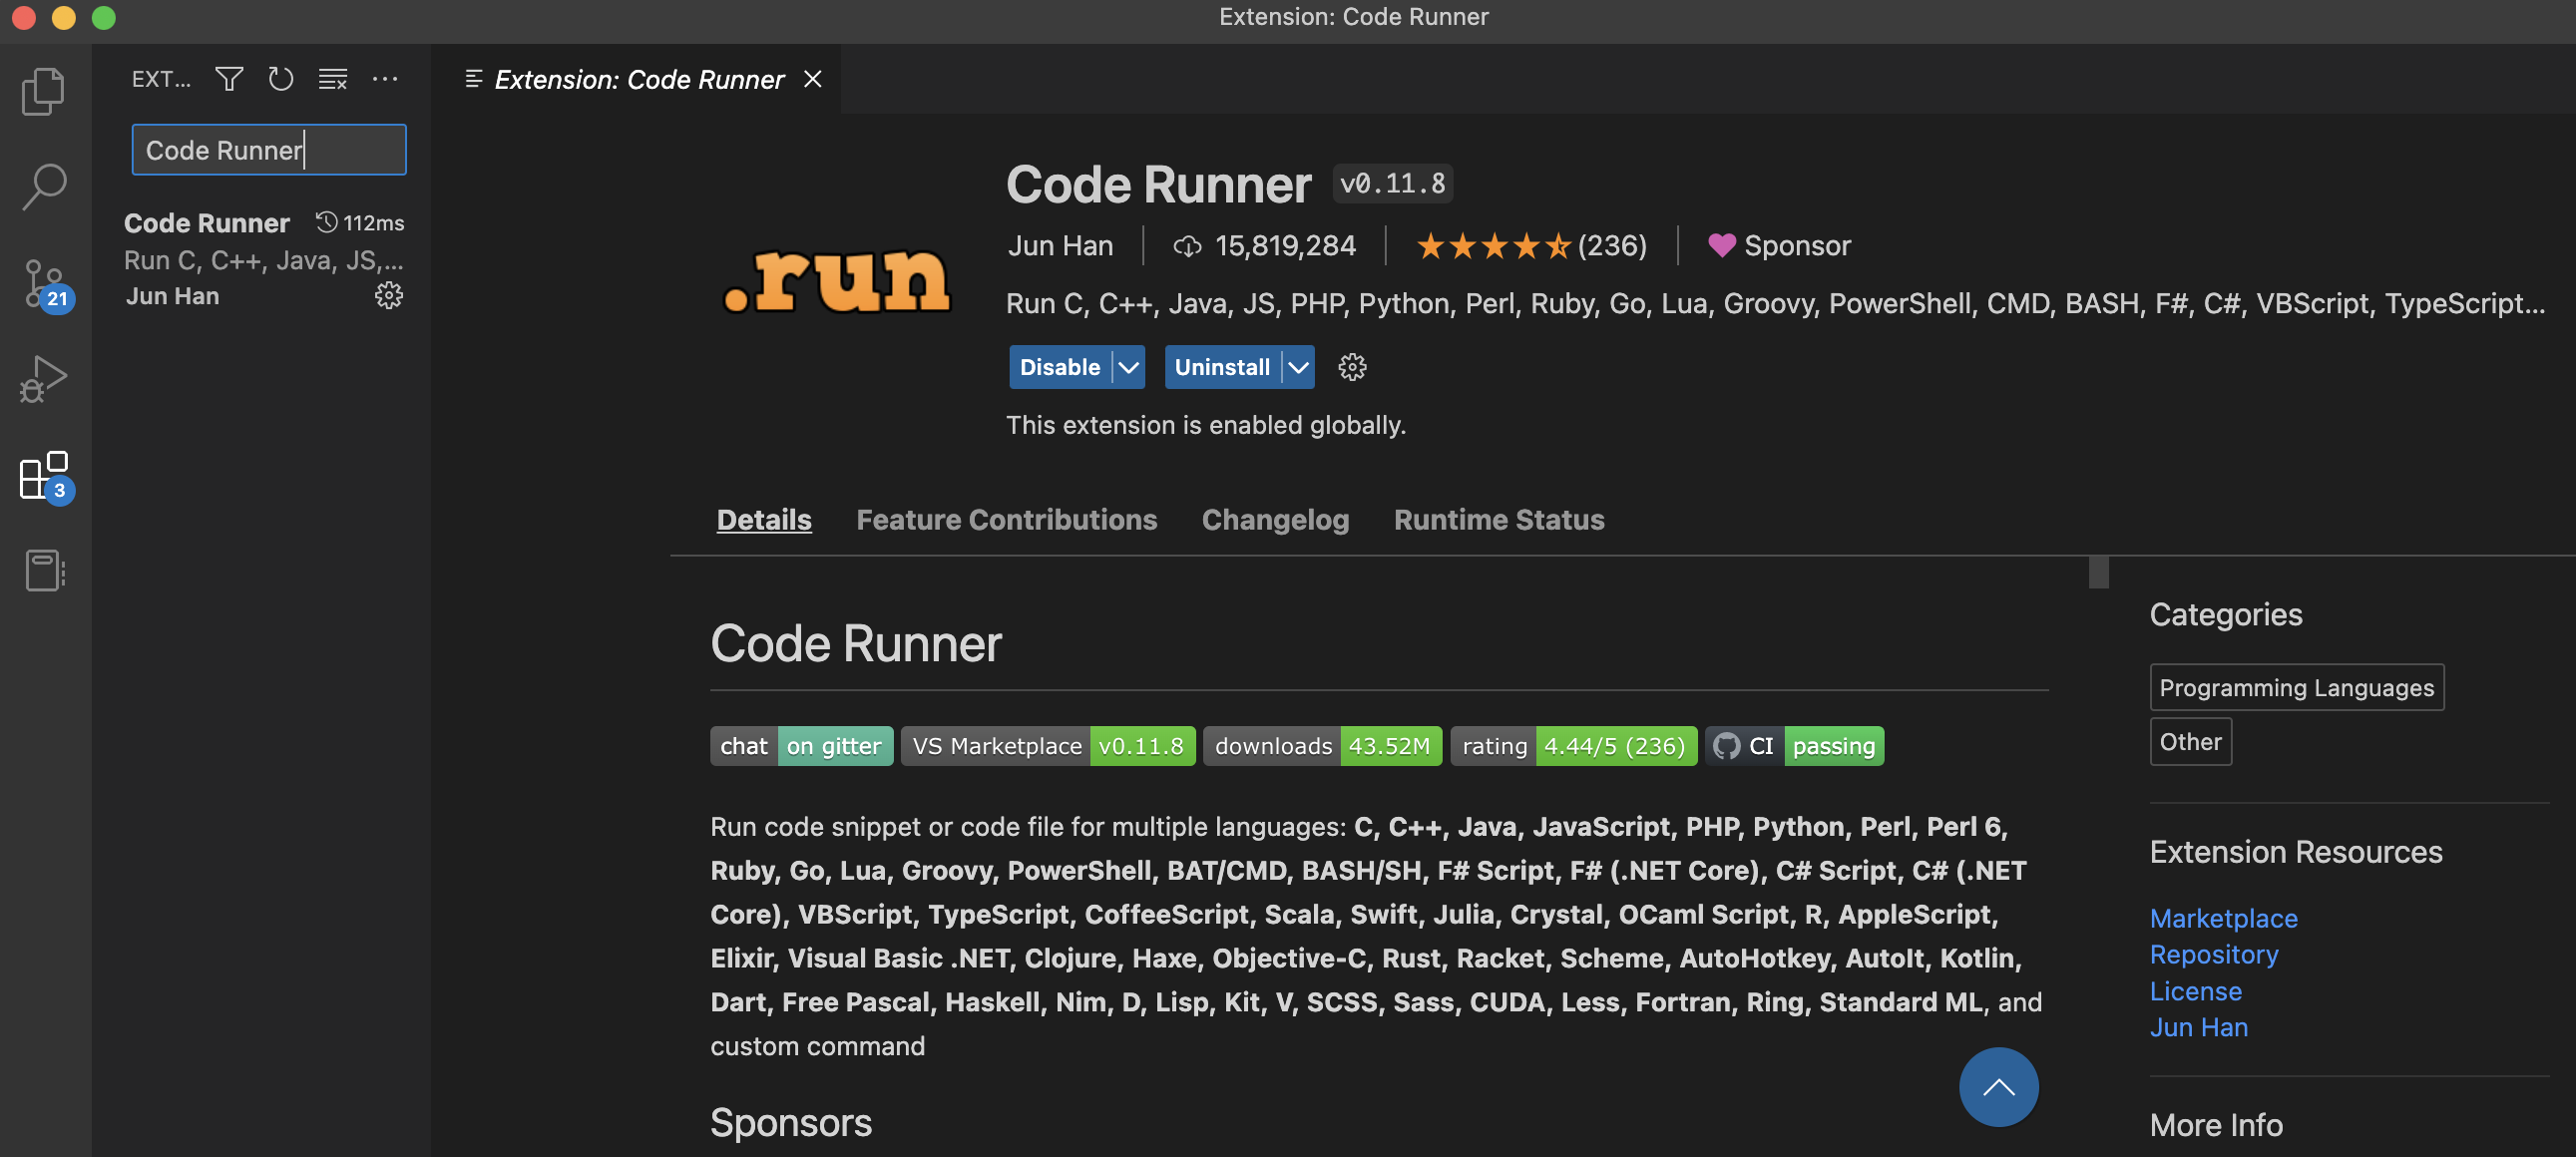
You can also set up your Visual Studio Code to run the code you are currently working on directly using the CLI. For this, you will need a task runner extension such as Code Runner (opens in a new tab).
You can install this extension by searching for it as Code Runner in the extensions search of Visual Studio Code:
Next, you need to configure the extension to know how to process .rel files.
For this, open the user settings settings.json using Cmd + Shift + P (or Ctrl + Shift + P for Windows) and typing Preferences: Open User Settings (JSON).
A new editor tab with the user settings will open up.
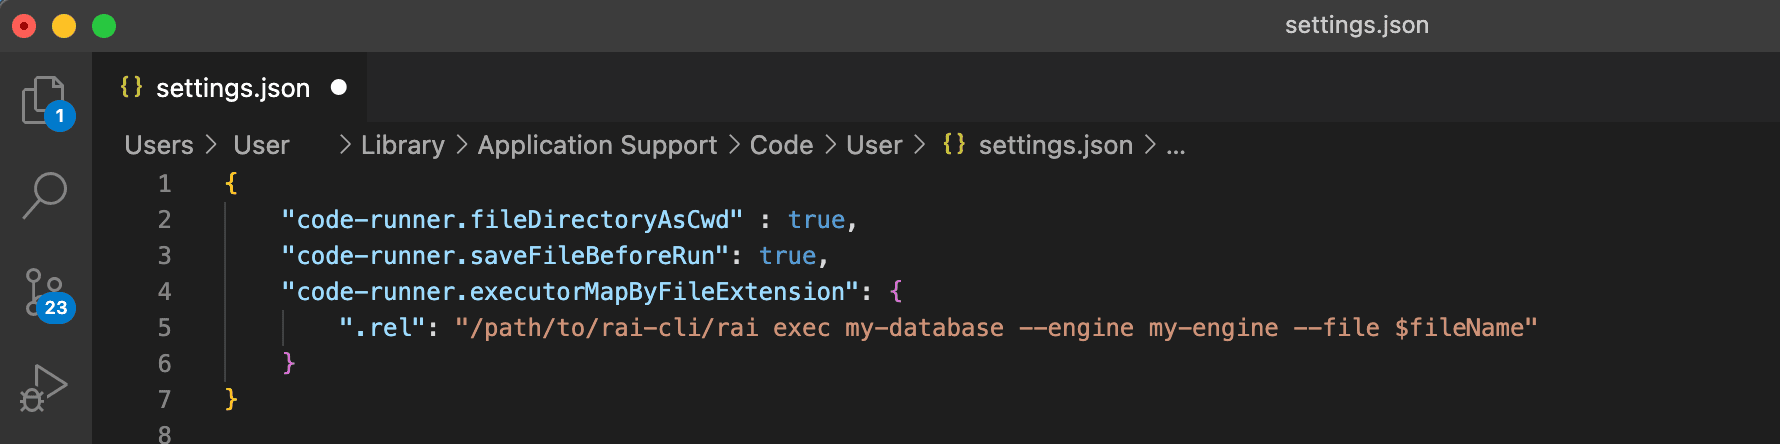
You can configure the extension to execute the rai binary for a given file by adding the following JSON code to your settings.json file:
{
    "code-runner.fileDirectoryAsCwd" : true,
    "code-runner.saveFileBeforeRun": true,
    "code-runner.executorMapByFileExtension": {
        ".rel": "/path/to/rai-cli/rai exec my-database --engine my-engine --file $fileName"
    }
}
Your settings.json will look something like this:
You may want to modify the following parameters in the example above to your situations:
| Parameter | Description |
|---|---|
/path/to/rai-cli/ | Replace with the actual path to the CLI binary in your system. |
my-database | Replace with the name of database you’re planning to use. |
my-engine | Replace with the name of engine you’re planning to use. |
You can now send Rel code over to RelationalAI using the play button of the Visual Studio Code.
Here is another example of simple.rel with the executed code:
